How to create an Objective-C Swift bridging header?
Step 1: Check whether the bridging header is present
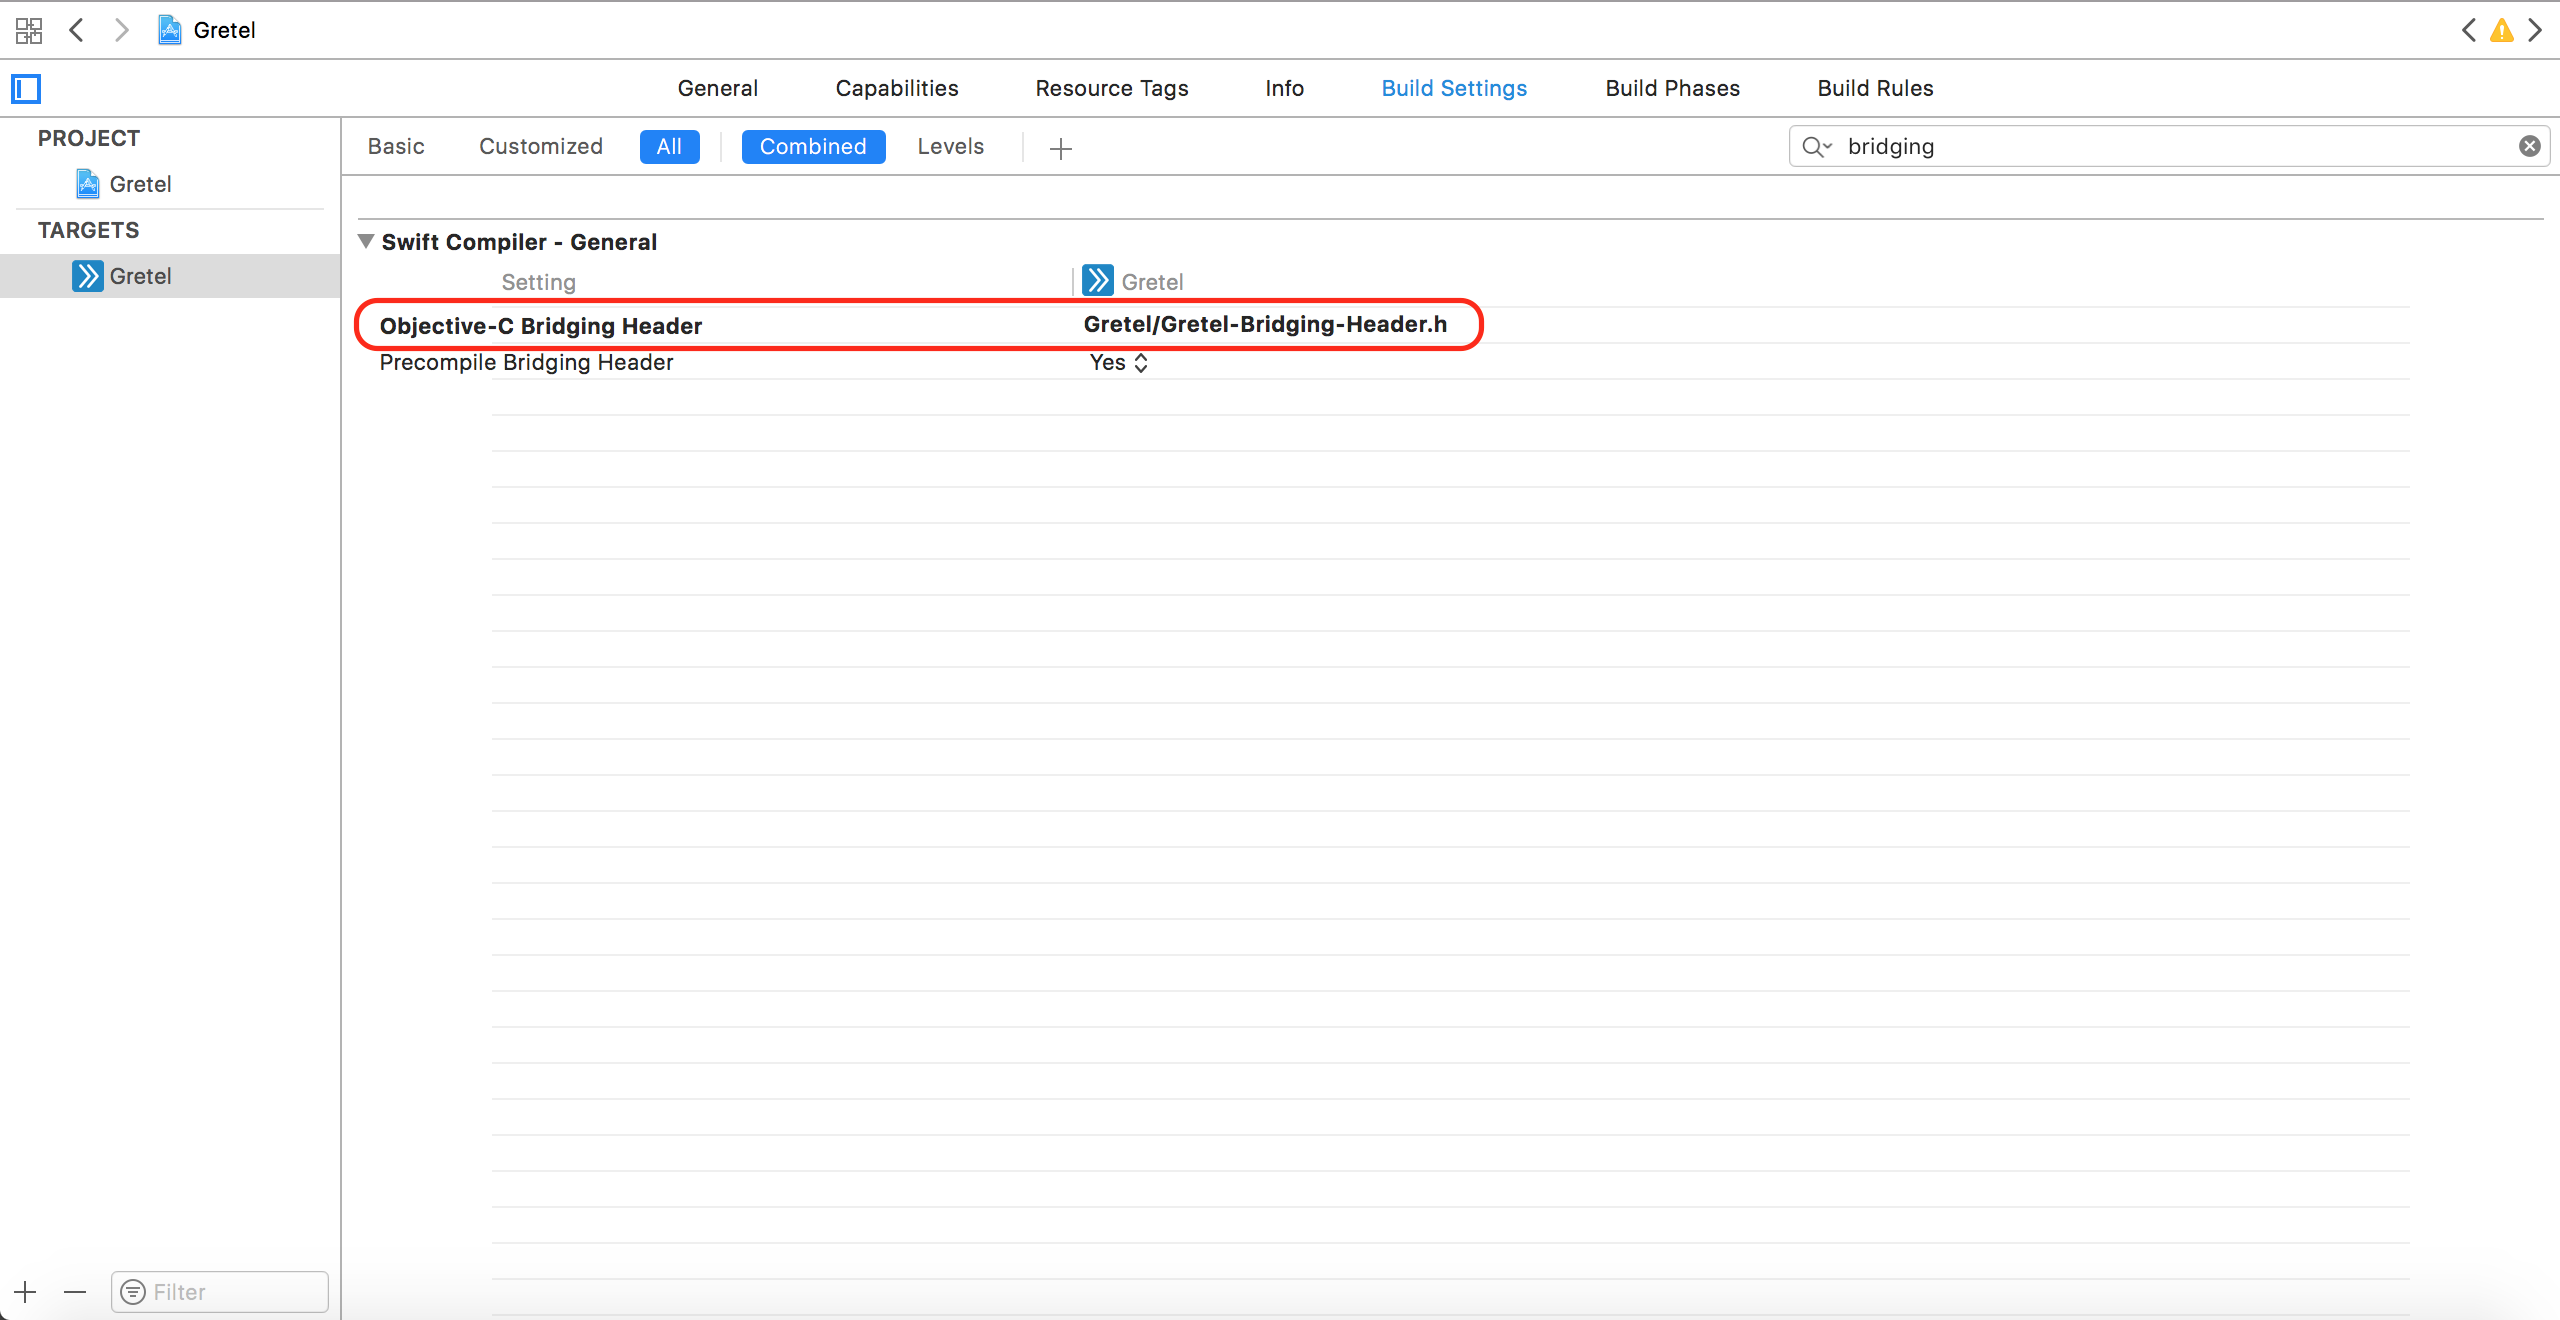
Select the Xcode project → Select the build target → "Build Settings" → "All” | “Combined”.
Search for "bridging". If you get a result like the one shown below, the bridging file exists and you don't need to create it. If it doesn't, go through the instructions in the next step to create a new one.

Step 2: Create a bridging-header
- Create a new header file and name it in this format "[your_project_name]-Bridging-Header.h". Save it in the project folder.
- Select the Xcode project → Select the build target → "Build Settings" → Search for "bridging".
- Select Objective-C Bridging Header and enter the bridging header file path as its value. This path should be relative to the workspace file.
Done! Now you can import your Product Experience Objective-C libraries (eg. #import <Hansel/Hansel-umbrella.h>) in the bridging file and use these APIs in your swift project.
Updated 5 months ago
