APNS Configuration
To setup browser push notification for your website on Safari, please follow the below steps.
Note
Individual certificate to be provided for each website, if you have multiple websites.
Step 1: Create a Certificate Request
In this step, we are going to create a certificate signing request which will be used later on.
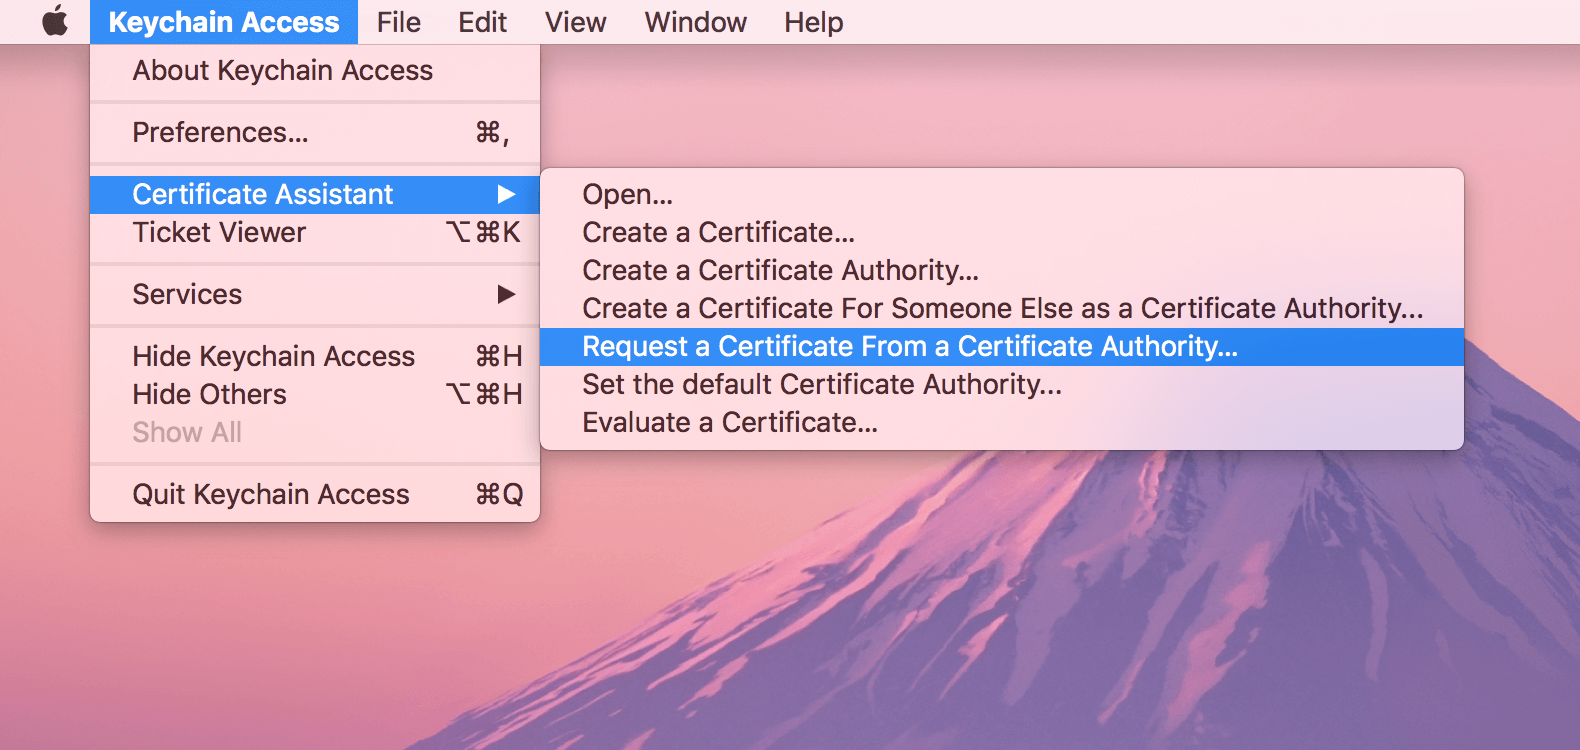
- Launch the Keychain Access app.
- Click on Keychain Access > Certificate Assistant > then, Request a Certificate From a Certificate Authority.
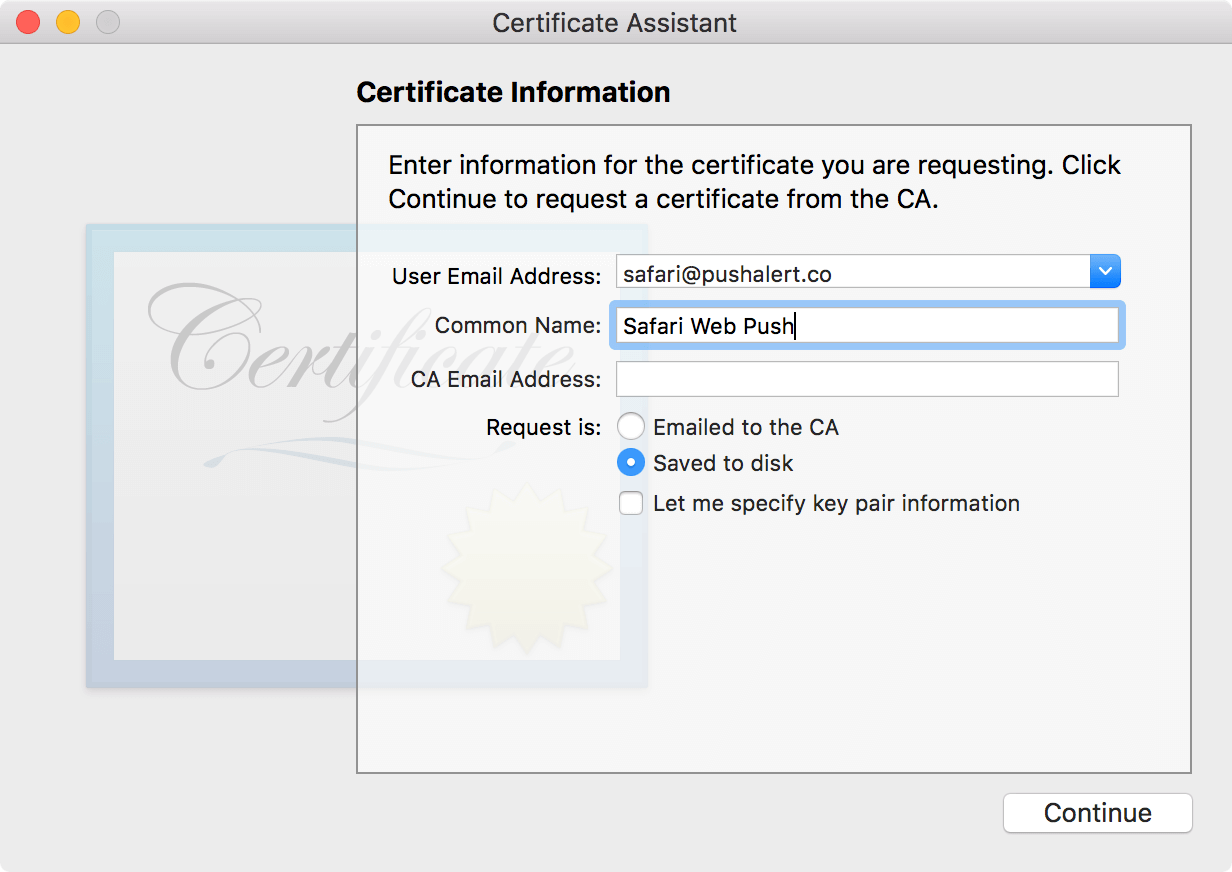
- Enter email address, a name and then check "Saved to disk" option. Click on Continue.
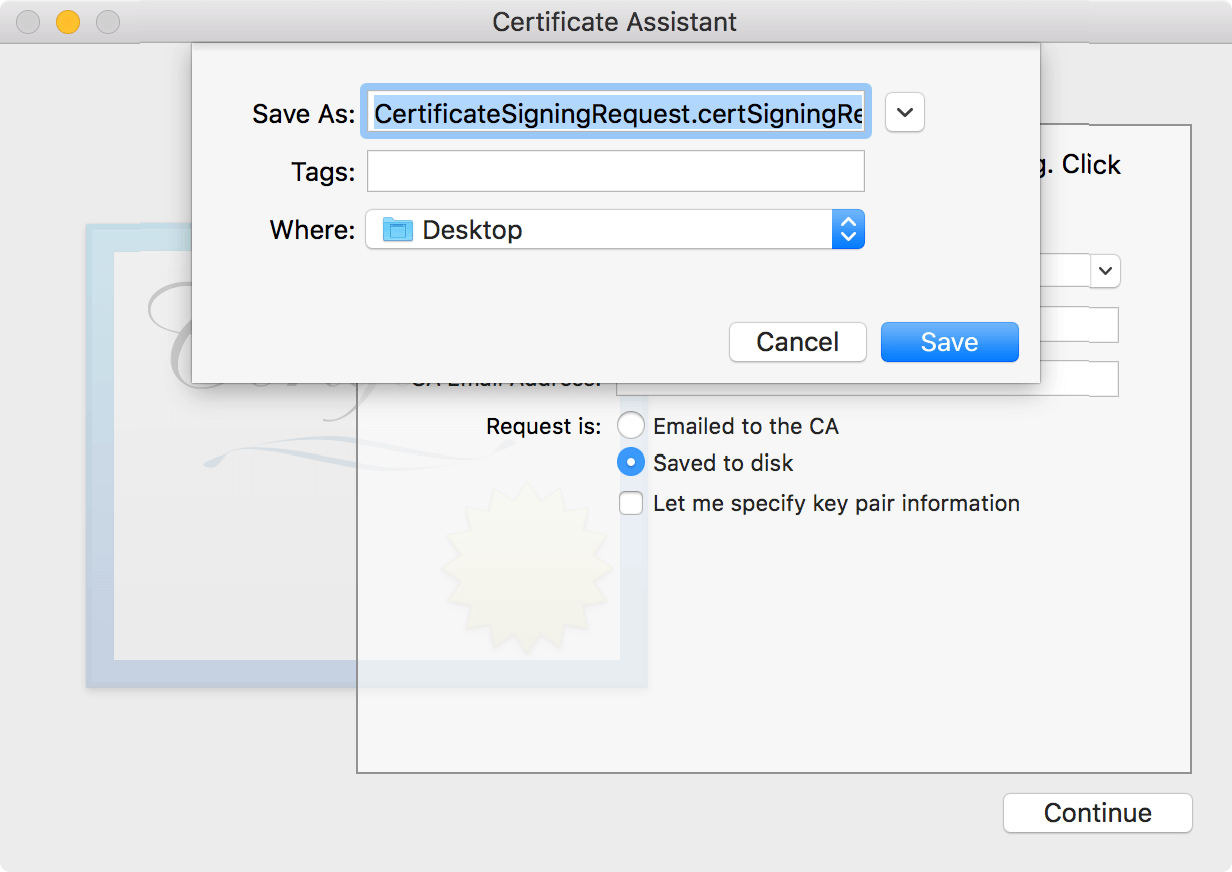
- Save the certificate signing request (CSR) with the given name, we will need it later to create the Website Push Certificate.
Step 2: Setting up Website Push ID for APNS (Apple Push Notification Service)
- For this, you need to first login to the Apple Developer Console. Here, we are going to create a unique Website Push ID for push notifications.
- Click on 'Certificates, Identifiers & Profiles', then click on Plus sign on Identifiers and then click on "Register an App ID".
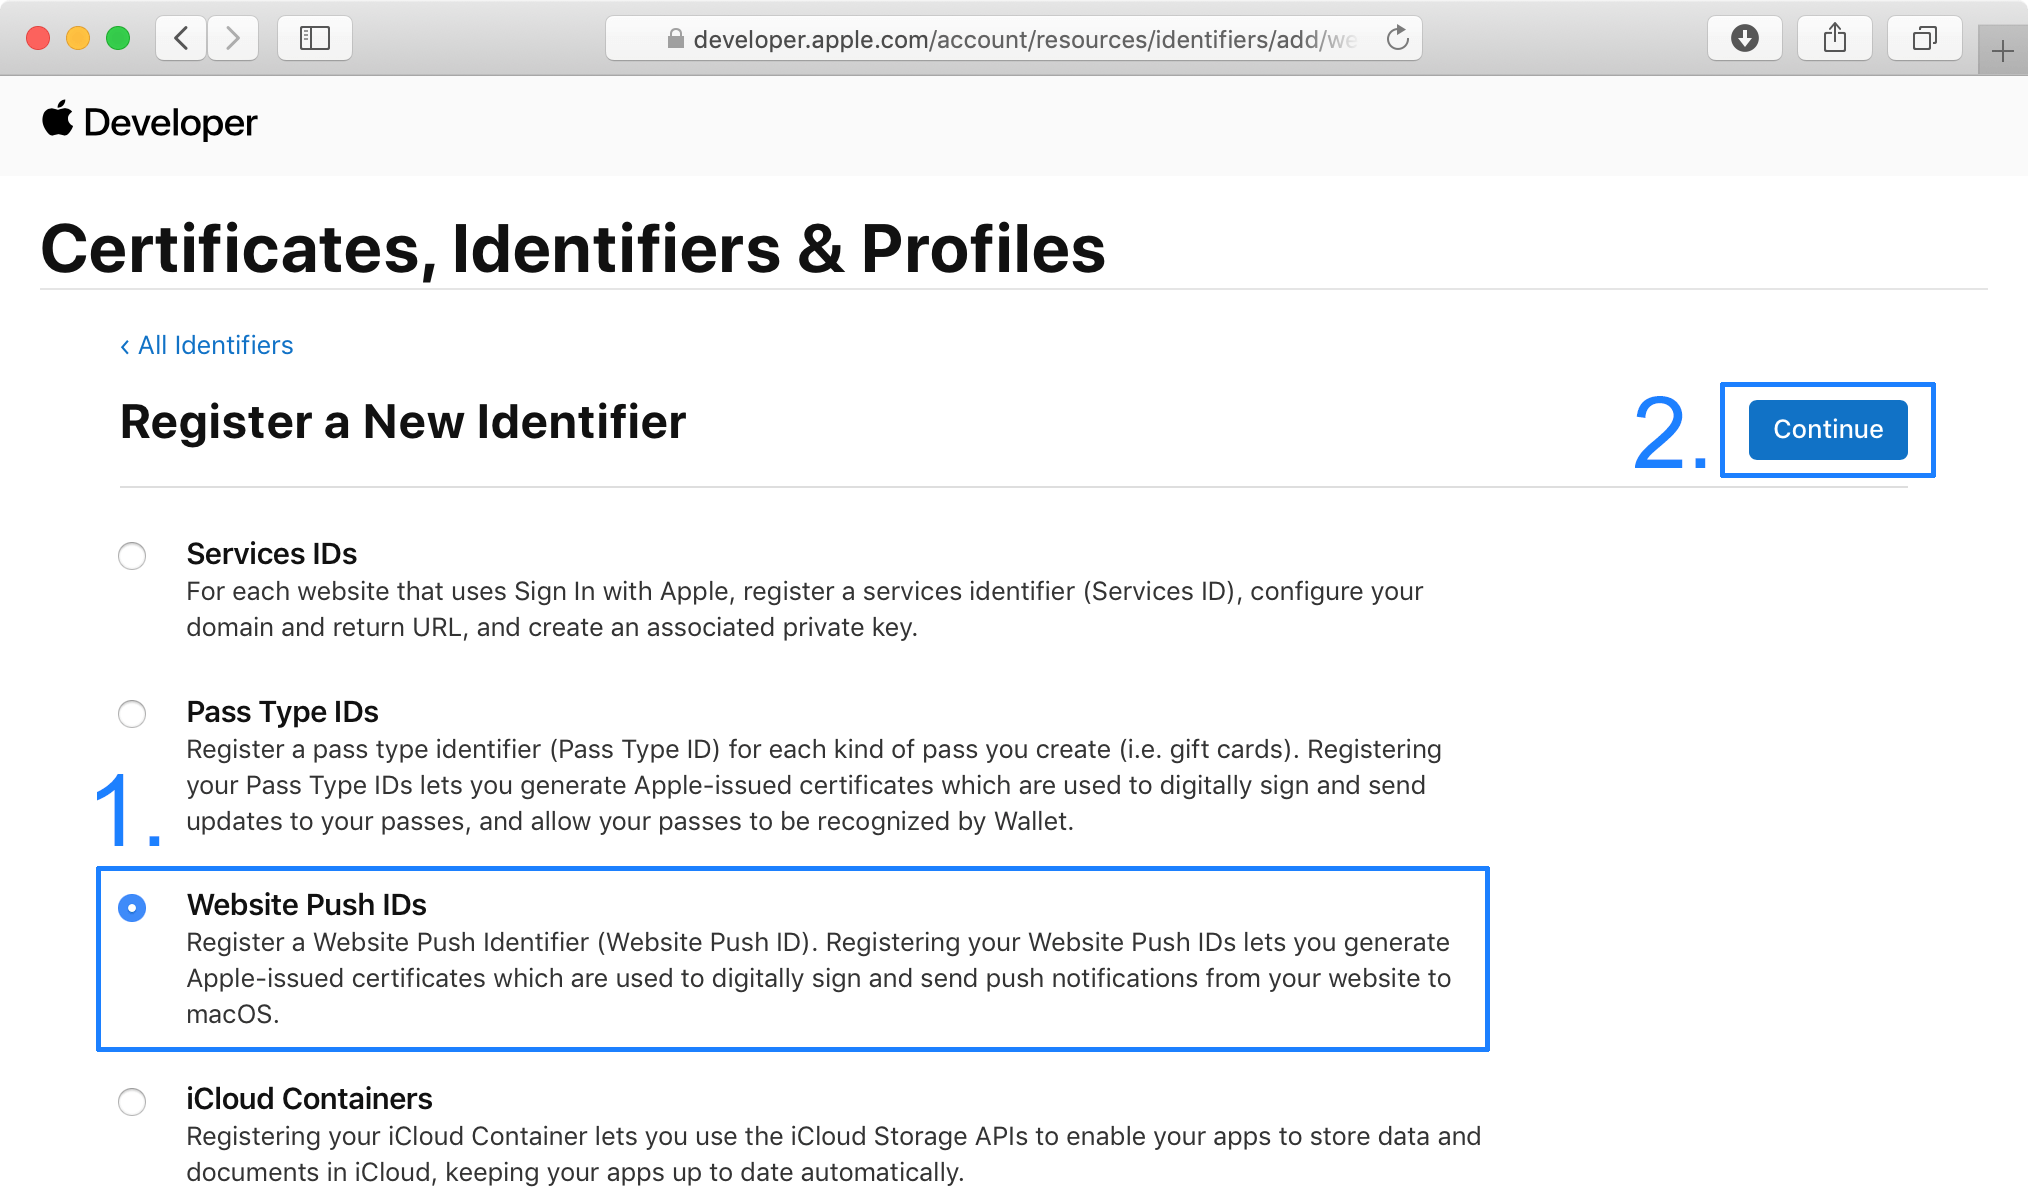
- Select "Website Push IDs" from the "Register a New Identifier" list and click "Continue"
- First enter a meaningful Description.
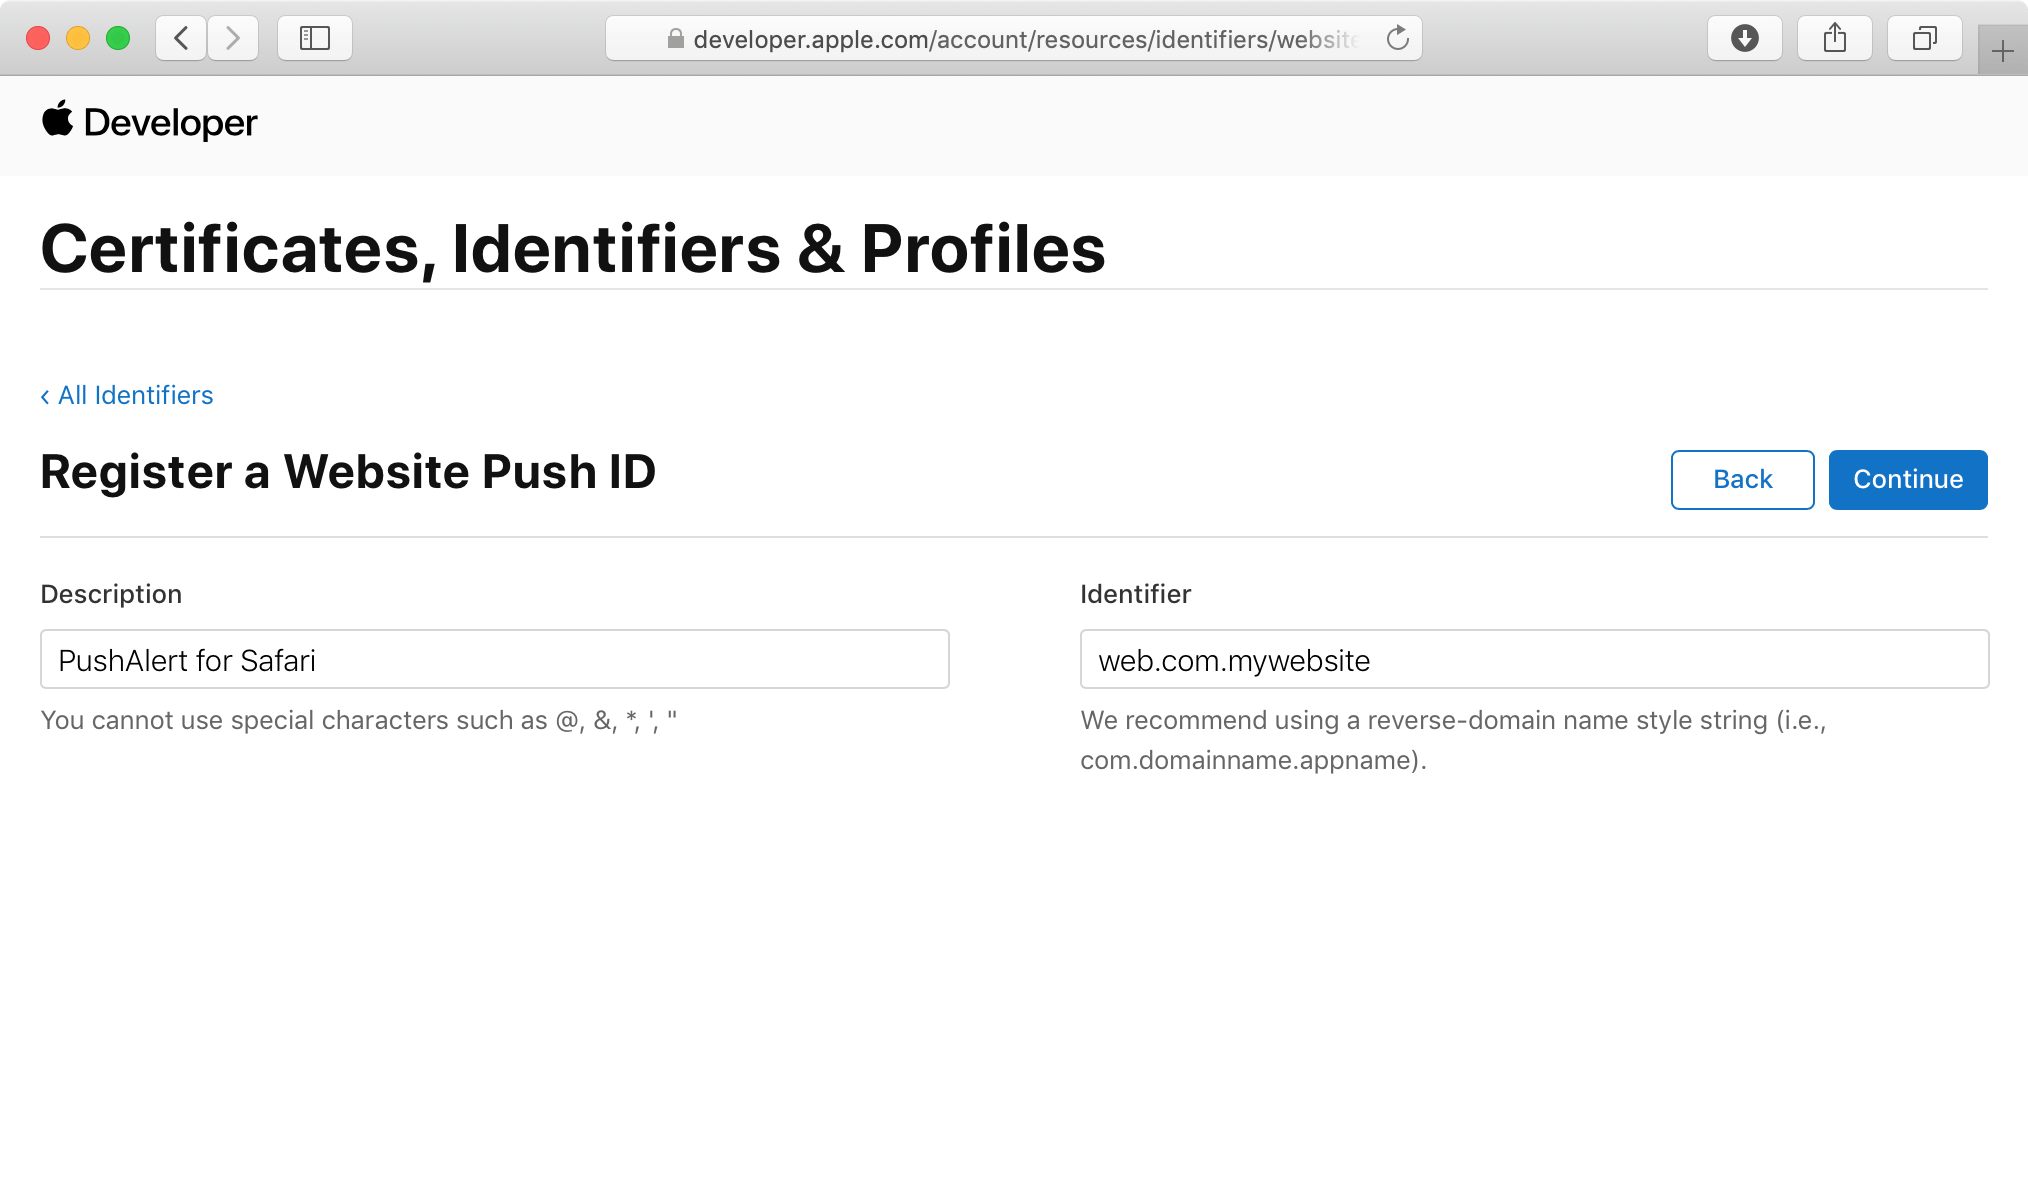
- Then enter an identifier, it follows reverse-domain name styling. So you should enter something like "web.com.mywebsite". (Note: "web" is added automatically to the identifier)
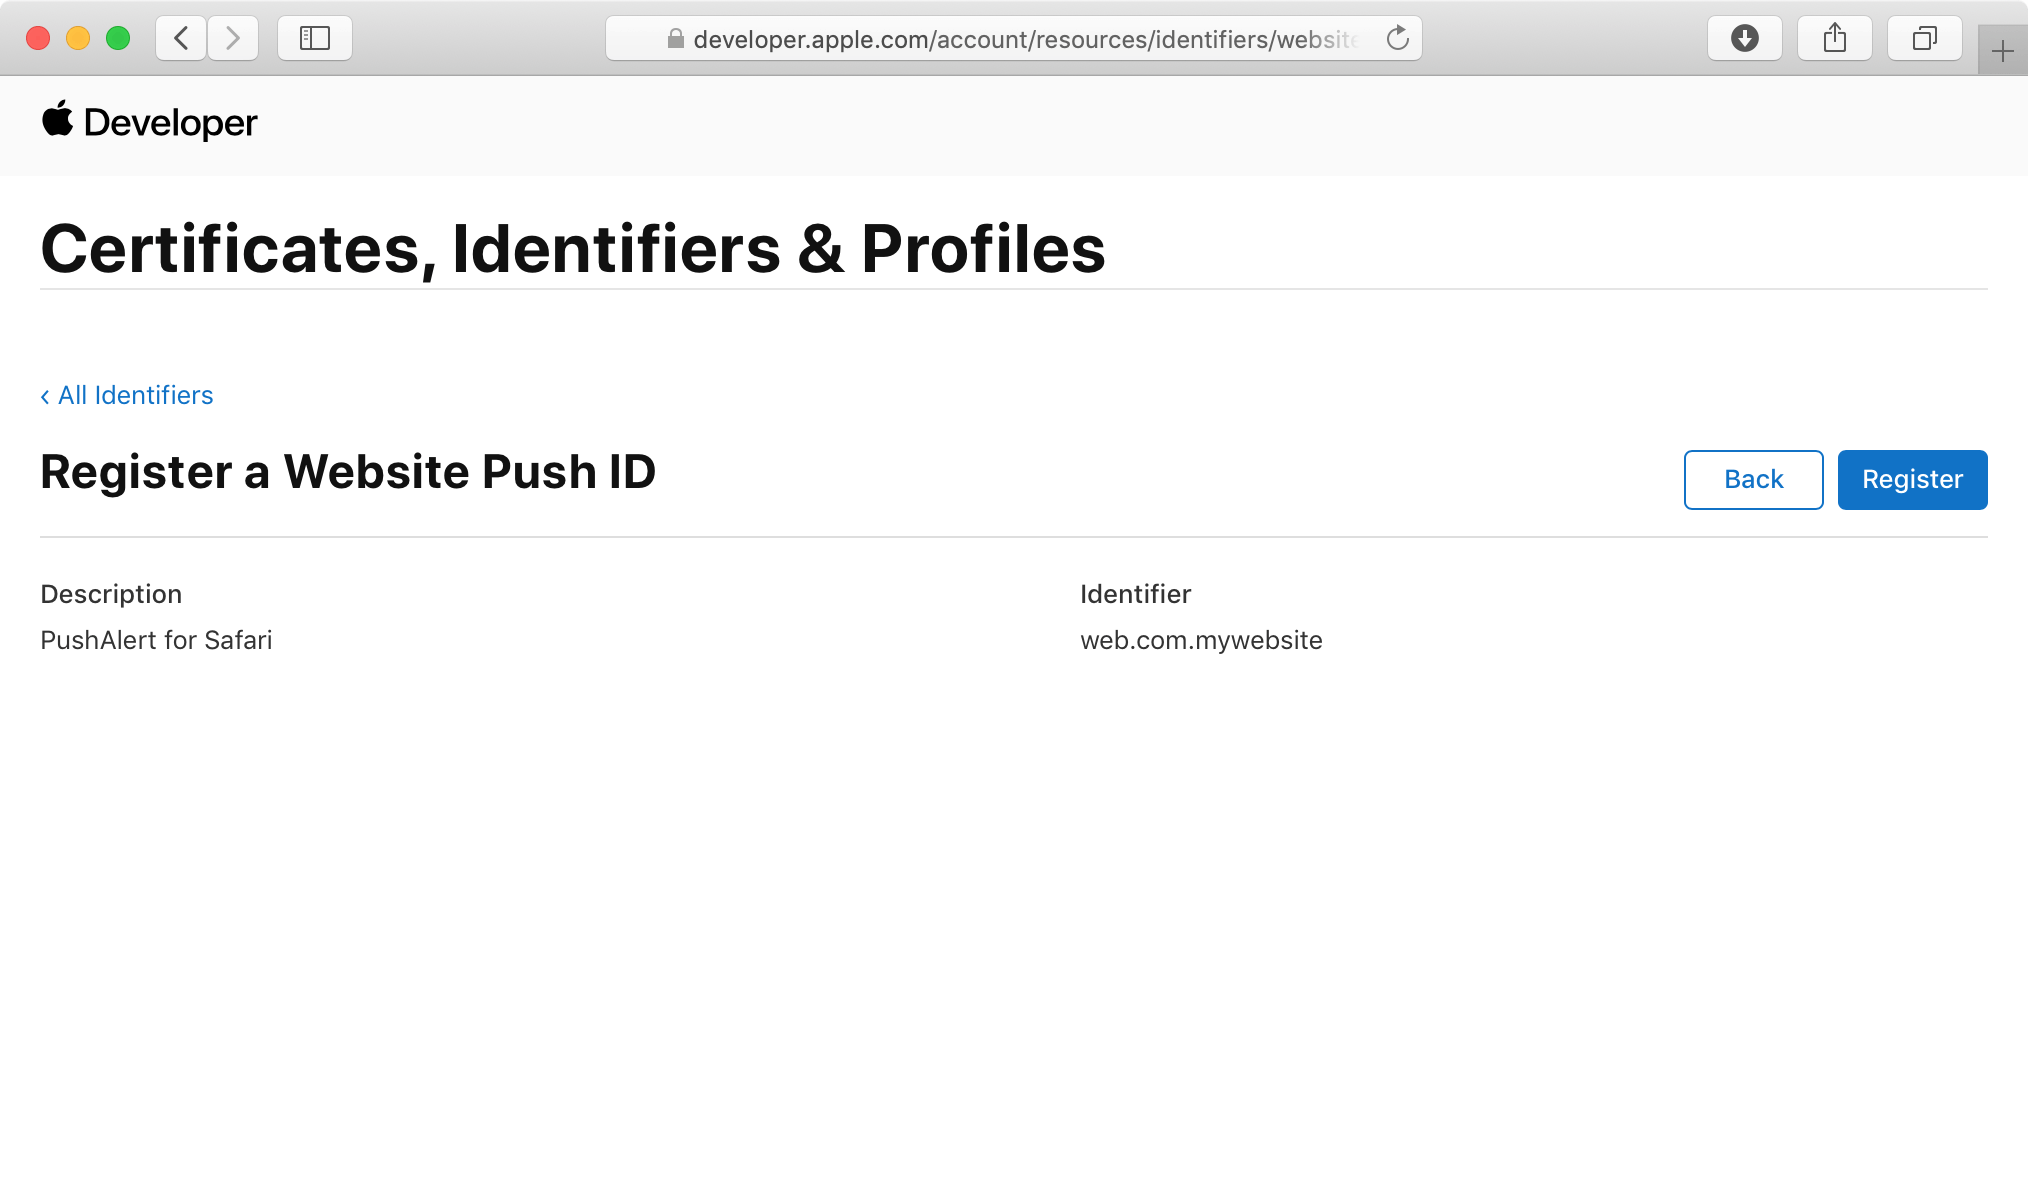
- Click on Continue, check everything is in order and then click Register.
Step 3: Generating Web Push Certificate
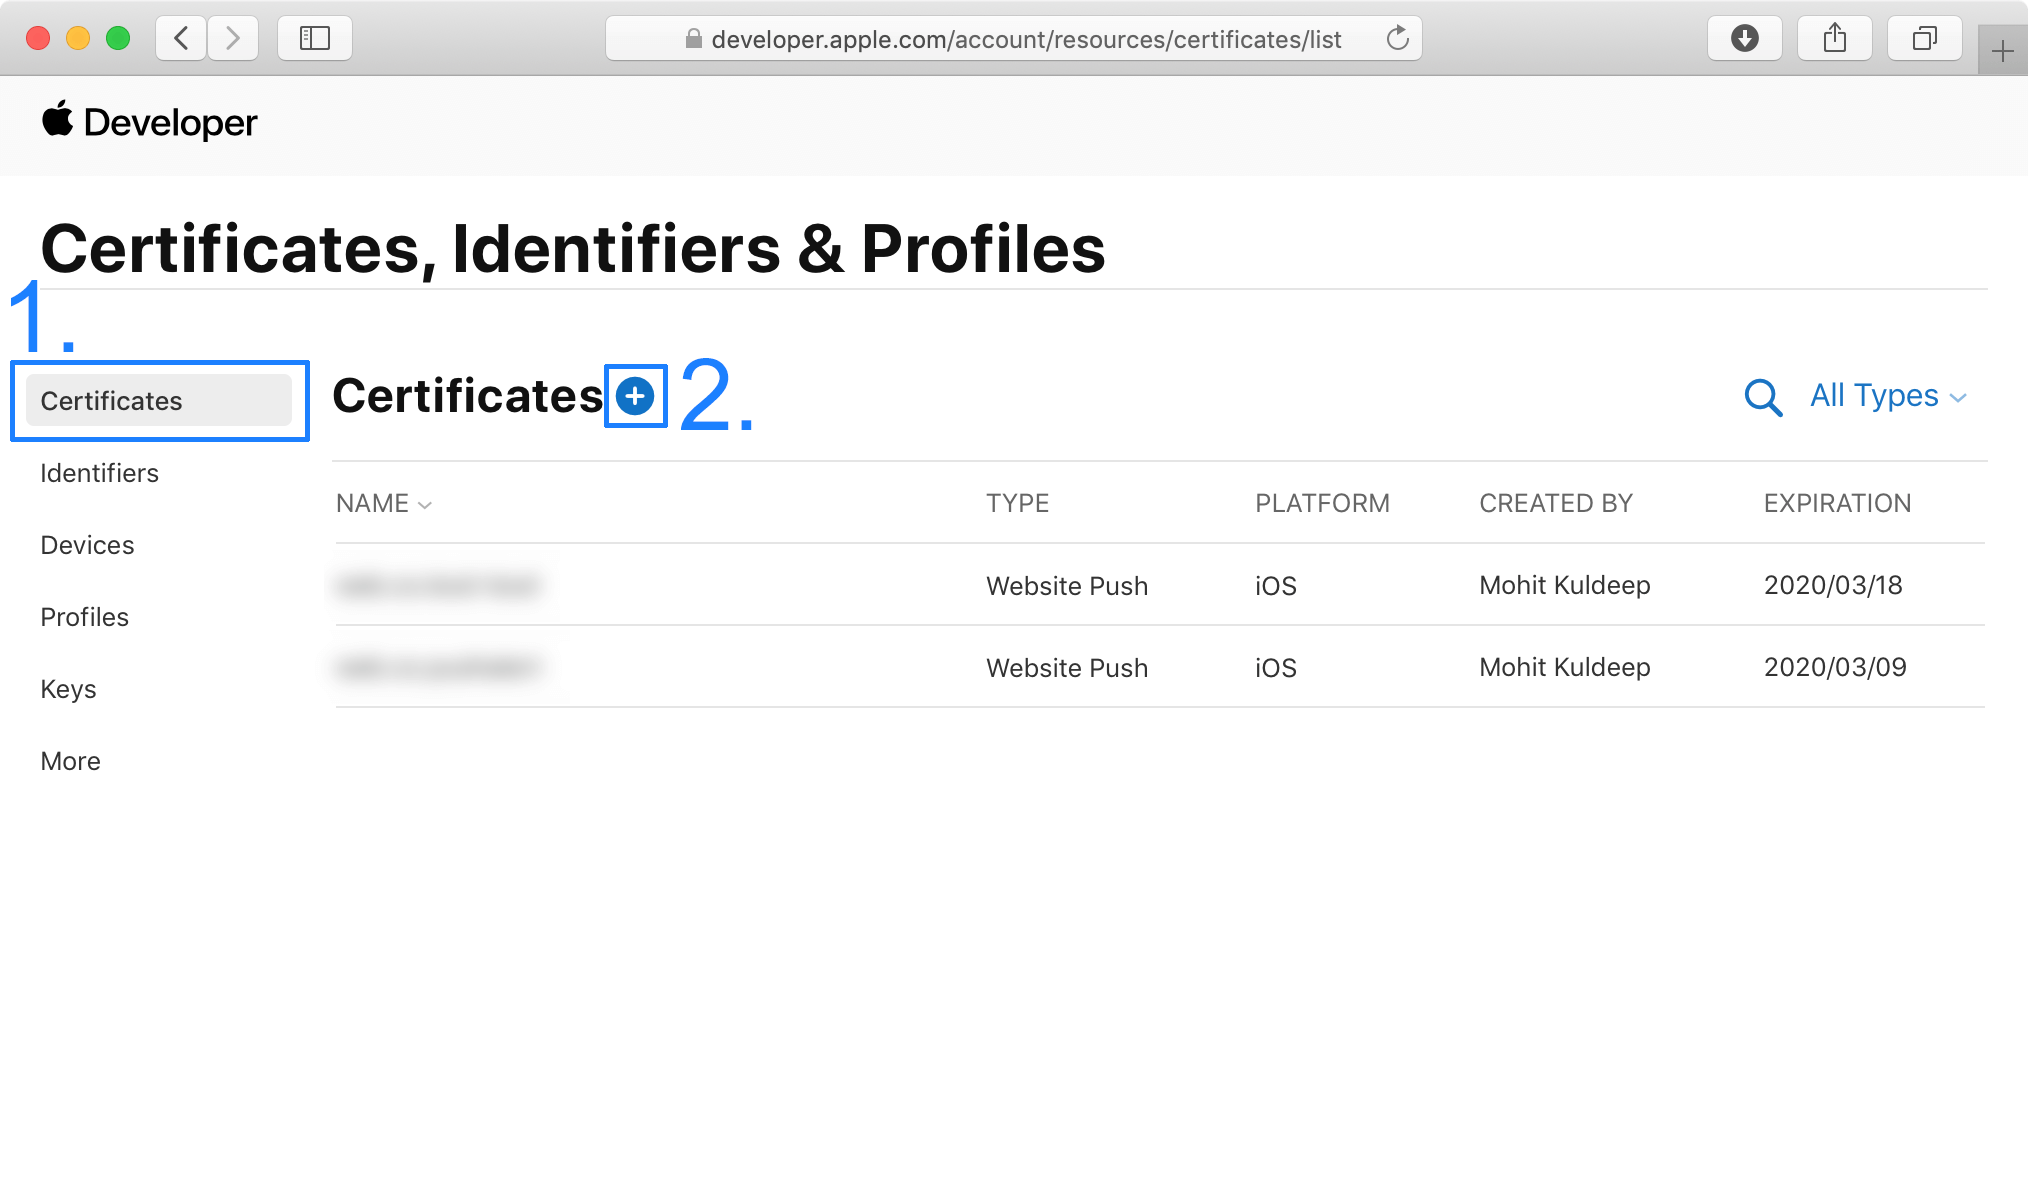
- Click on the Certificates section, then click "+" to see all available options.
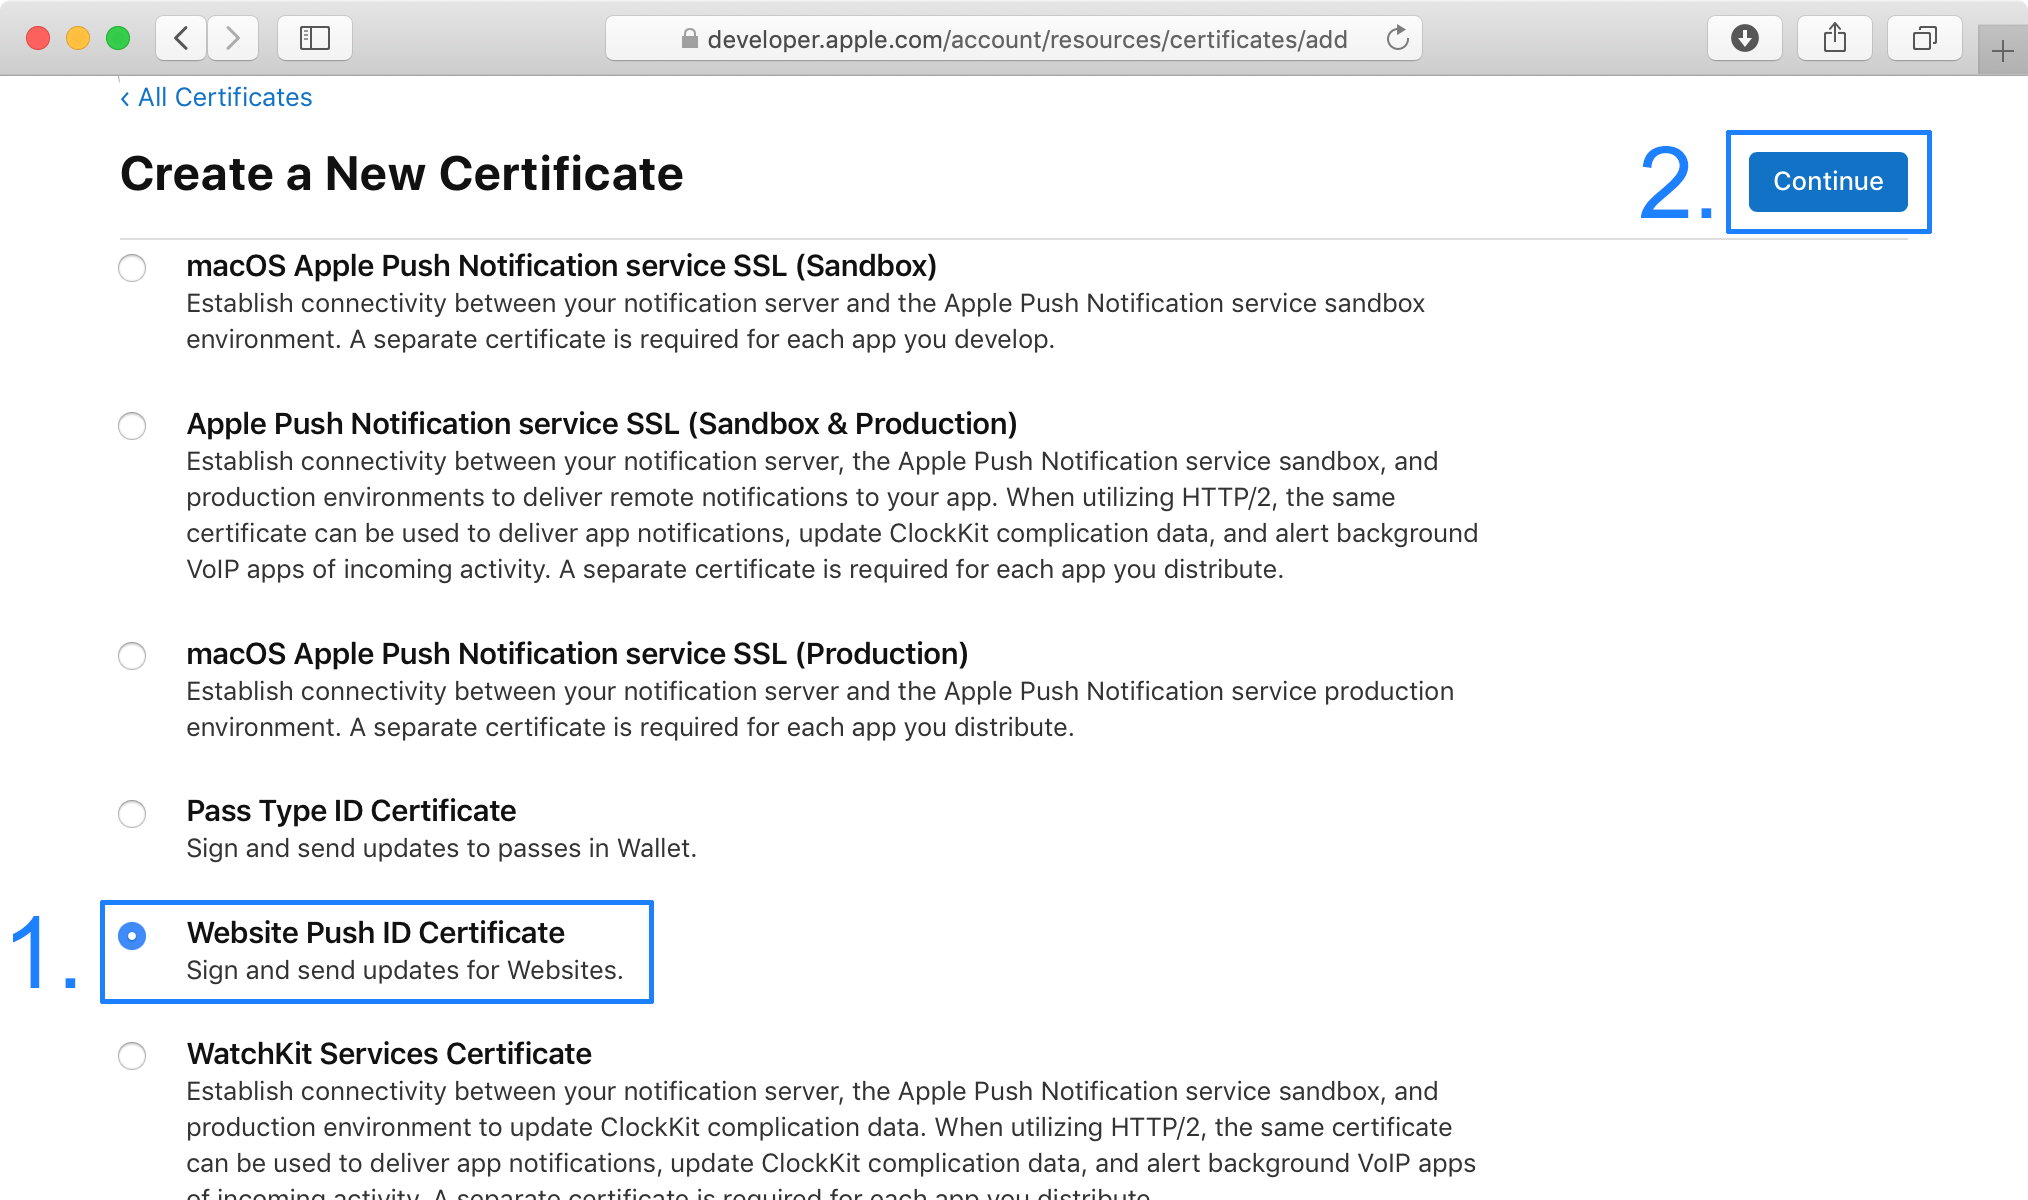
- Click on Website Push ID Certificate and Continue.
- Next, select the Website Push ID we created earlier in Step 2 and hit Continue.
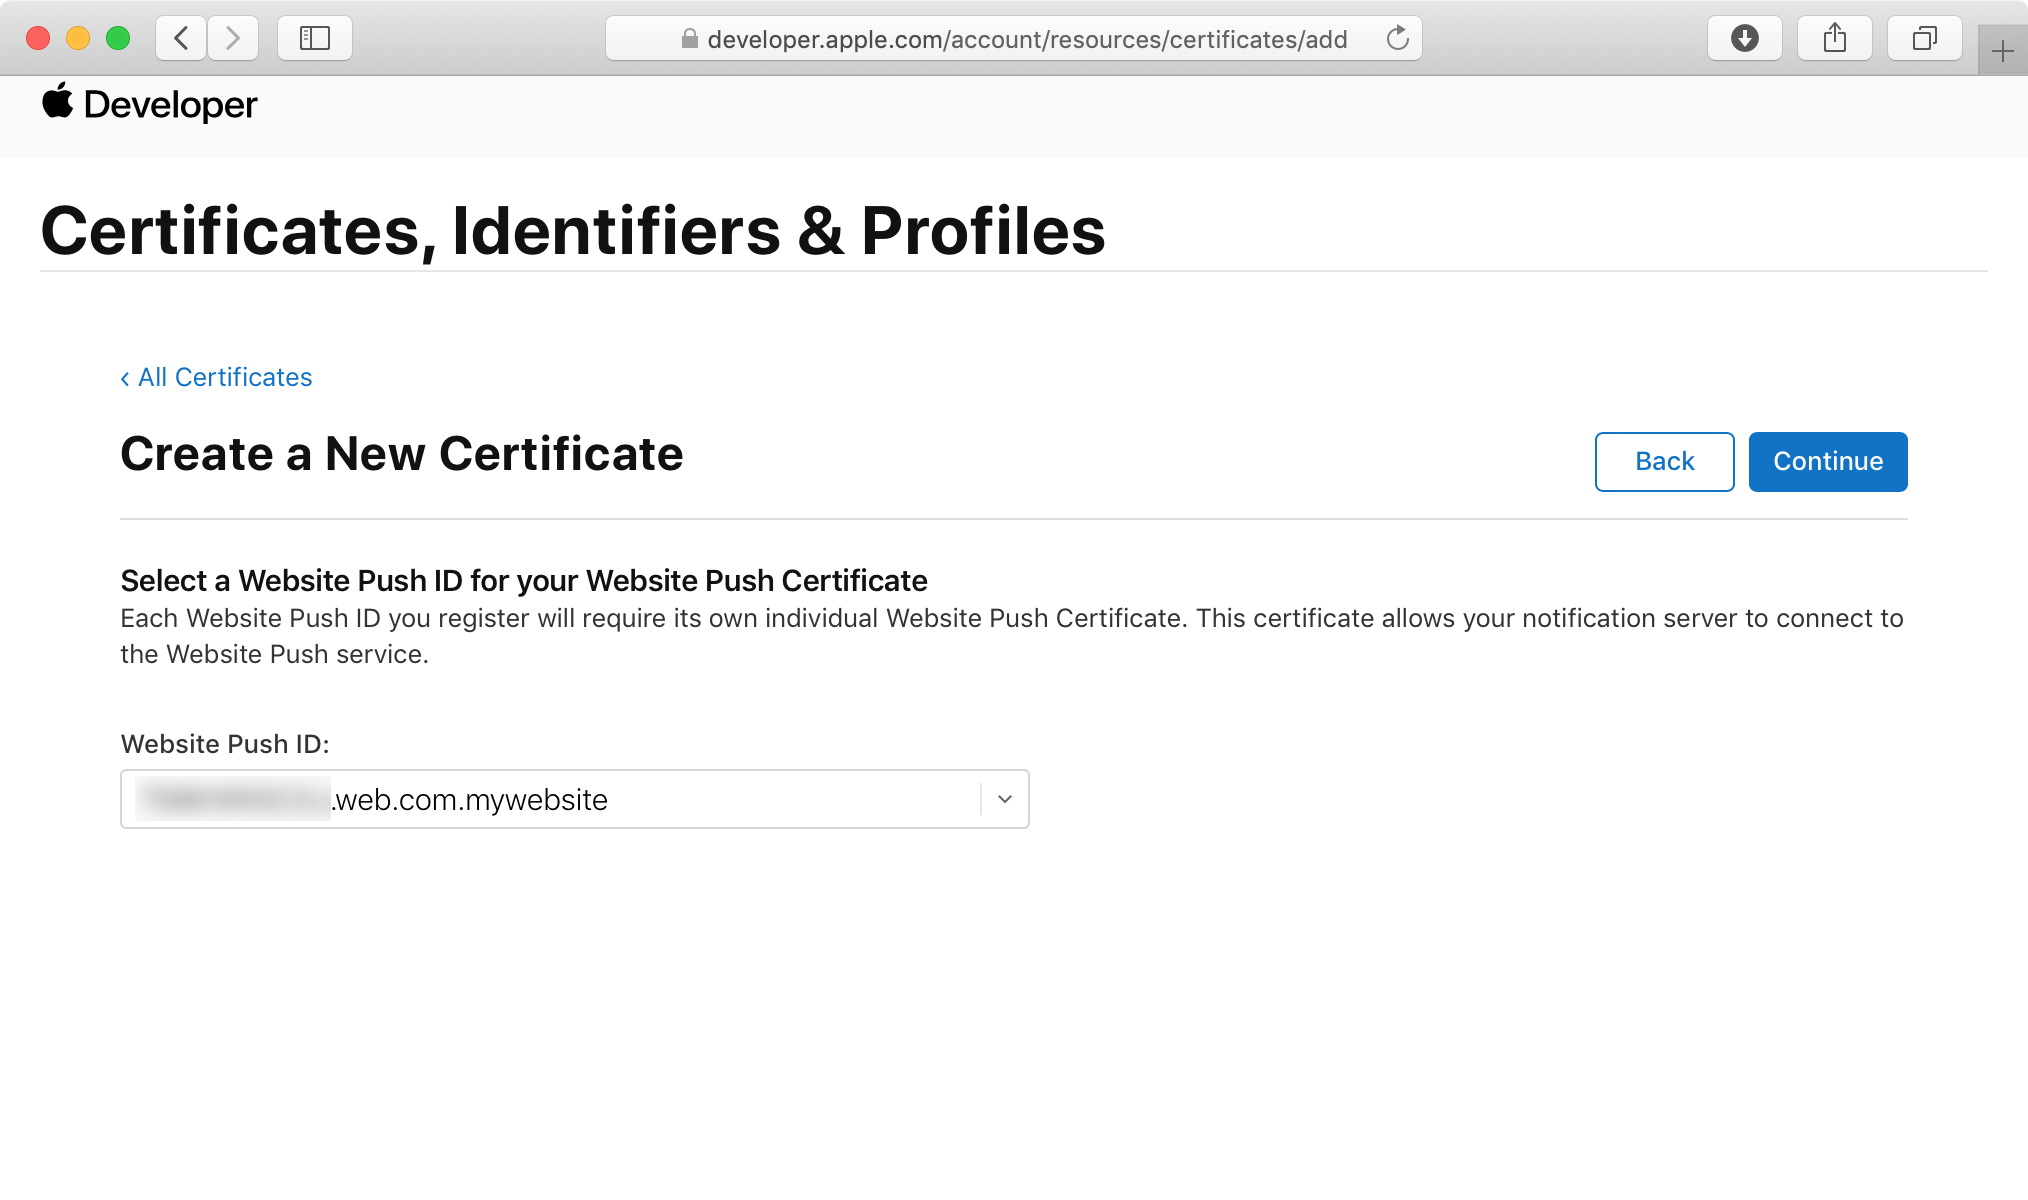
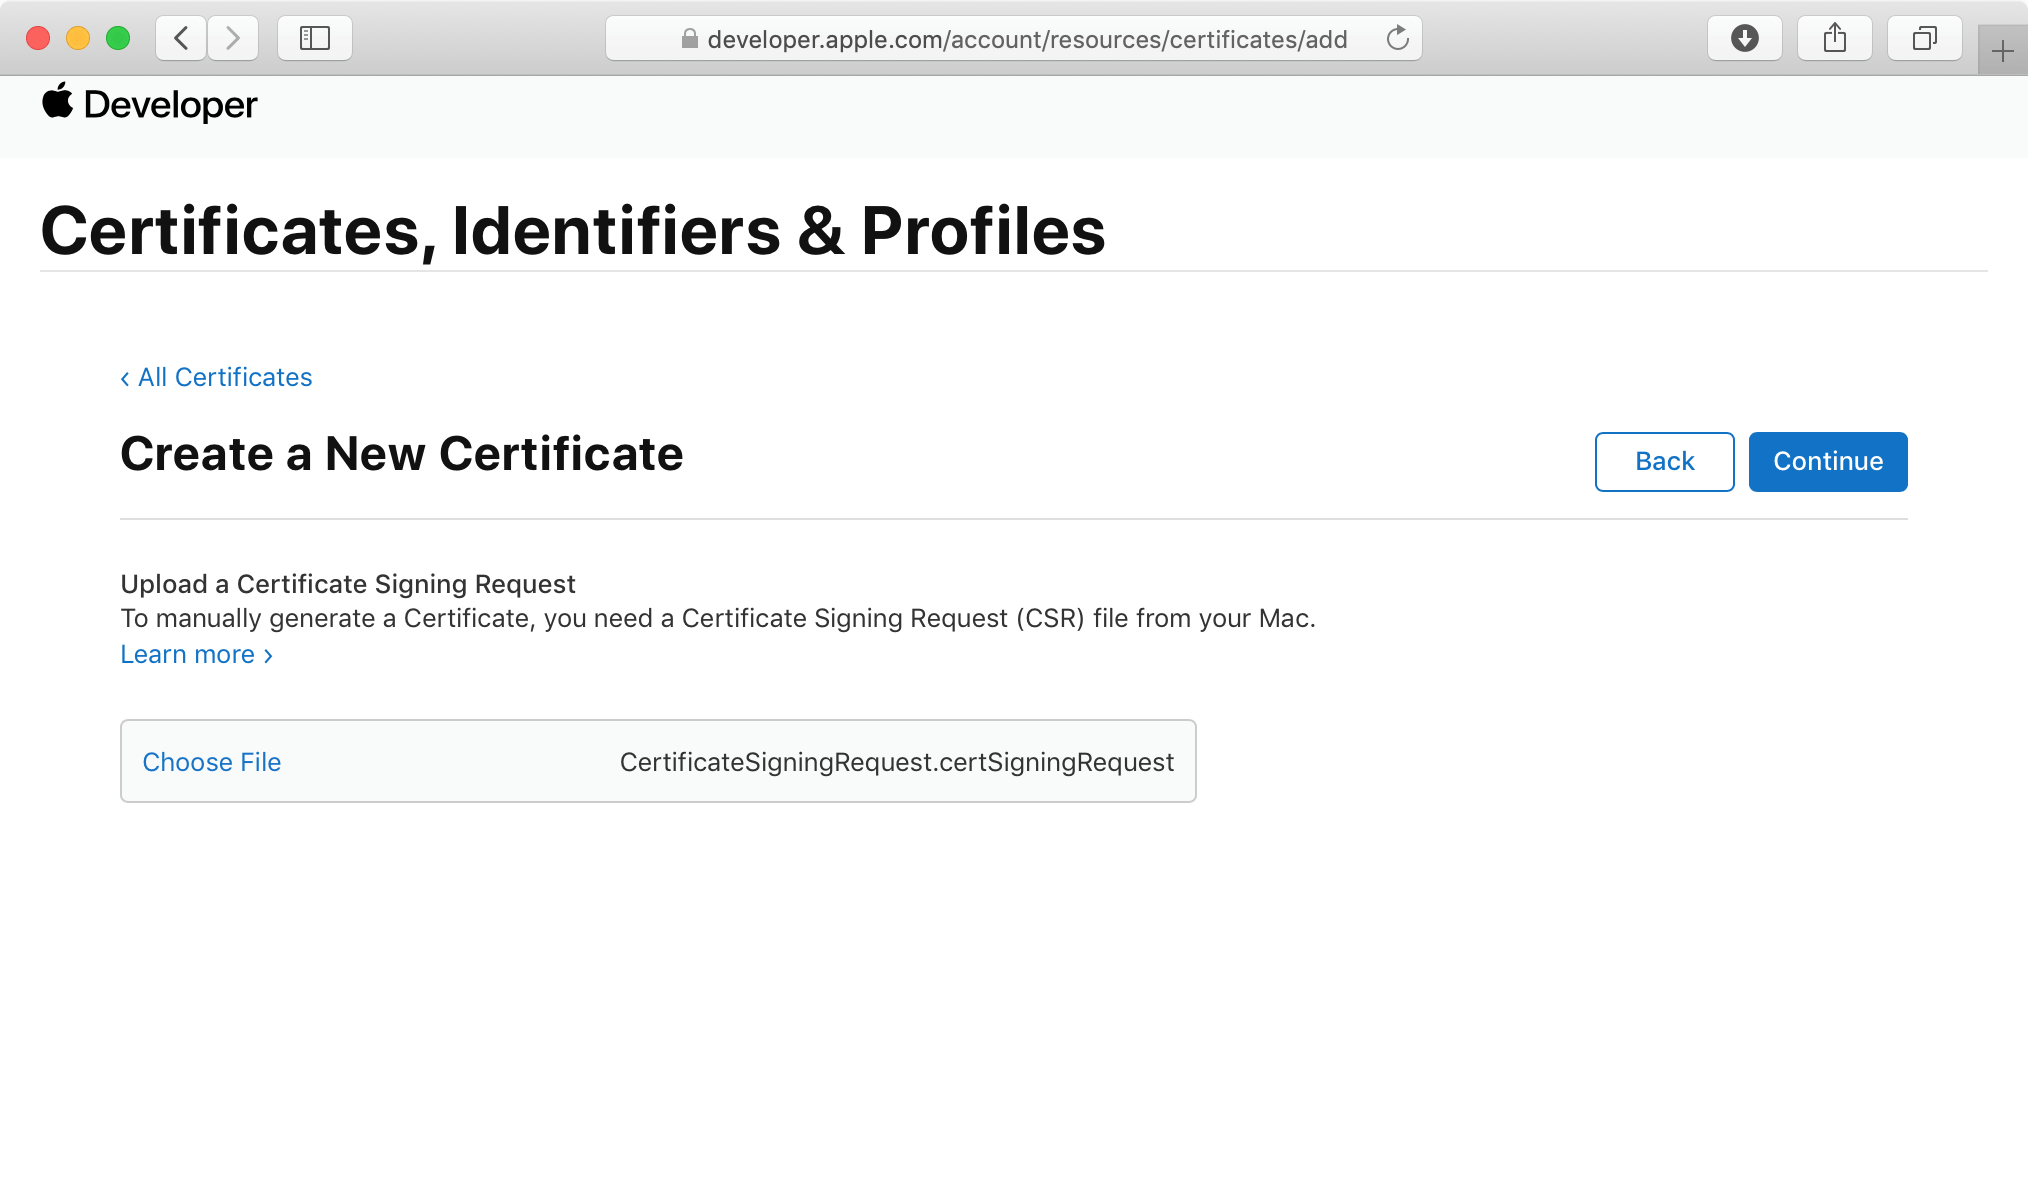
- Now we need the CSR file that was created in Step 1. Browse to the file with the Choose file button, and hit Continue to upload.
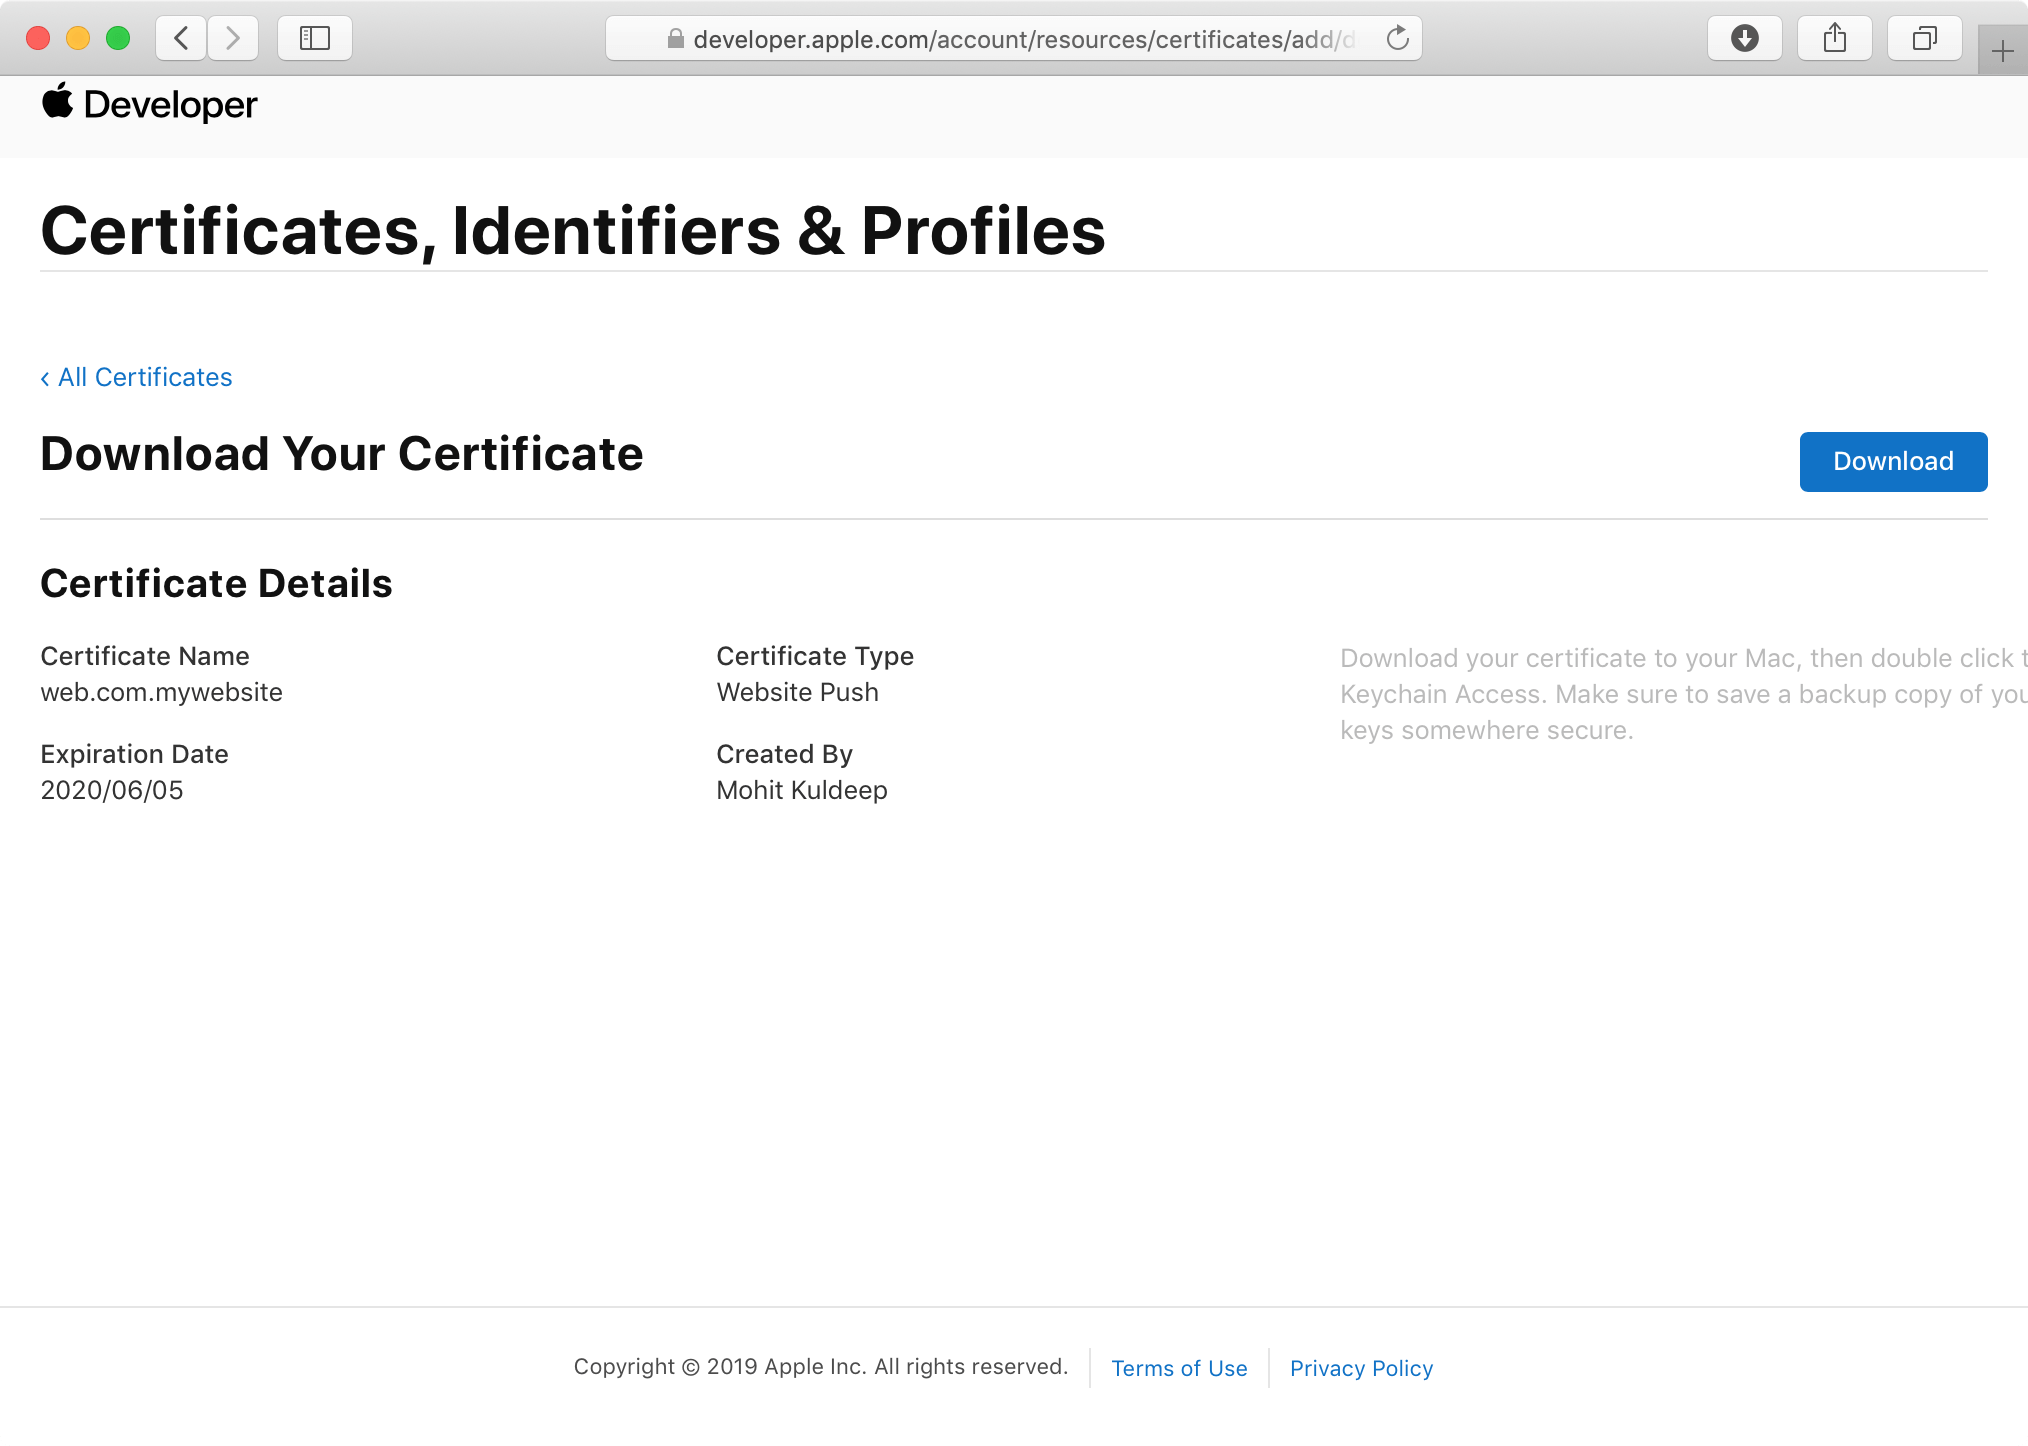
- On the next screen you will see "Download Your Certificate". Download the SSL certificate, this will be used to send notifications to your Subscribers
- Now we need to install and export the Certificate. For that, double click on the downloaded certificate, this will install the certificate in the Keychain Access app.
- Let’s export the Certificate now. Open the Keychain Access app and click on Certificates in the category section.
- Right click on the Website Push ID for which we had created the certificate, you will get a menu where you need to click on Export
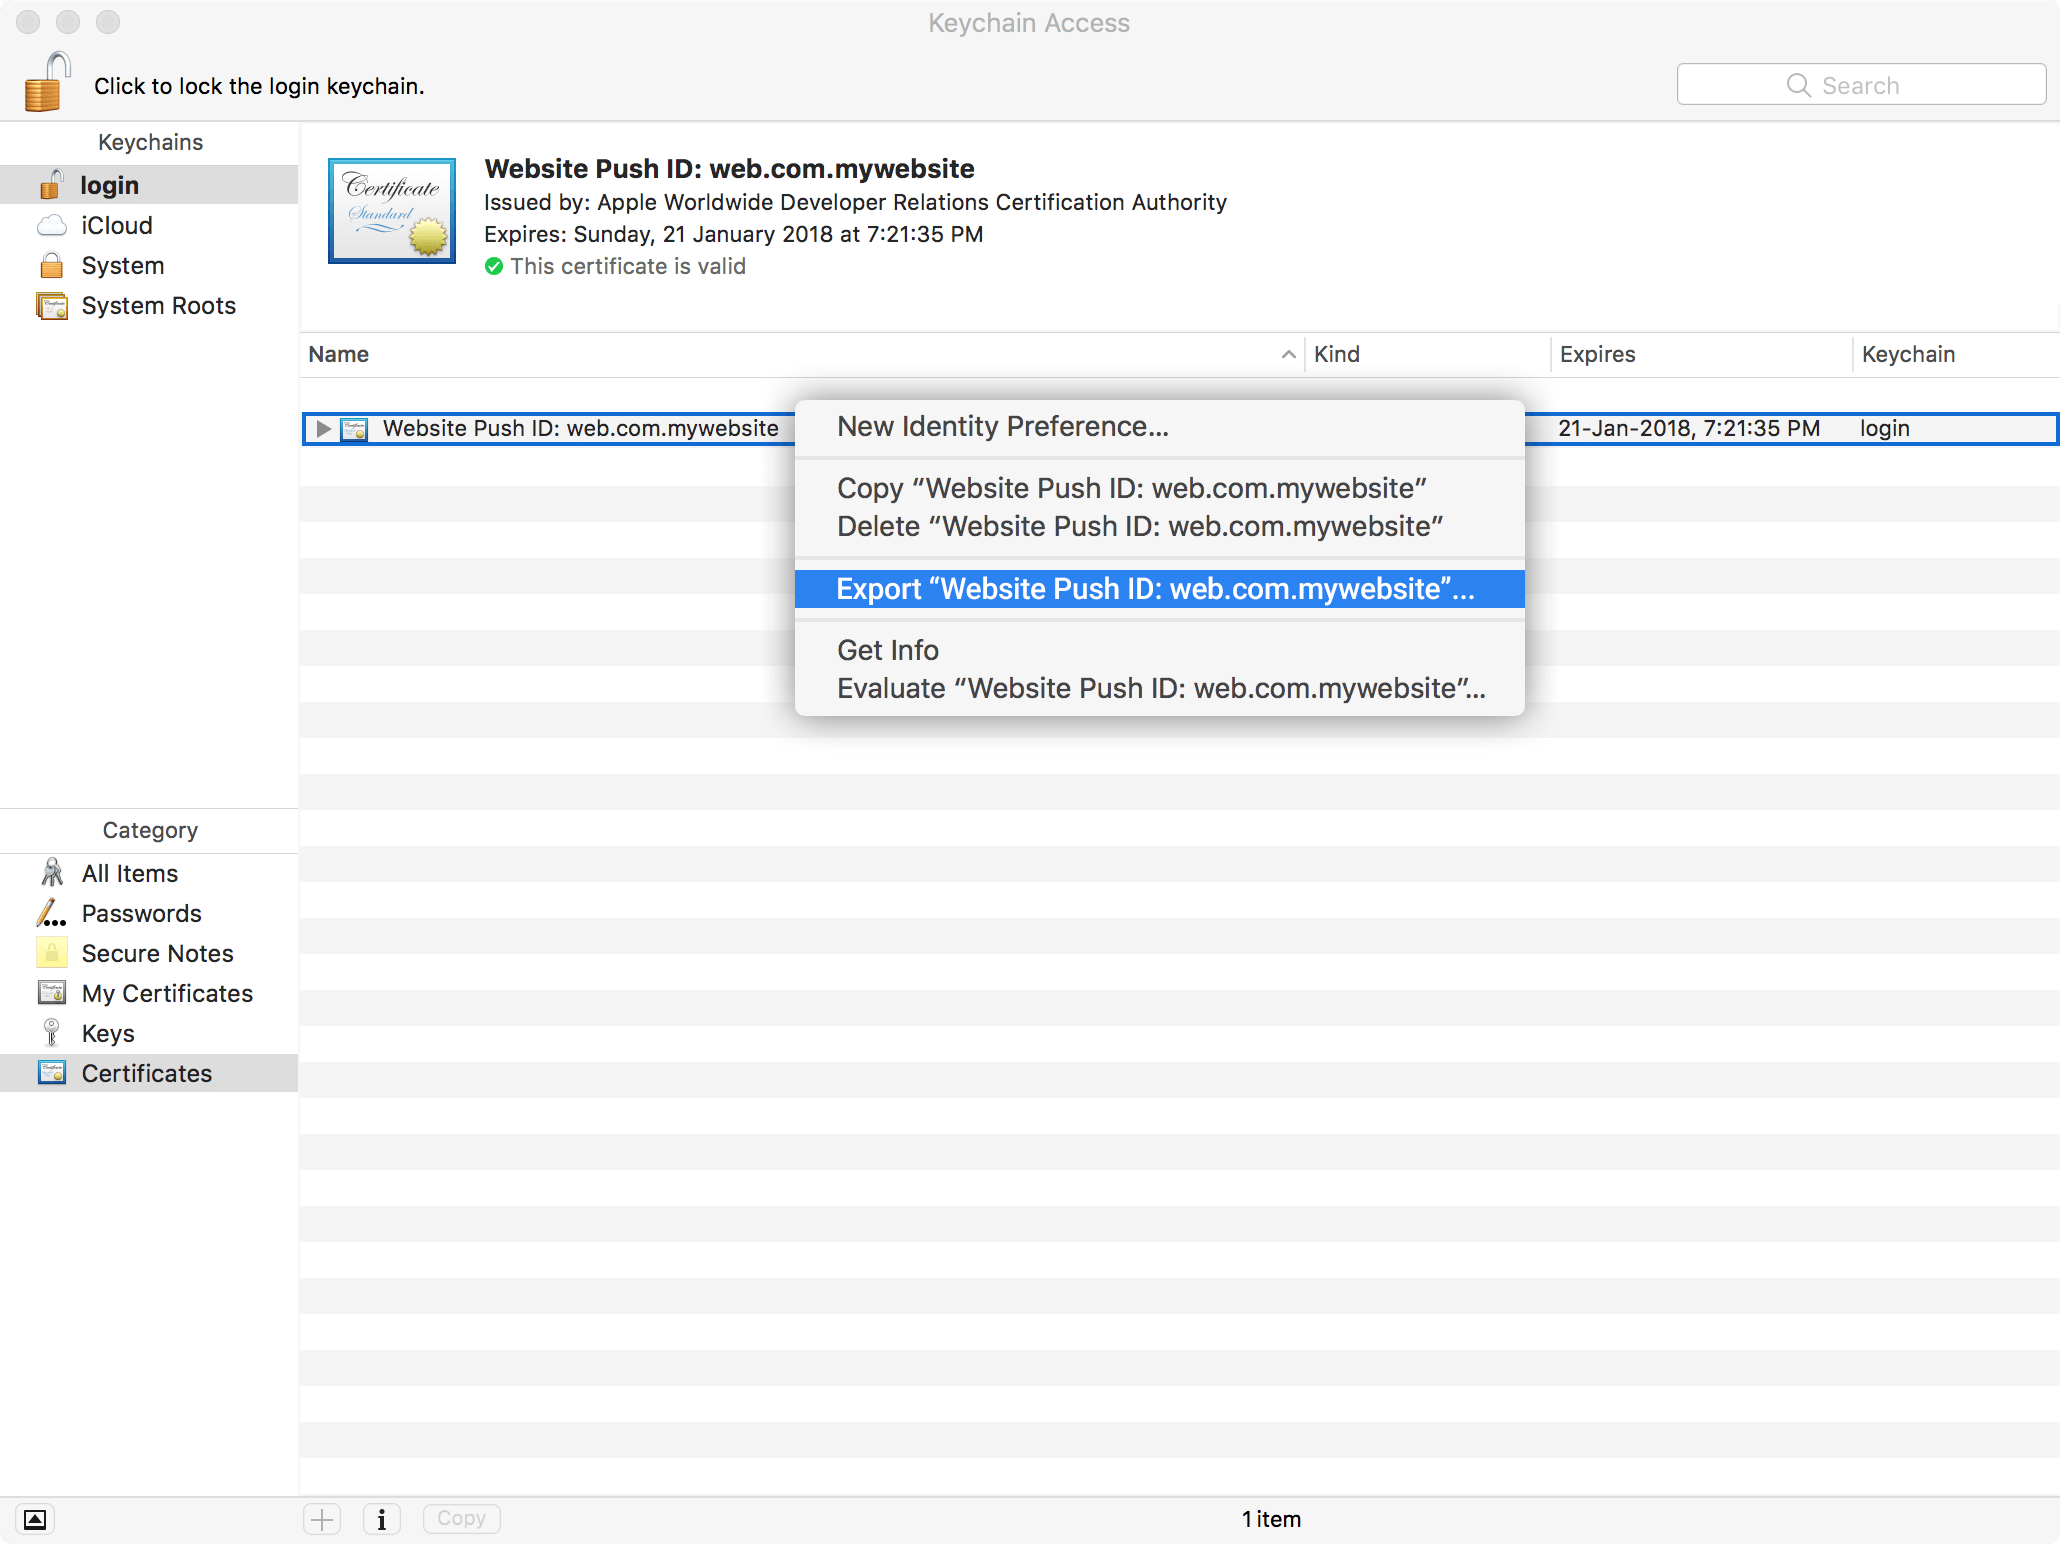
- While saving the certificate file, use Personal Information Exchange (.p12) format.
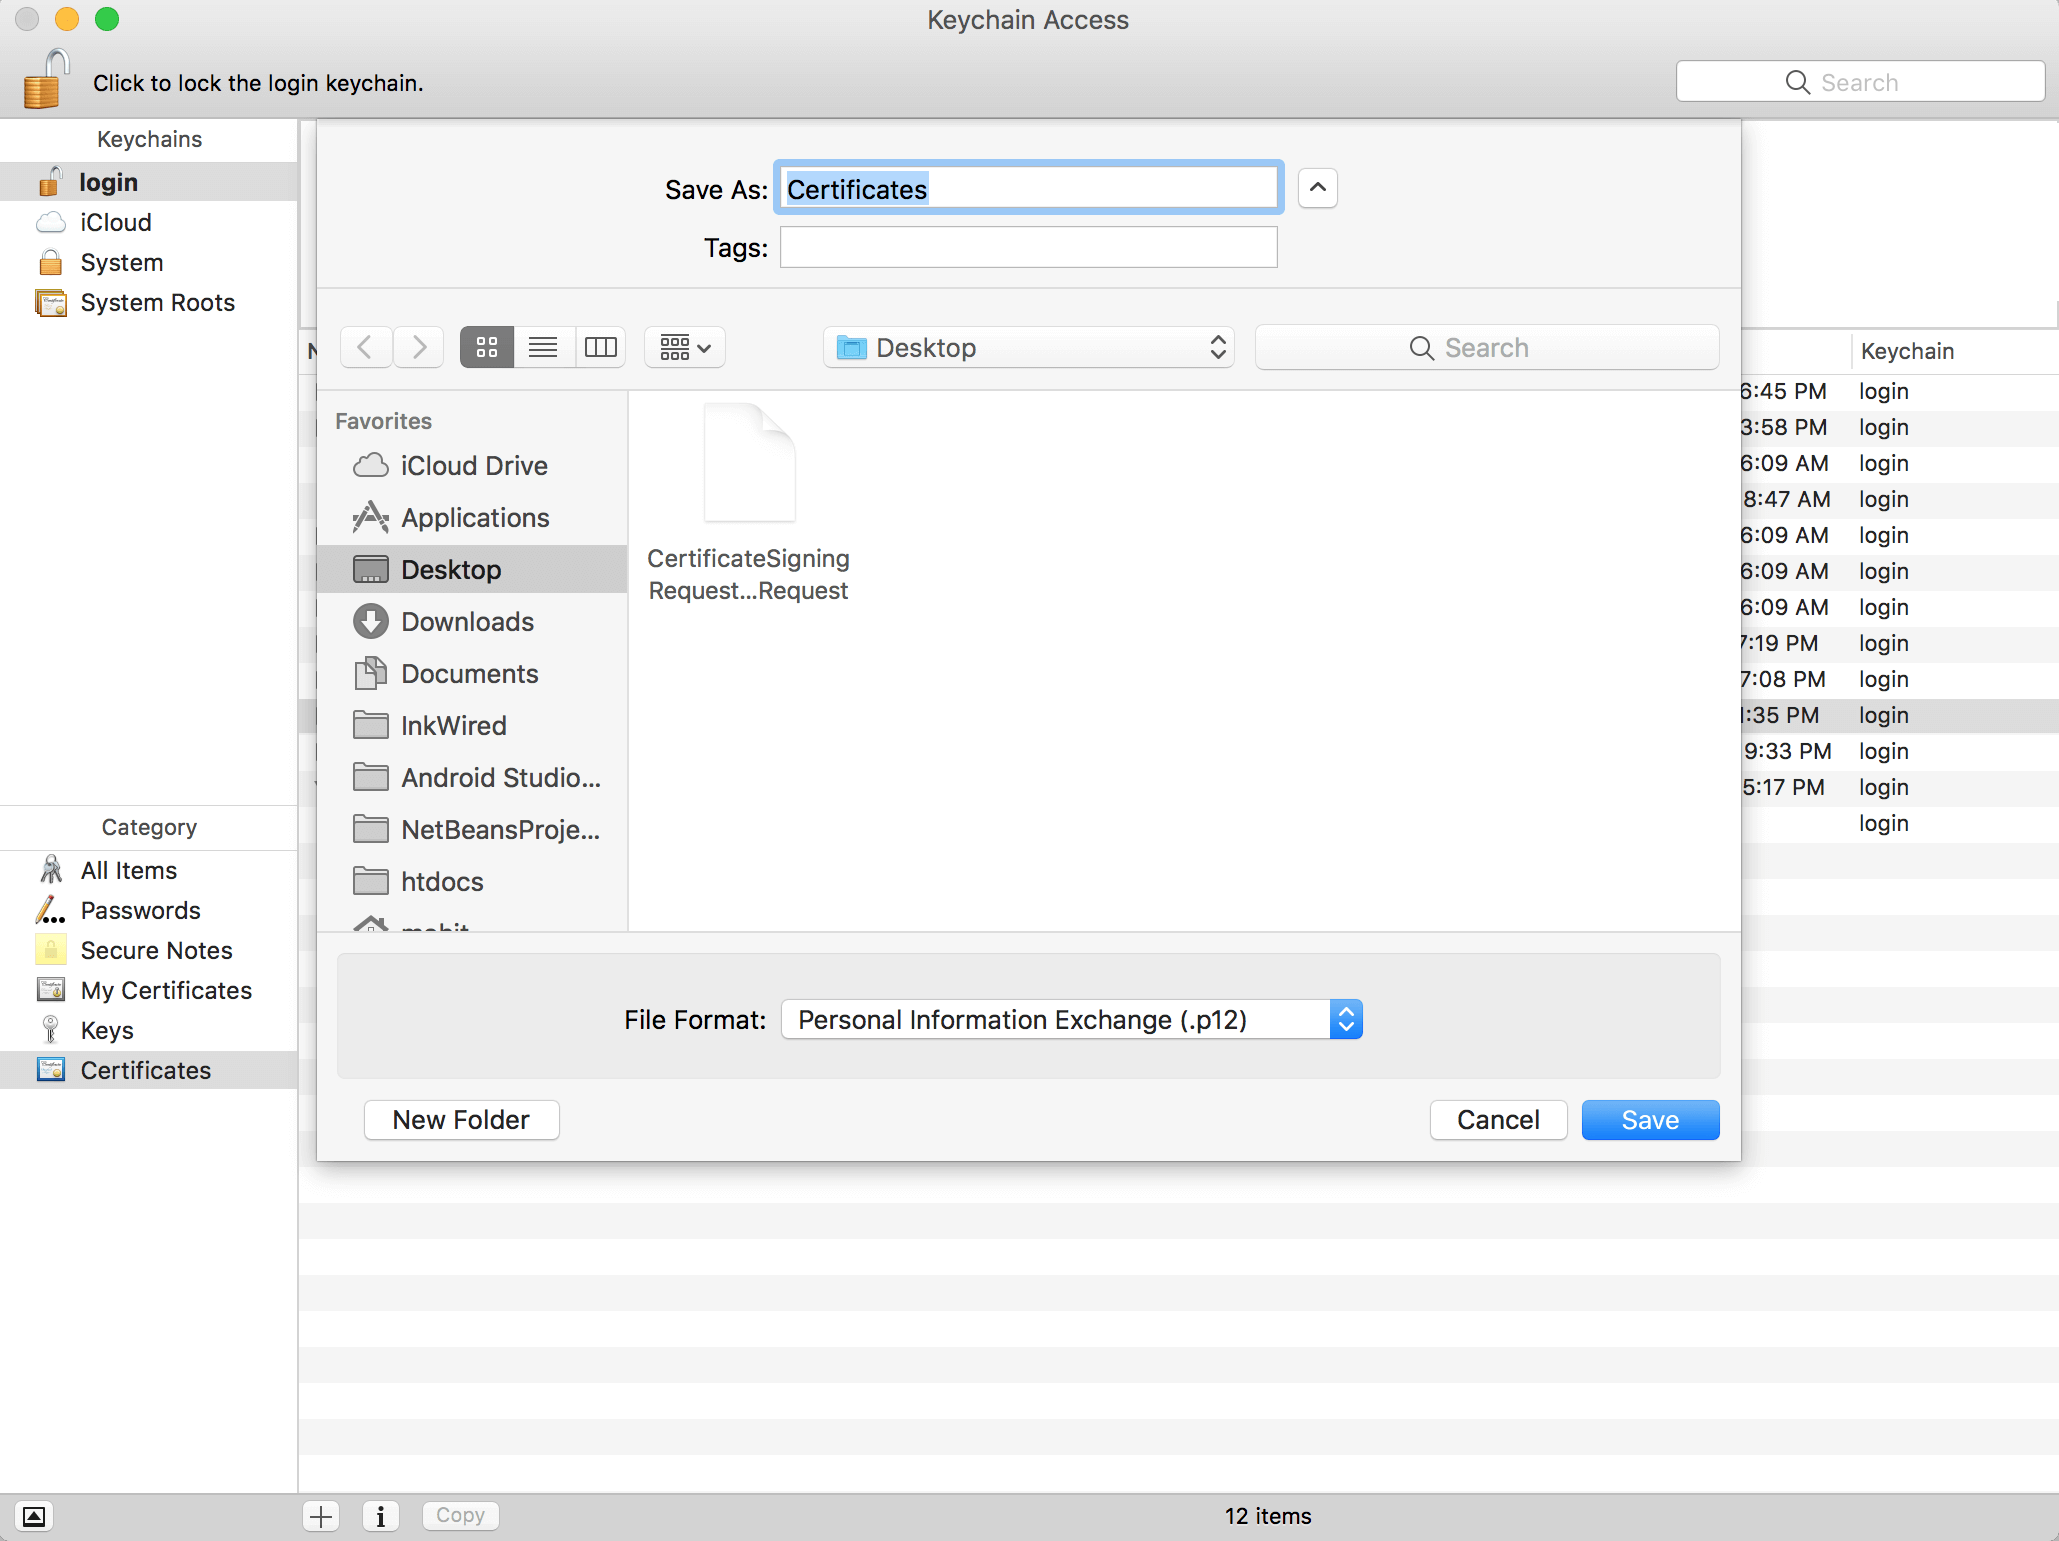
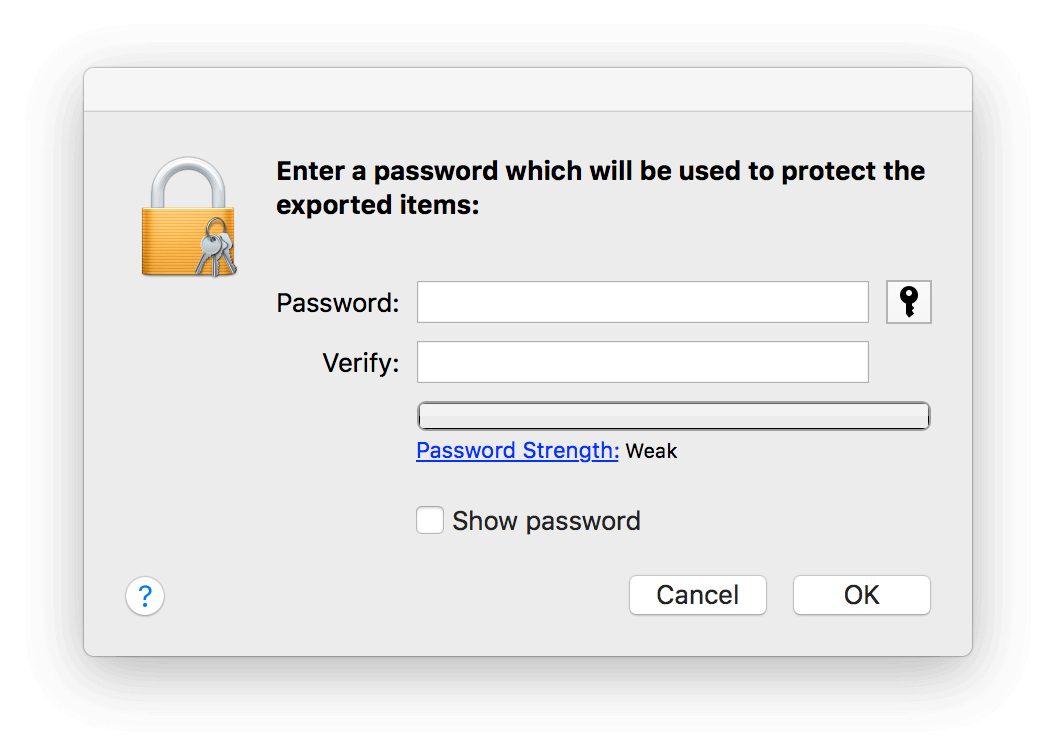
- Next, you will be prompted to enter a password, please enter a password and click on "OK".
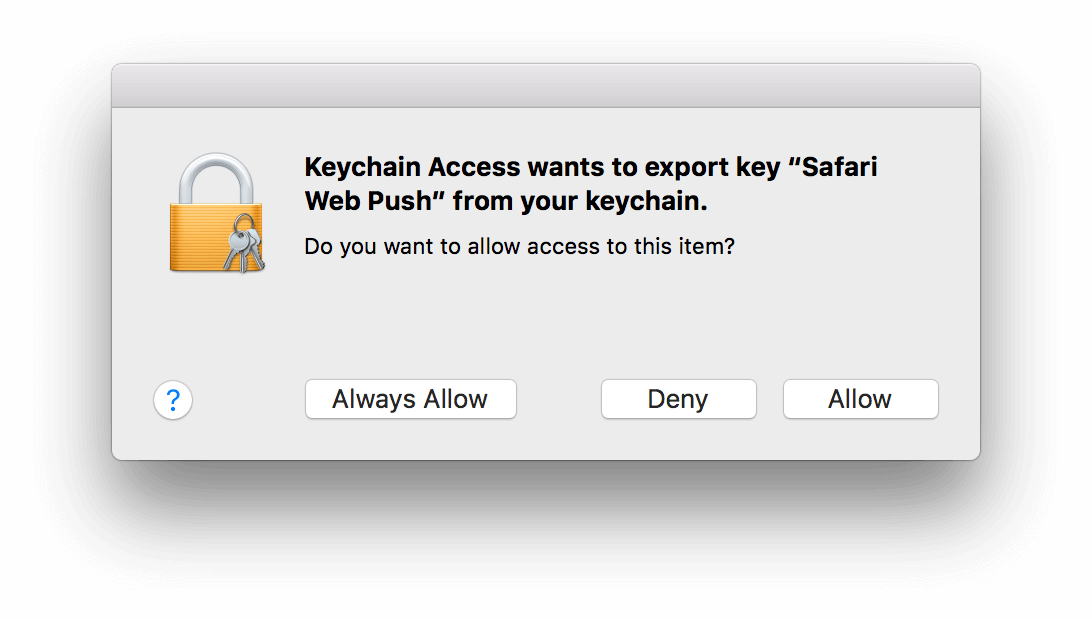
- Then click "Allow" and enter your Mac password to export the certificate to your Mac.
Step 4: Setup
- Once the domain is registered with APNS, you will receive the .p12 certificate file and the icons folder from there.
- Icons from the icons folder will be checked whether they are in the required correct ratios as per the APNS Guidelines.
Guidelines
Please share brand logo images with below Format with 72 Dots per inches only
- [email protected]
- icon_128x128.png
- [email protected]
- icon_16x16.png
- [email protected]
- icon_32x32.png
- [email protected]
- icon_64x64.png
E.g. icon_128x128.png - the size of image must be 128x128 & [email protected], the size of the image must be 256x256
Download sample files from here
- Client will need to provide the said files to the Smartech Team. Please send complete details (Certificate, Password & icon folder) at [email protected]
- Post this our team will complete the backend setup
- Now, login to the Smartech Panel, navigate to Assets > Websites > Choose you website and click edit.
- In the configuration page turn on the Browser Push Notification Switch and under the APNS Section ,upload the .p12 file and put in the Intermediate Certificate Password, also available on your APNS Account.(Please refer image below)
- In case of Safari, double opt-in is mandatory, so if the client wants that to happen from a sub domain, put that in the sub domain field or if it needs to be done from the main domain put the main domain in the sun domain field.
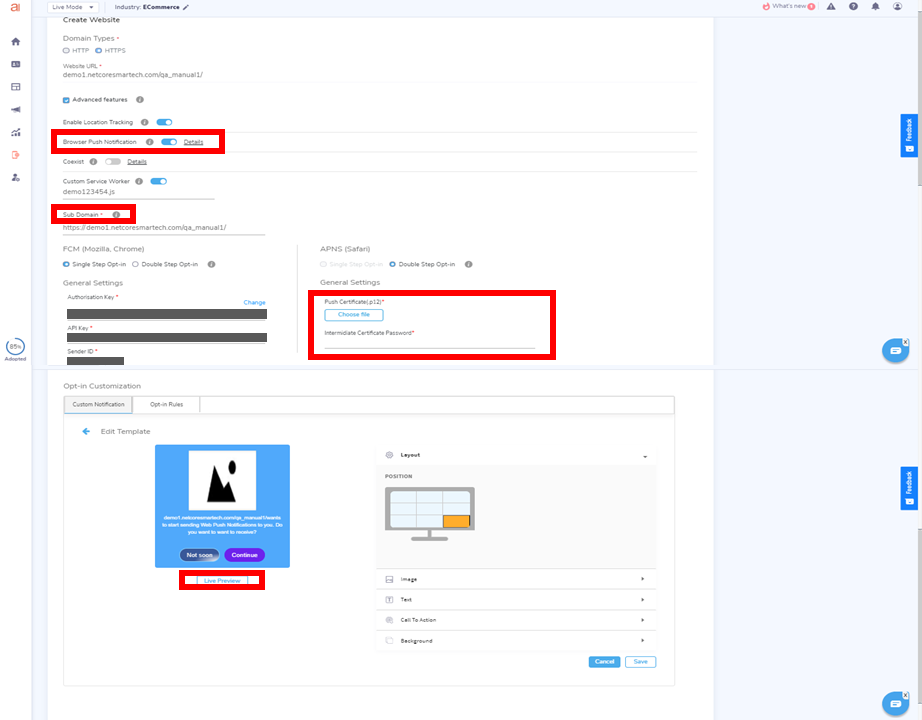
APNS Smartech configuration.
Updated over 4 years ago
