Web Push Broadcast
Overview
Web Push Notification is a clickable message that appears on the browser, irrespective of the fact whether the contact is active or not active on your website.
There is no contact information (email ID, mobile number, etc.) required to send these notifications. Hence, these can be sent to Identified as well as Anonymous contacts. However, these can be sent only when the contact has subscribed or agreed to receive notifications.
A pop-up dialog box appears on the browser that asks the contact to allow or deny displaying of the Web Push Notifications.
Smartech currently supports Web Push for Chrome, Firefox and other browsers for desktop, tablet and mobile.
You need to integrate your website with Smartech. Click here to know website integration.
To send a Web Push Broadcast
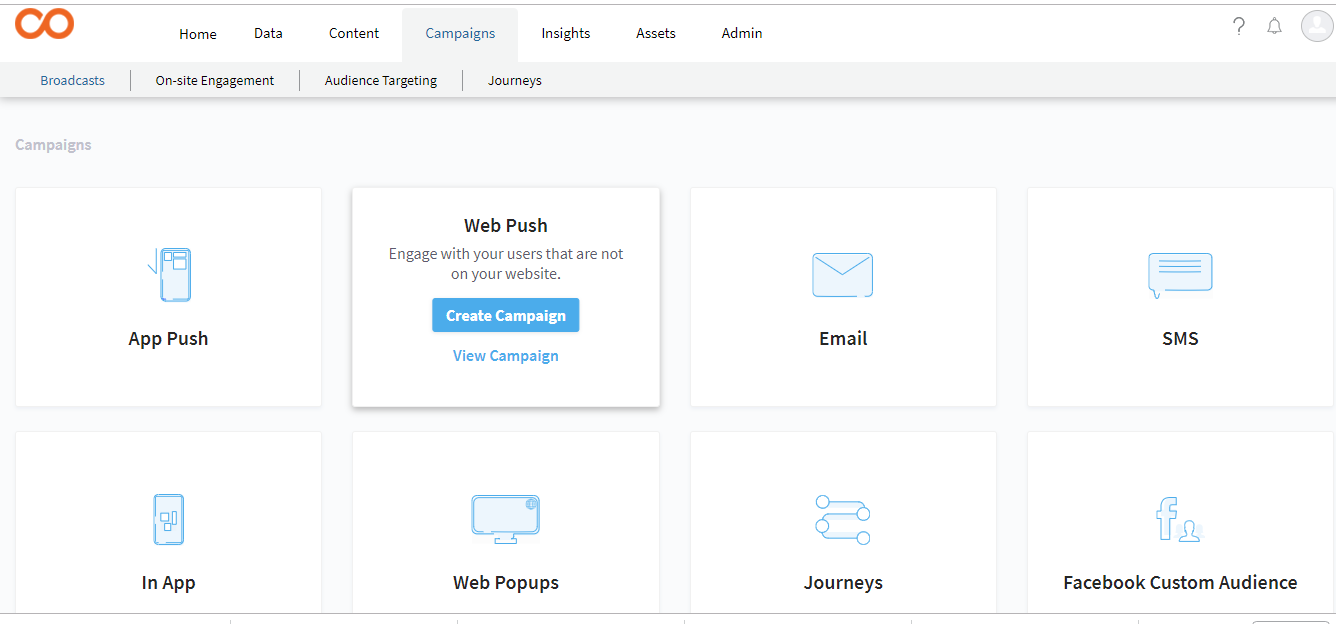
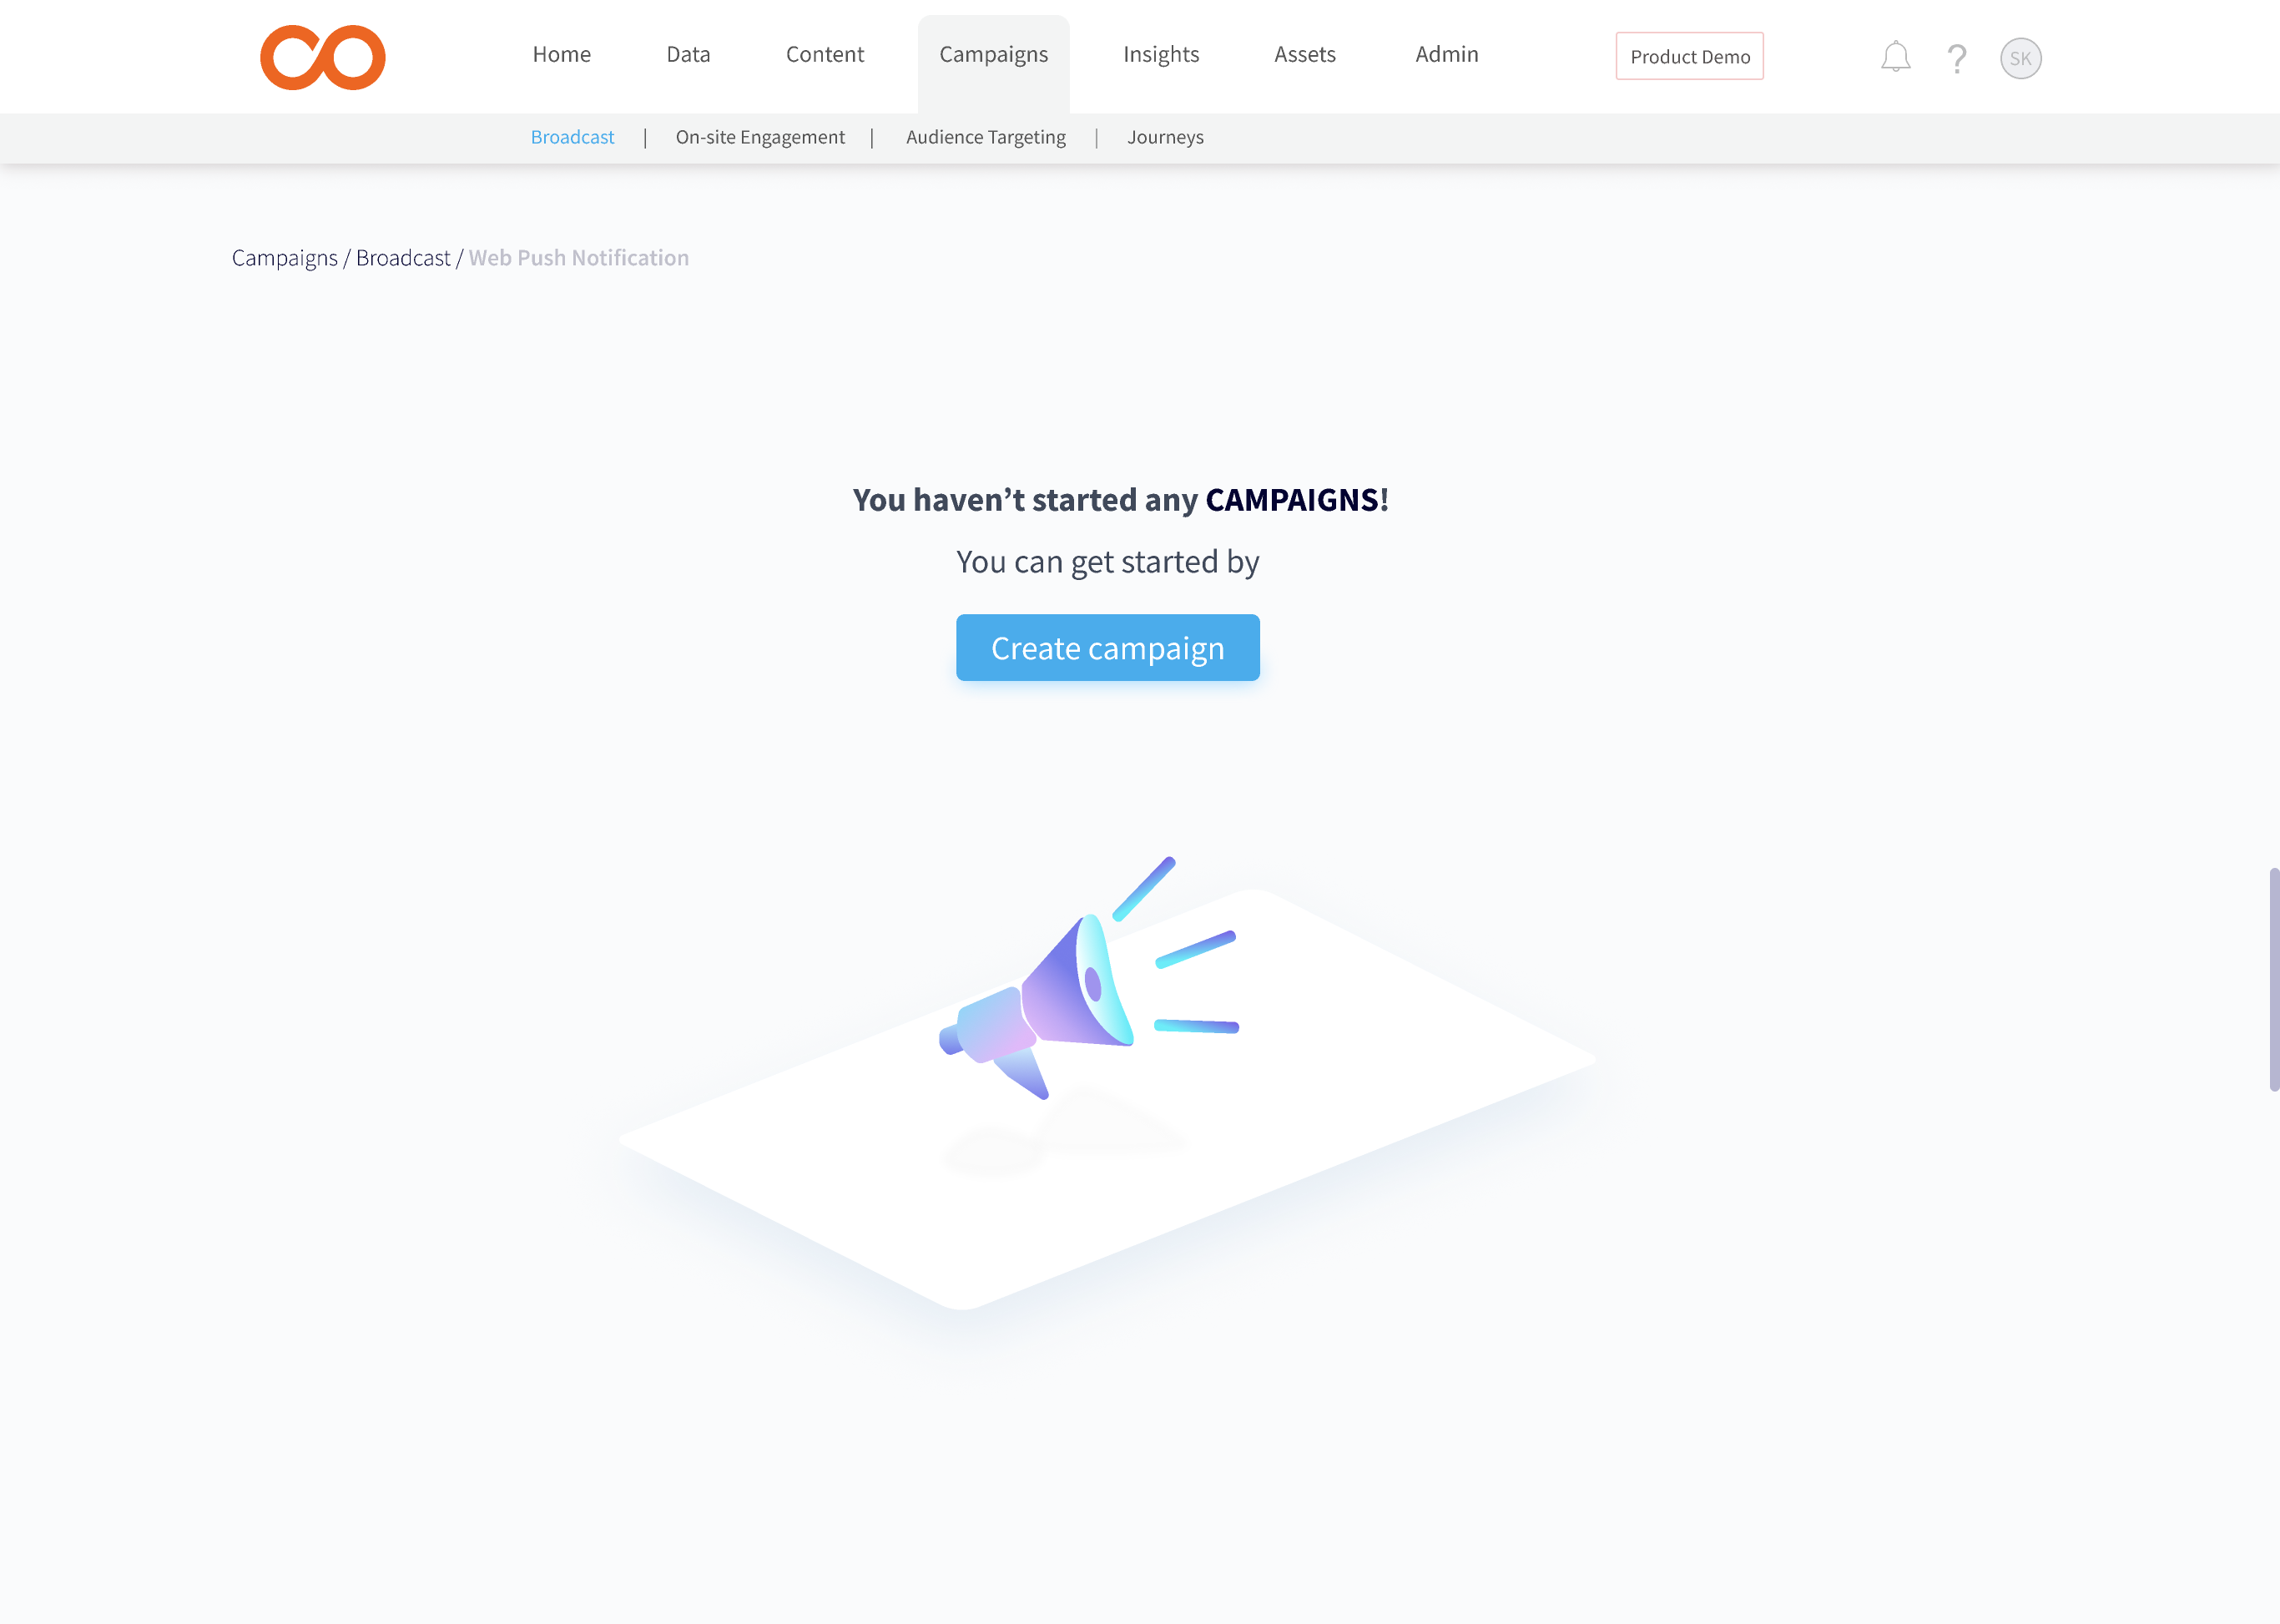
Go to Campaigns -> Broadcast. Mouse hover on 'Web Push' and click on 'Create Campaign'. Refer to the below image.
Setup
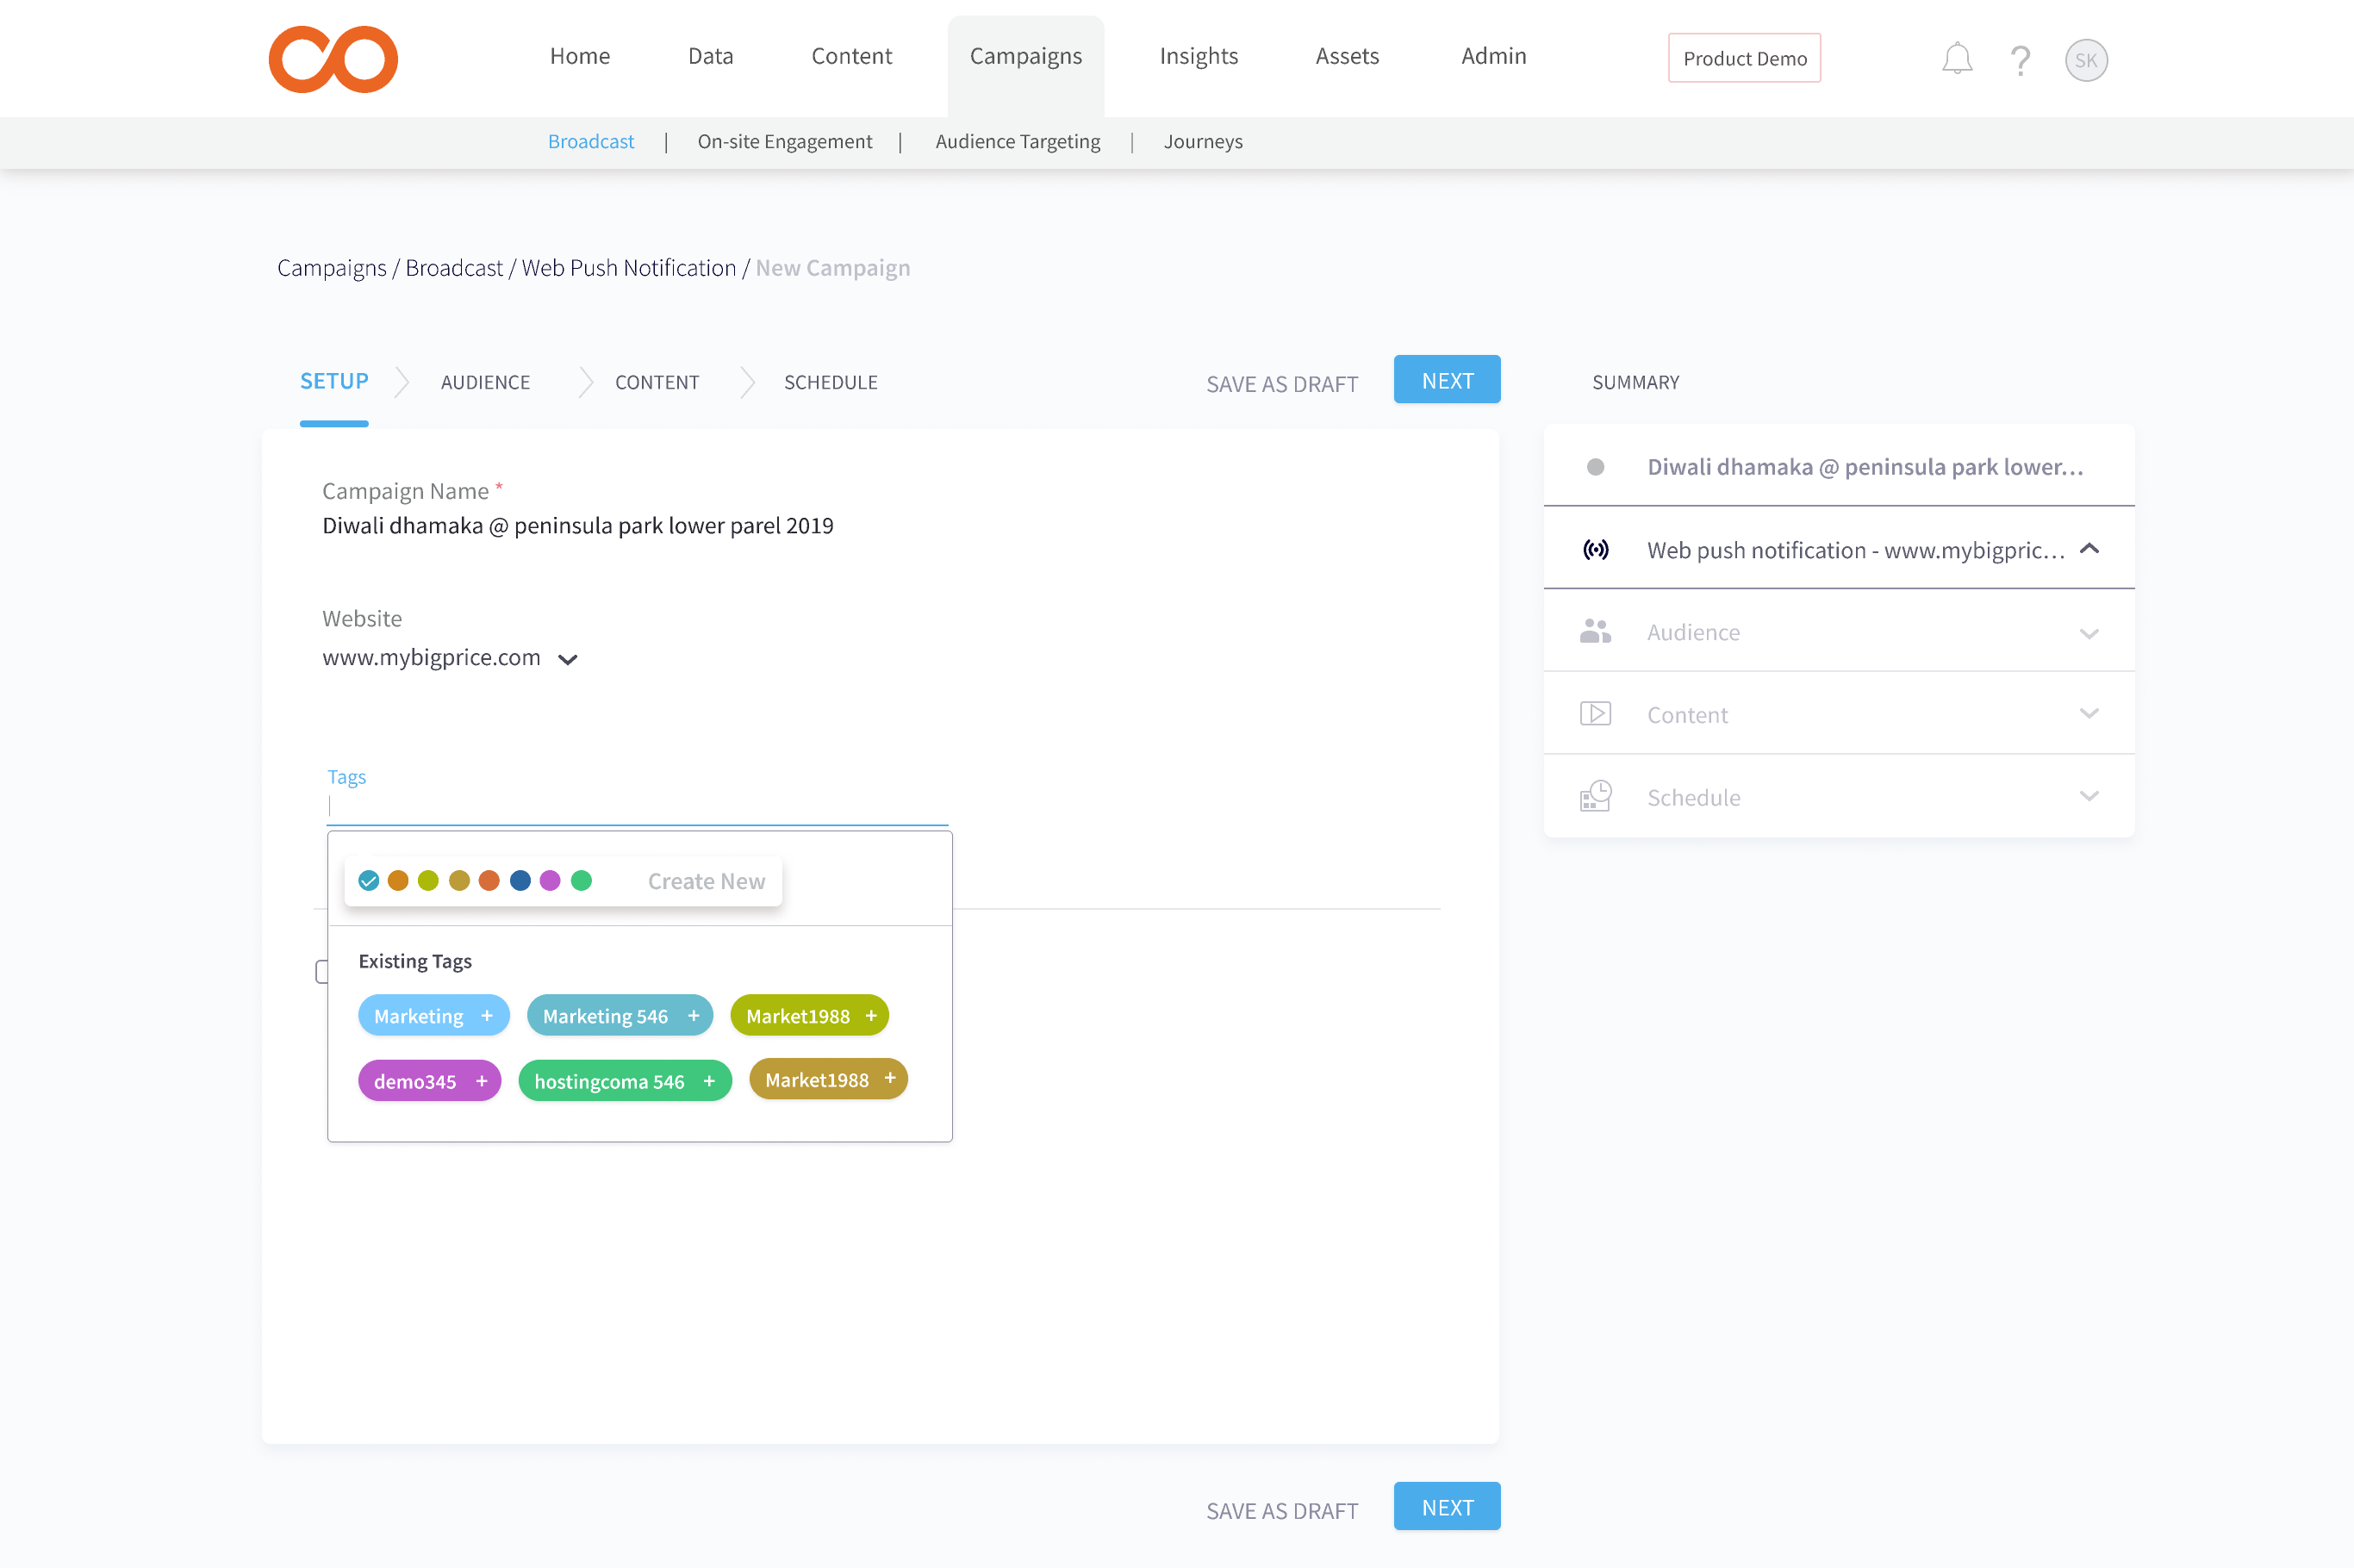
The 'setup' section consists of -
Campaign Name - Add campaign name. Mandatory field.
Website Selection - Select the website whose users you wish to target. Mandatory field.
Tags - Add a campaign tag. Optional field.
Conversion Tracking - Select your Conversion Activity. Optional field.
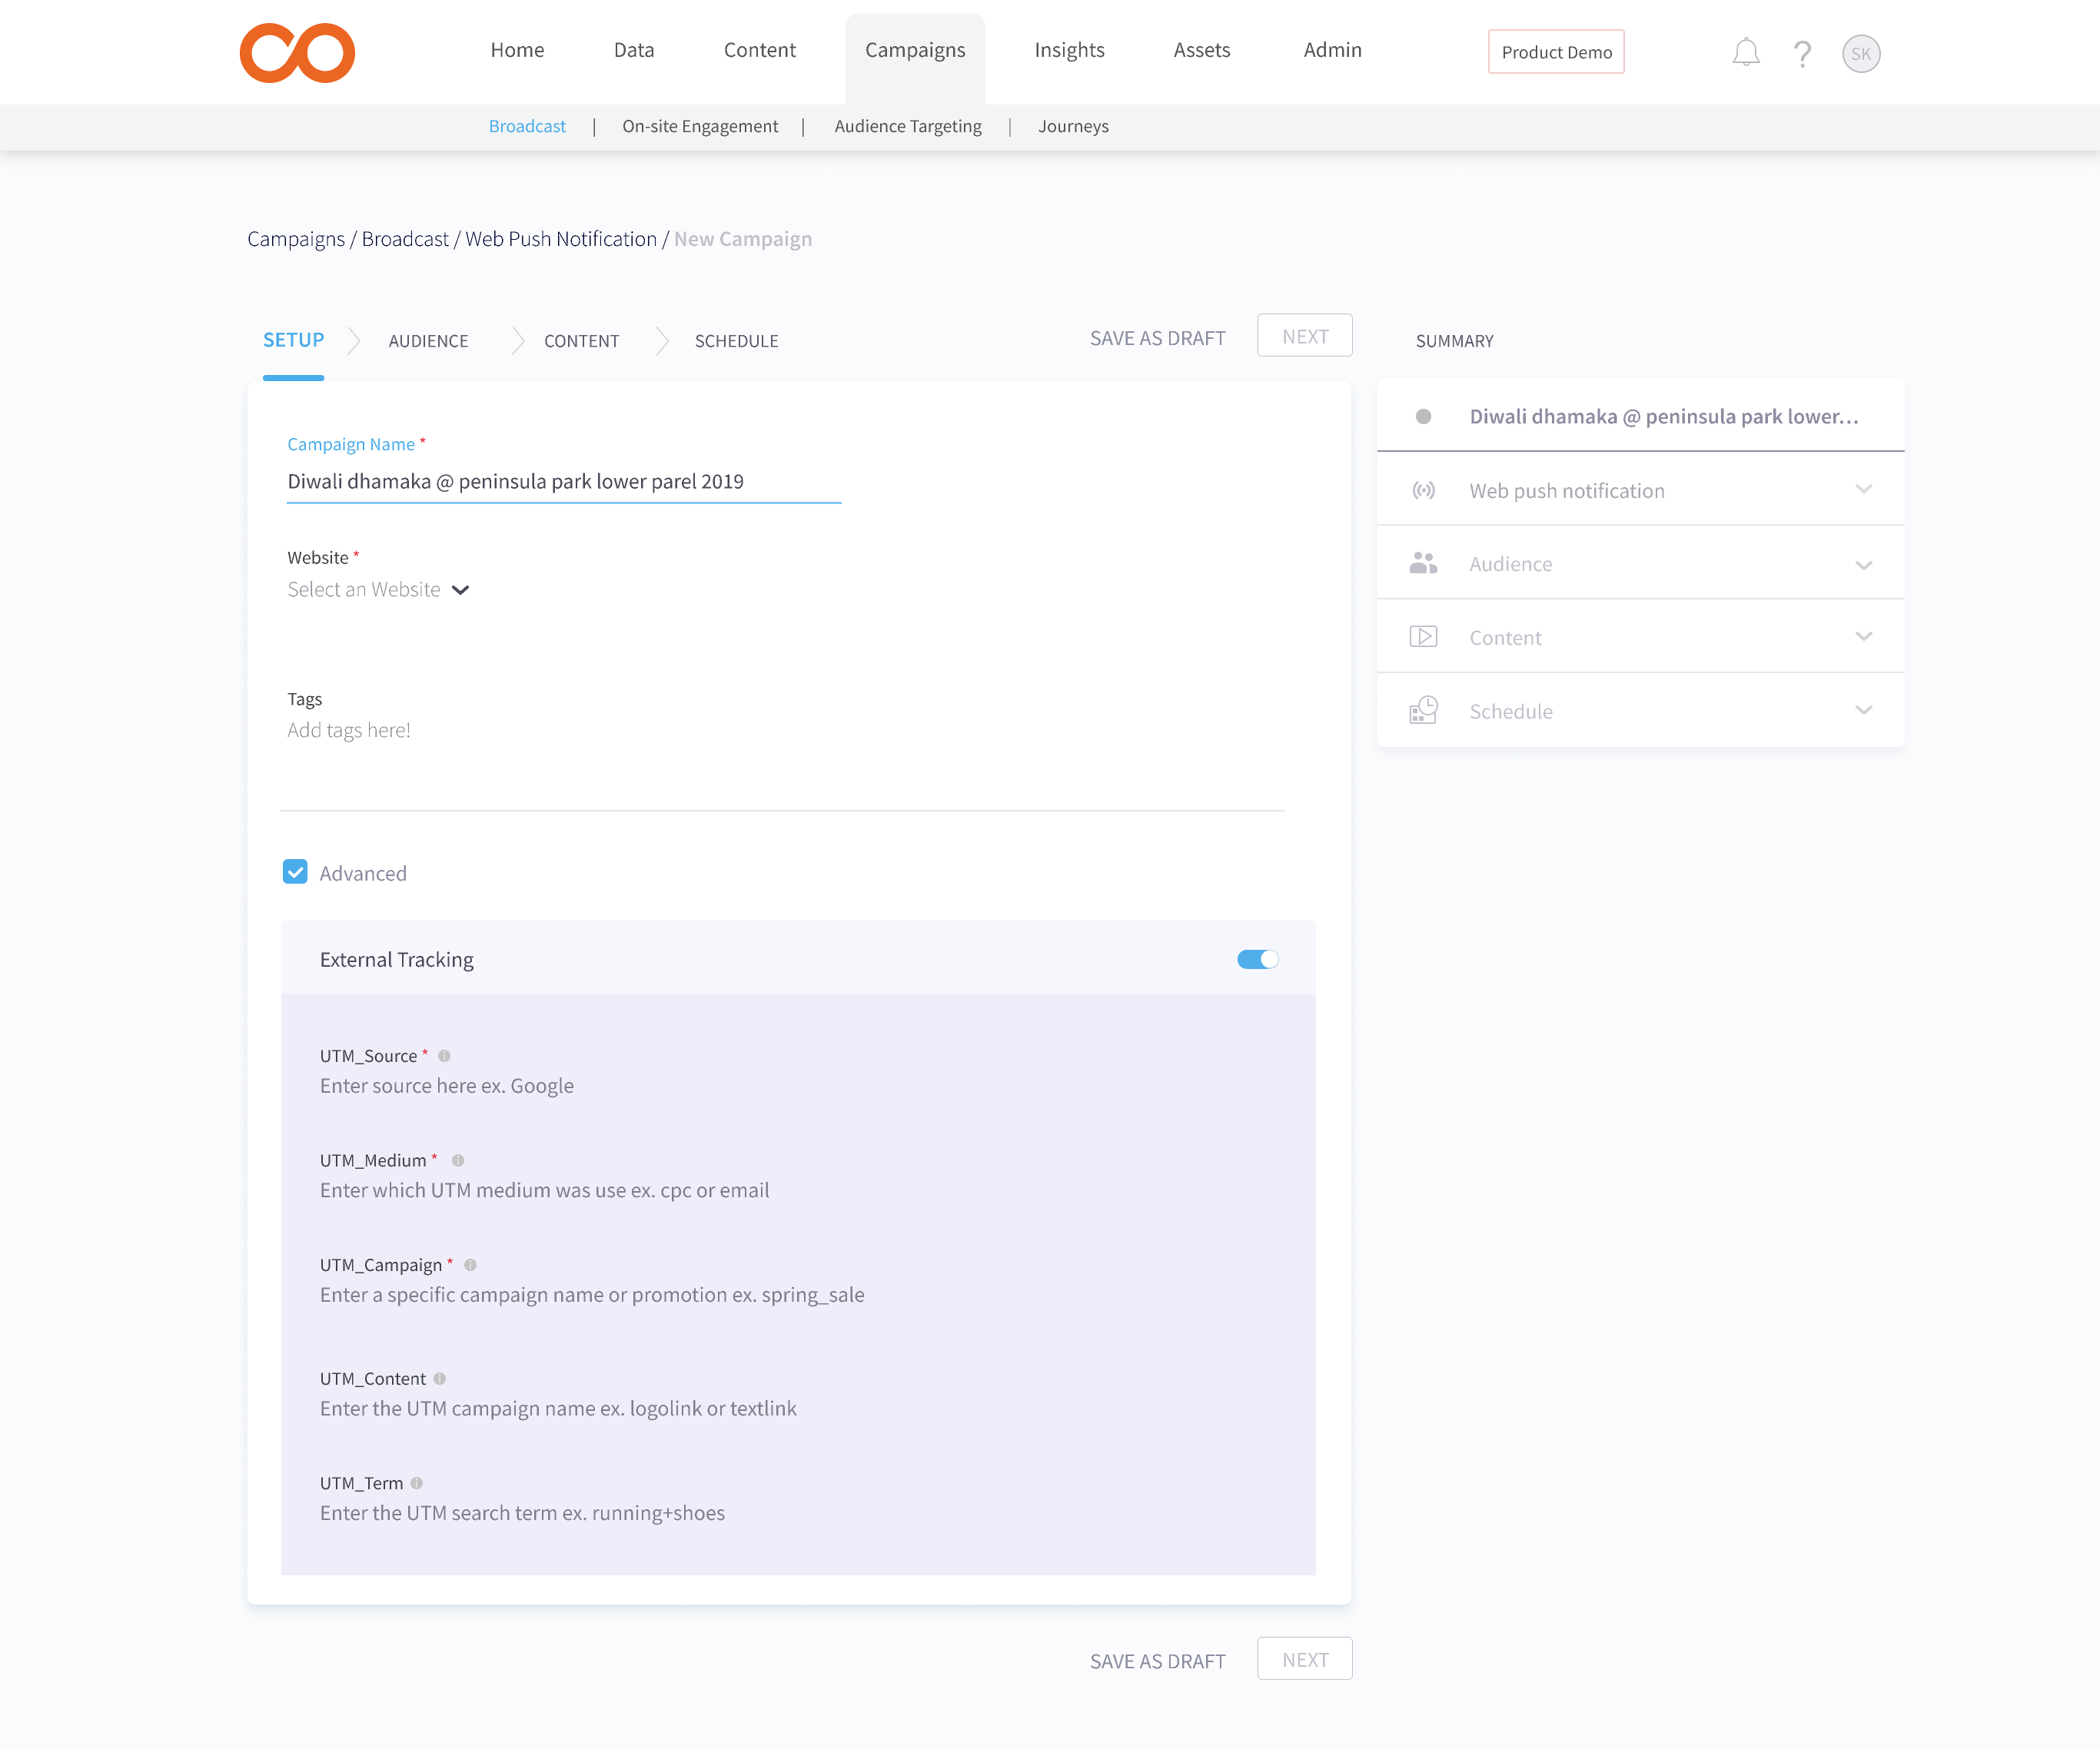
External tracking - Add UTM parameters. Optional field.
Note
Campaign Name is a mandatory field. Max 255 characters and Alphanumeric, space, hyphen, underscore, '&', allowed.
Campaign Tag is an optional field. Max 5 tags are allowed per campaign.
Conversion Tracking is the measurement of the campaign performance with reference to the end goal of the campaign.
Conversion Tracking is an optional feature that can be enabled when creating a Web Push campaign under the Advanced options of the Setup Section.
Users are required to follow the mentioned below steps:
- Select 'activity' name which defines the purpose of the web push notification campaign
- Specify selected activity's payload parameter which acts as a rule to filter/consider activities within specified parameters (optional).
- Then schedule campaign as usual.
- The reports will be visible in Web Push Section (list view)
External Tracking - You can add UTM parameters for a specific campaign.
Audience
The audience section allows the marketer to select all users or existing segments (saved segments).
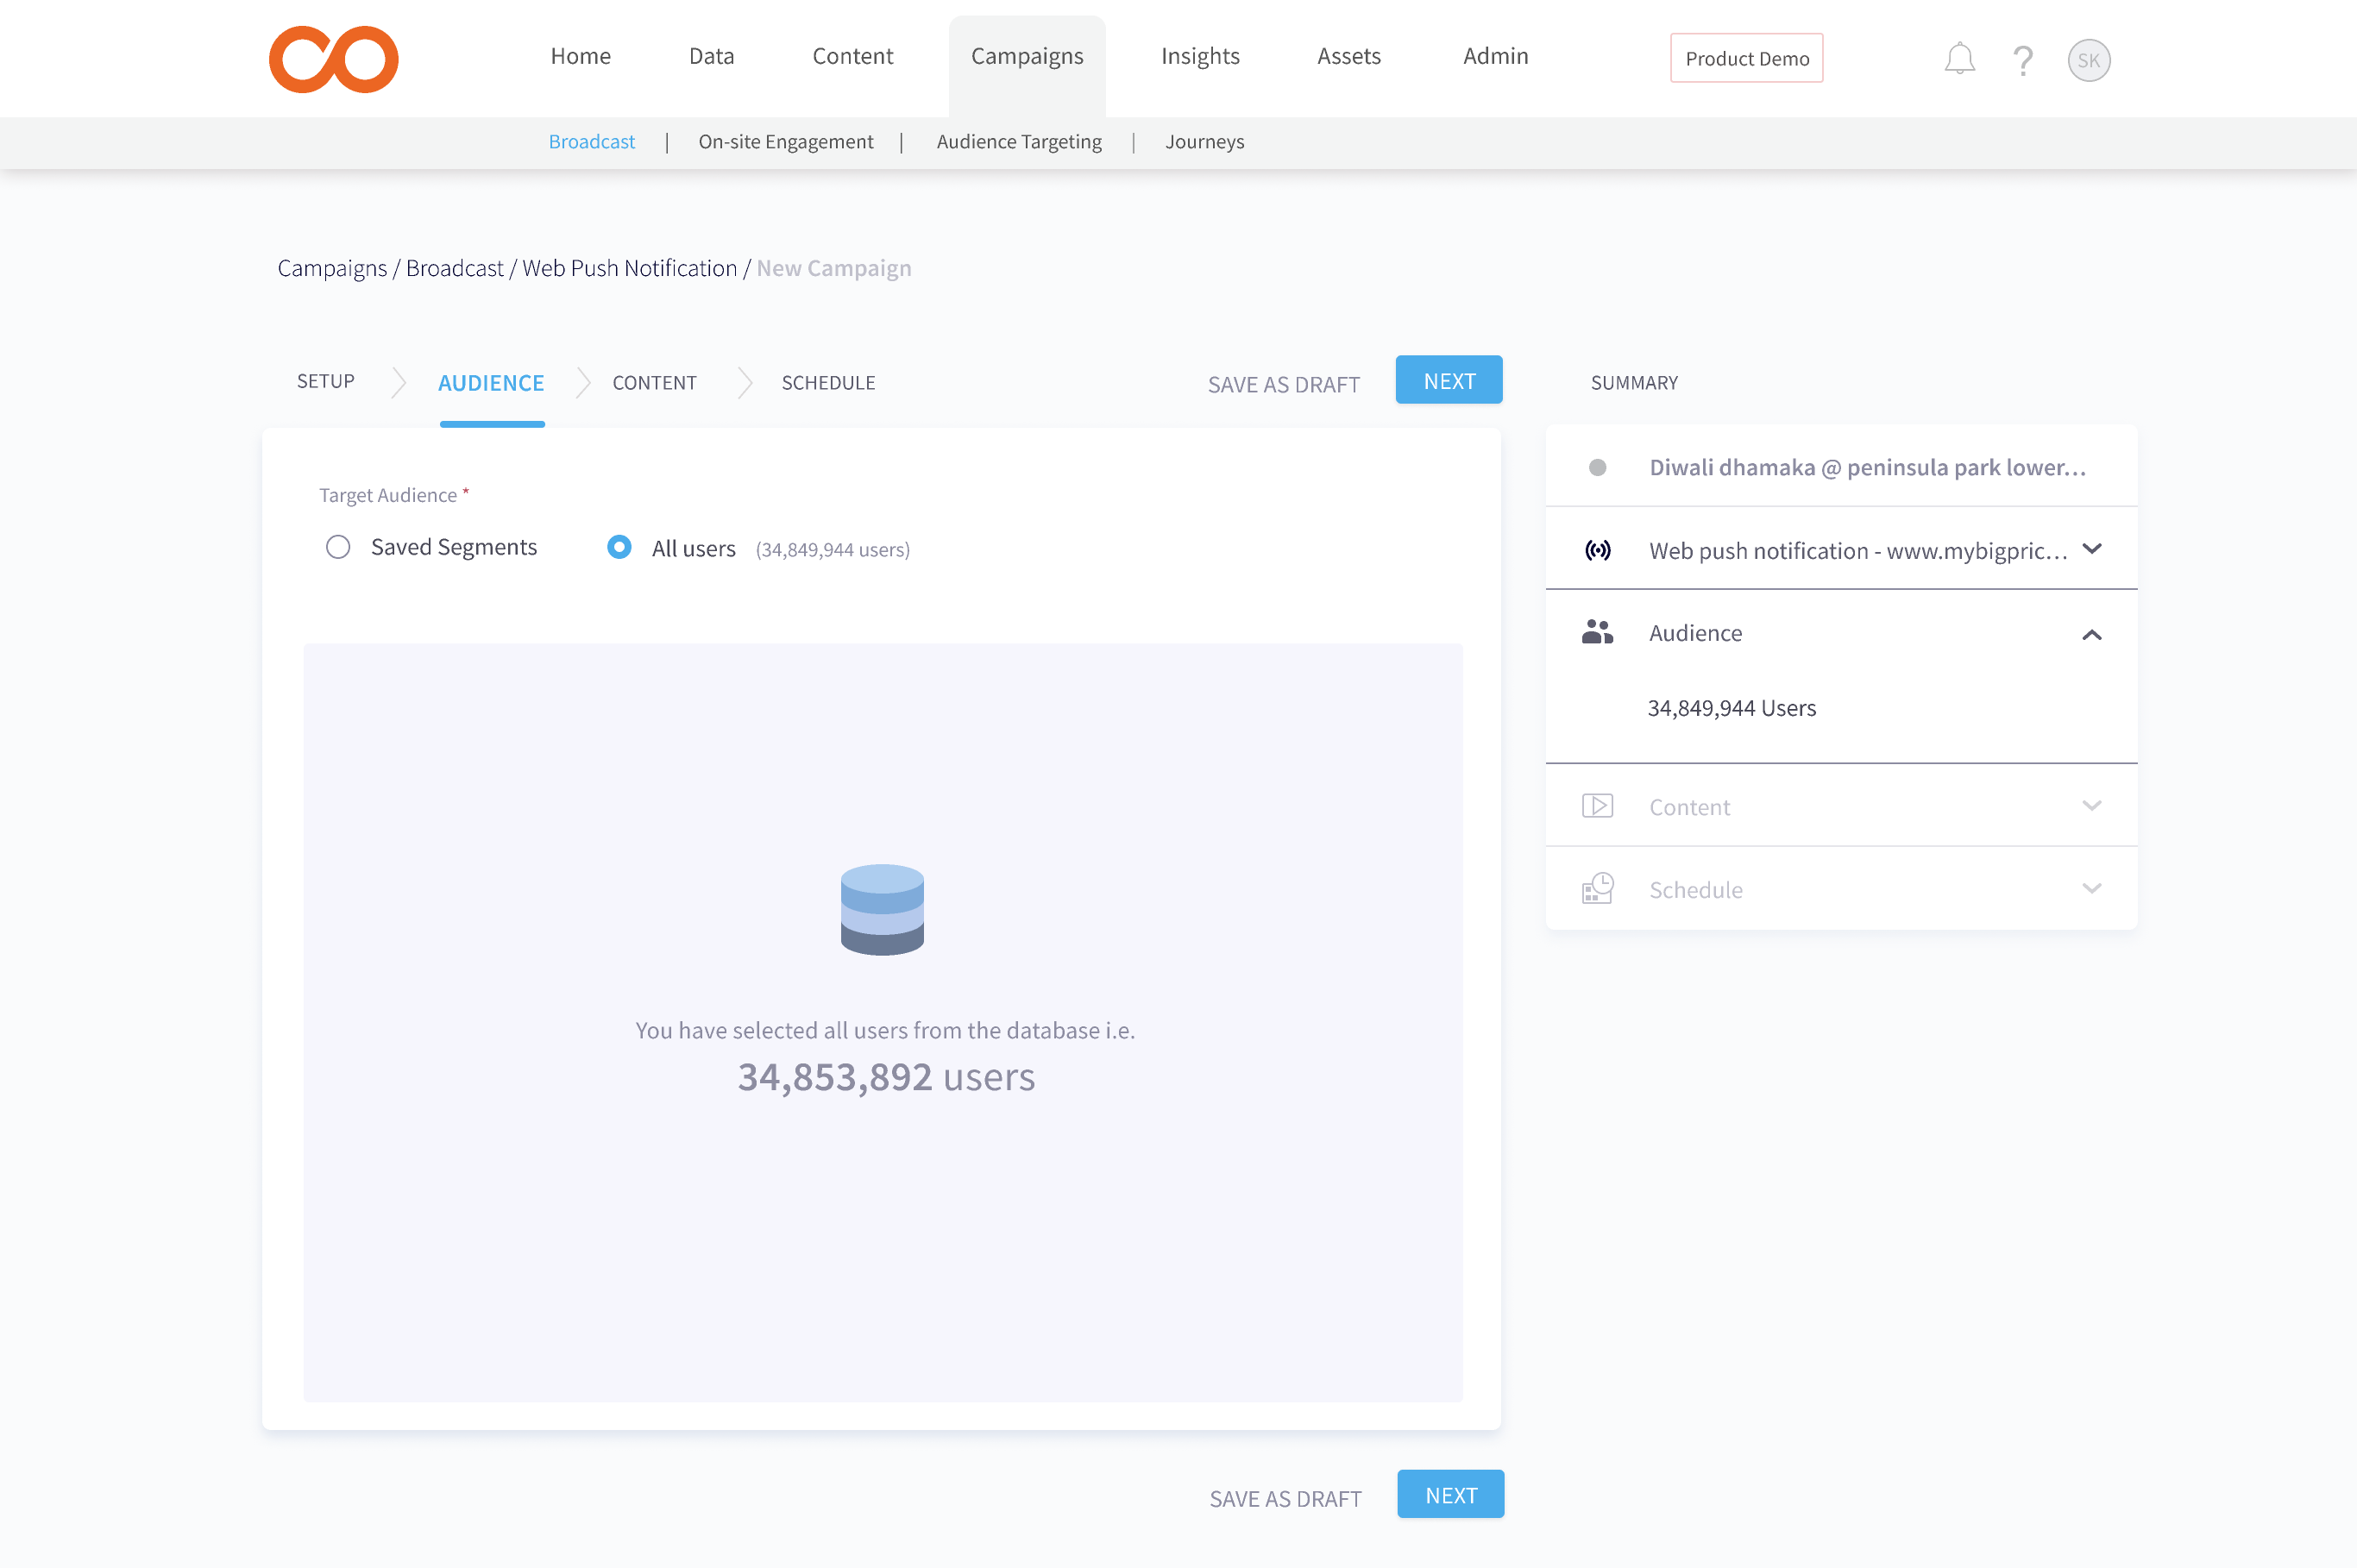
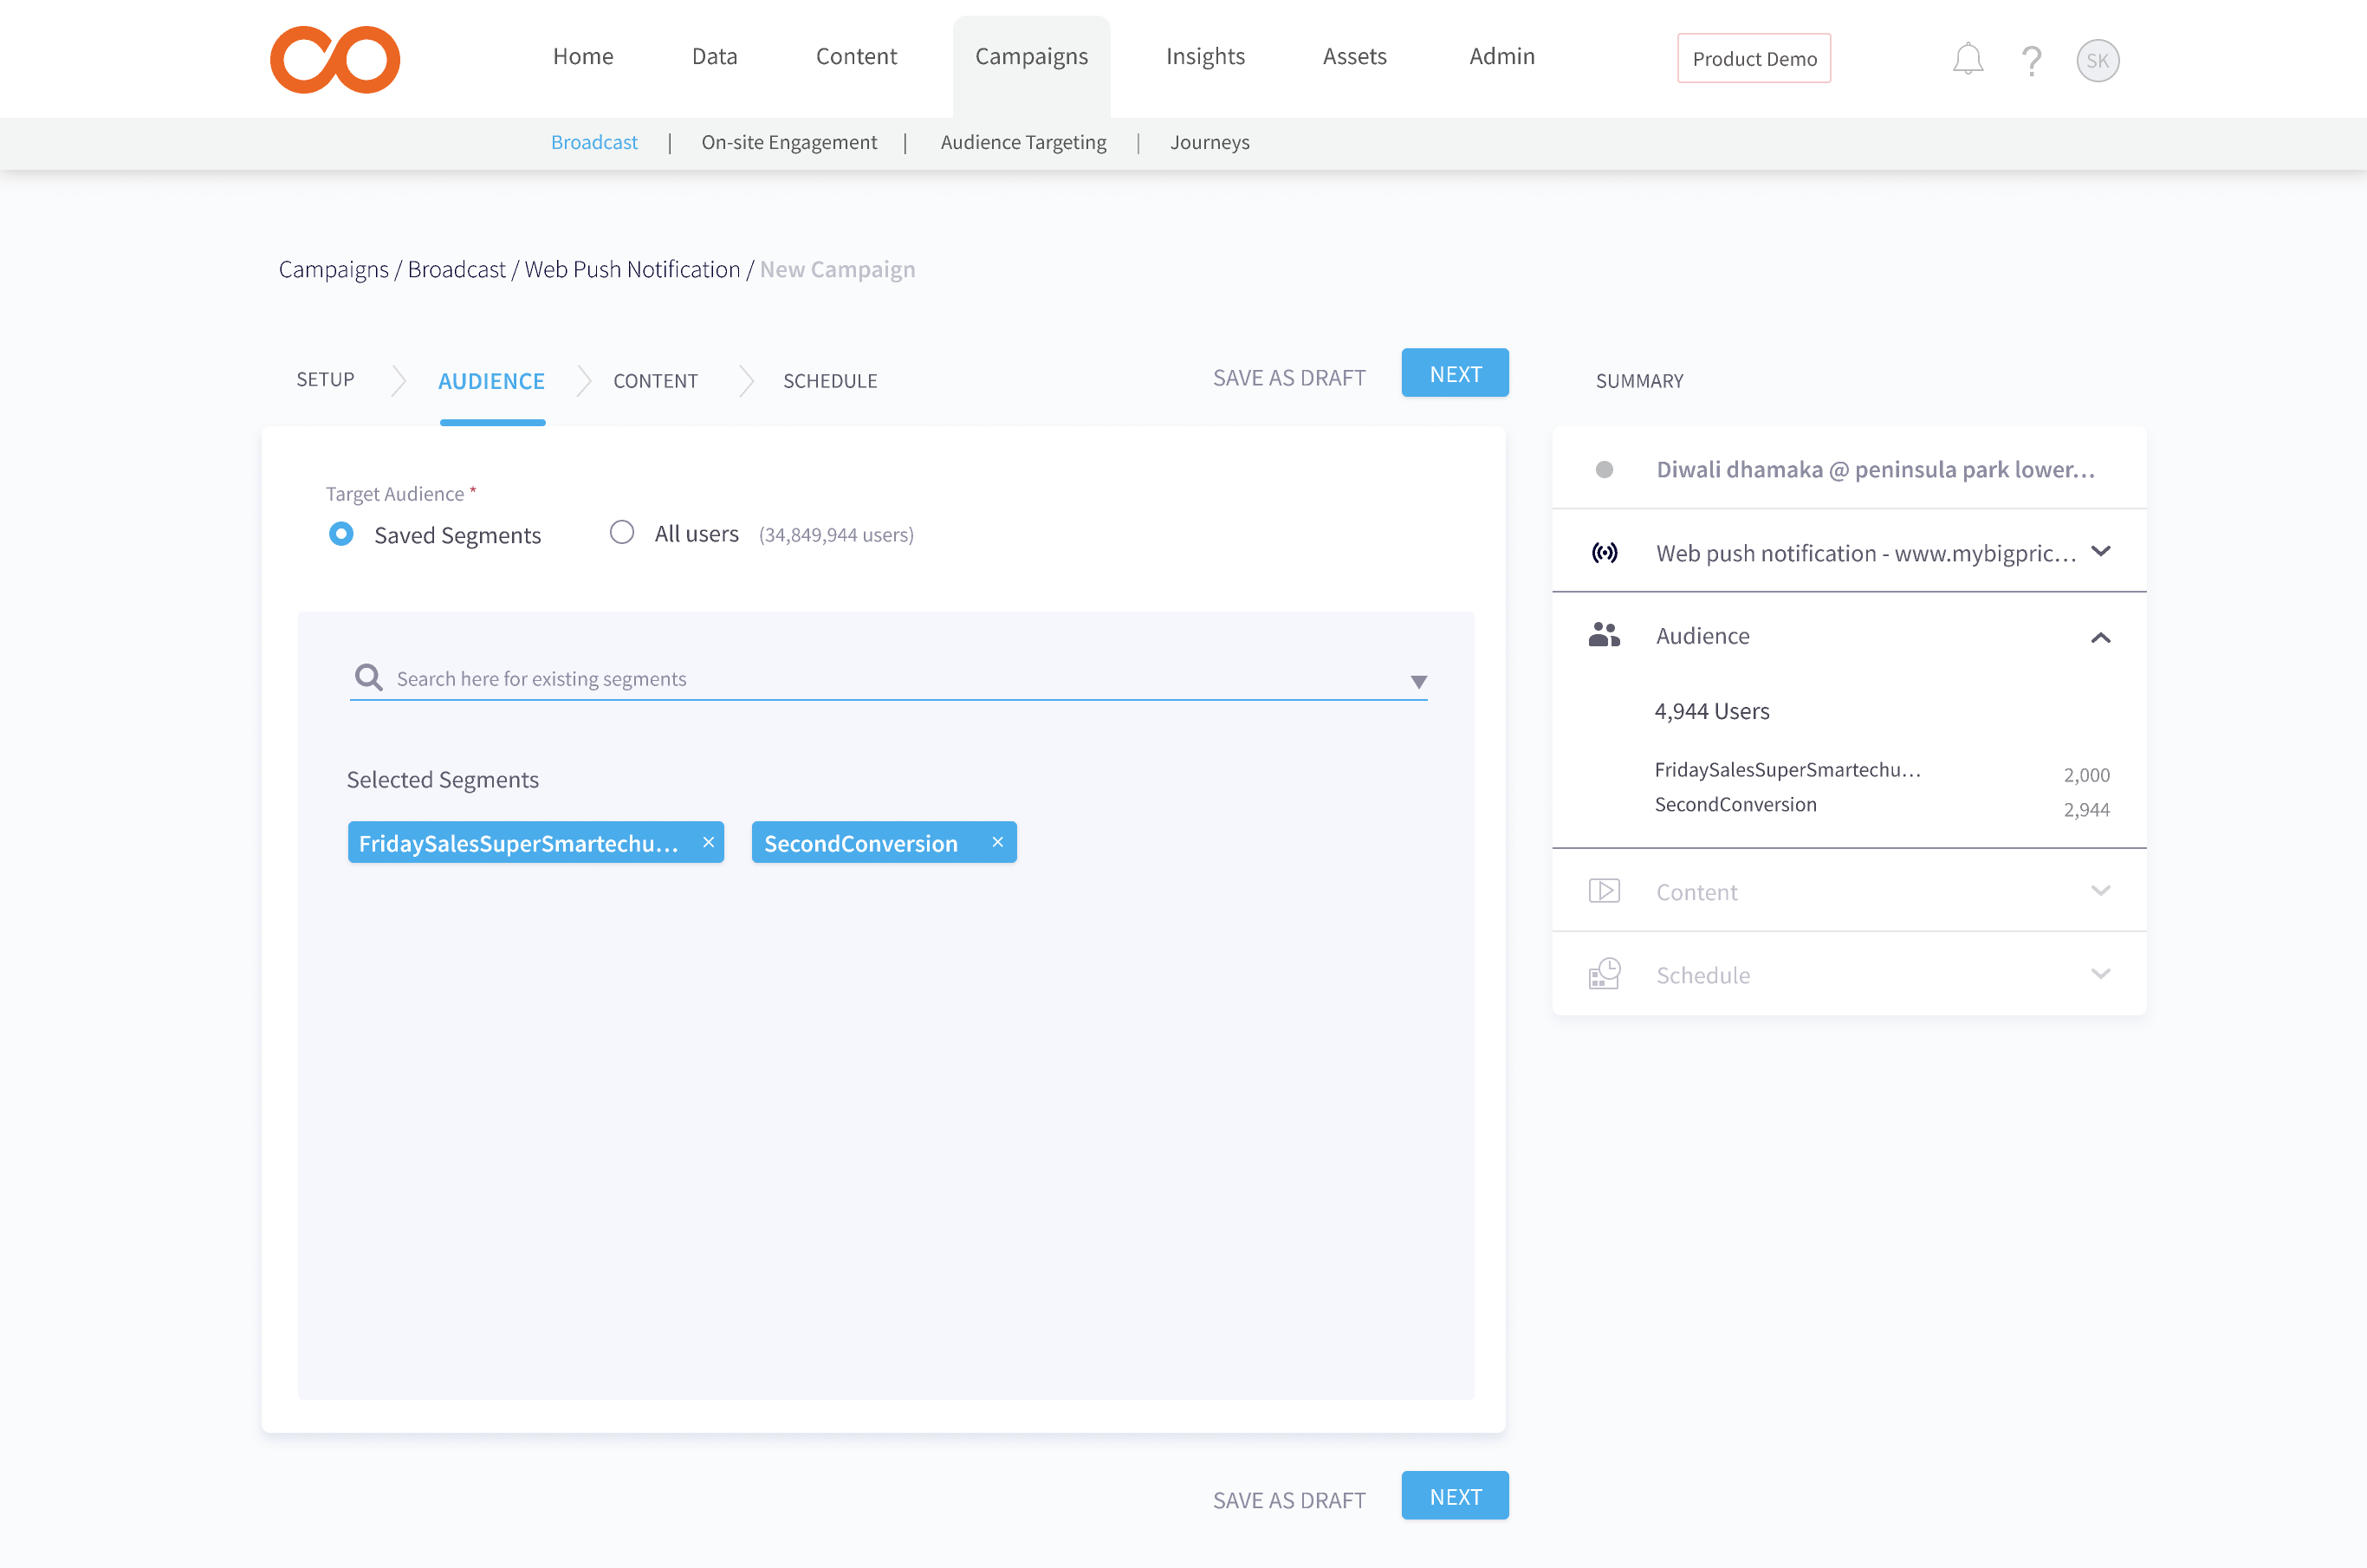
To target an existing segment/list, click on 'Saved Segments' and search the required segment.
Once selected, you can see the segment count in the 'Summary' view.
If multiple 'saved segments' are selected then count of reachable users of the selected segment and their sum will be displayed in the Summary view
Click on 'Save & Next' after selecting your target audience.
Content
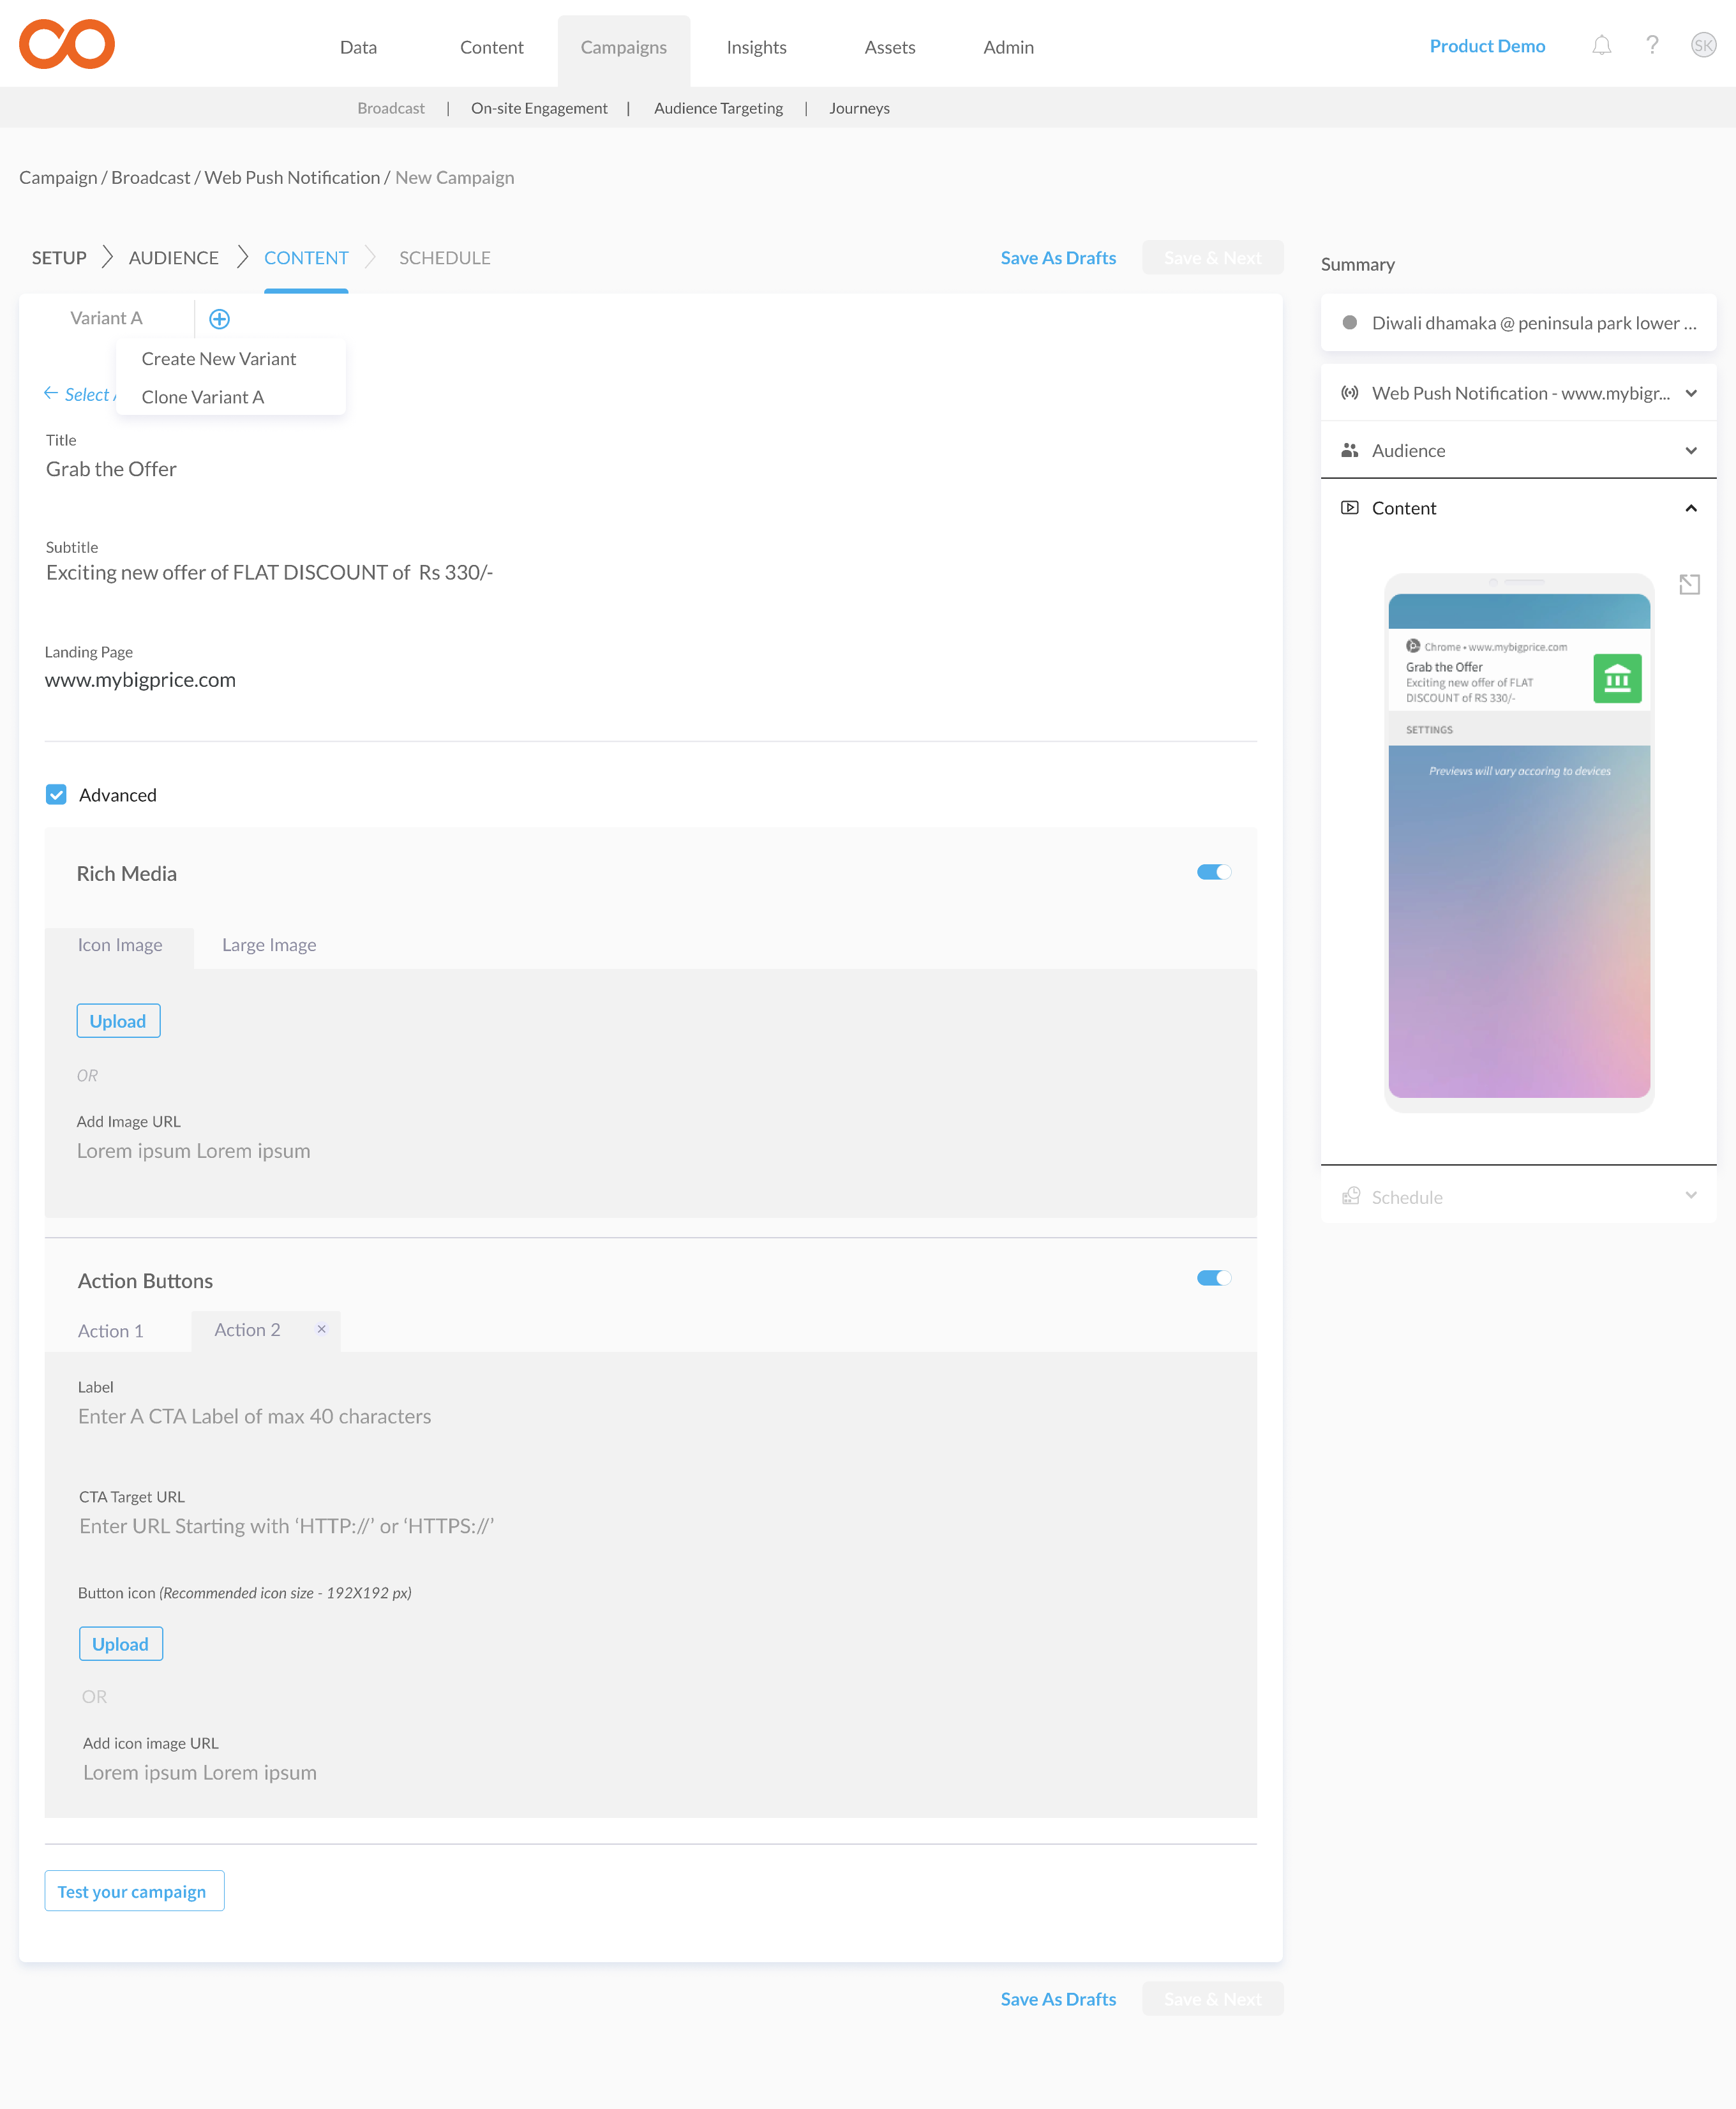
After the basic 'Setup' and defining the target audience, 'Content' is the section where all the action happens!
Add the 'Title', 'web push notification message content', and the landing page URL. All the fields are mandatory.
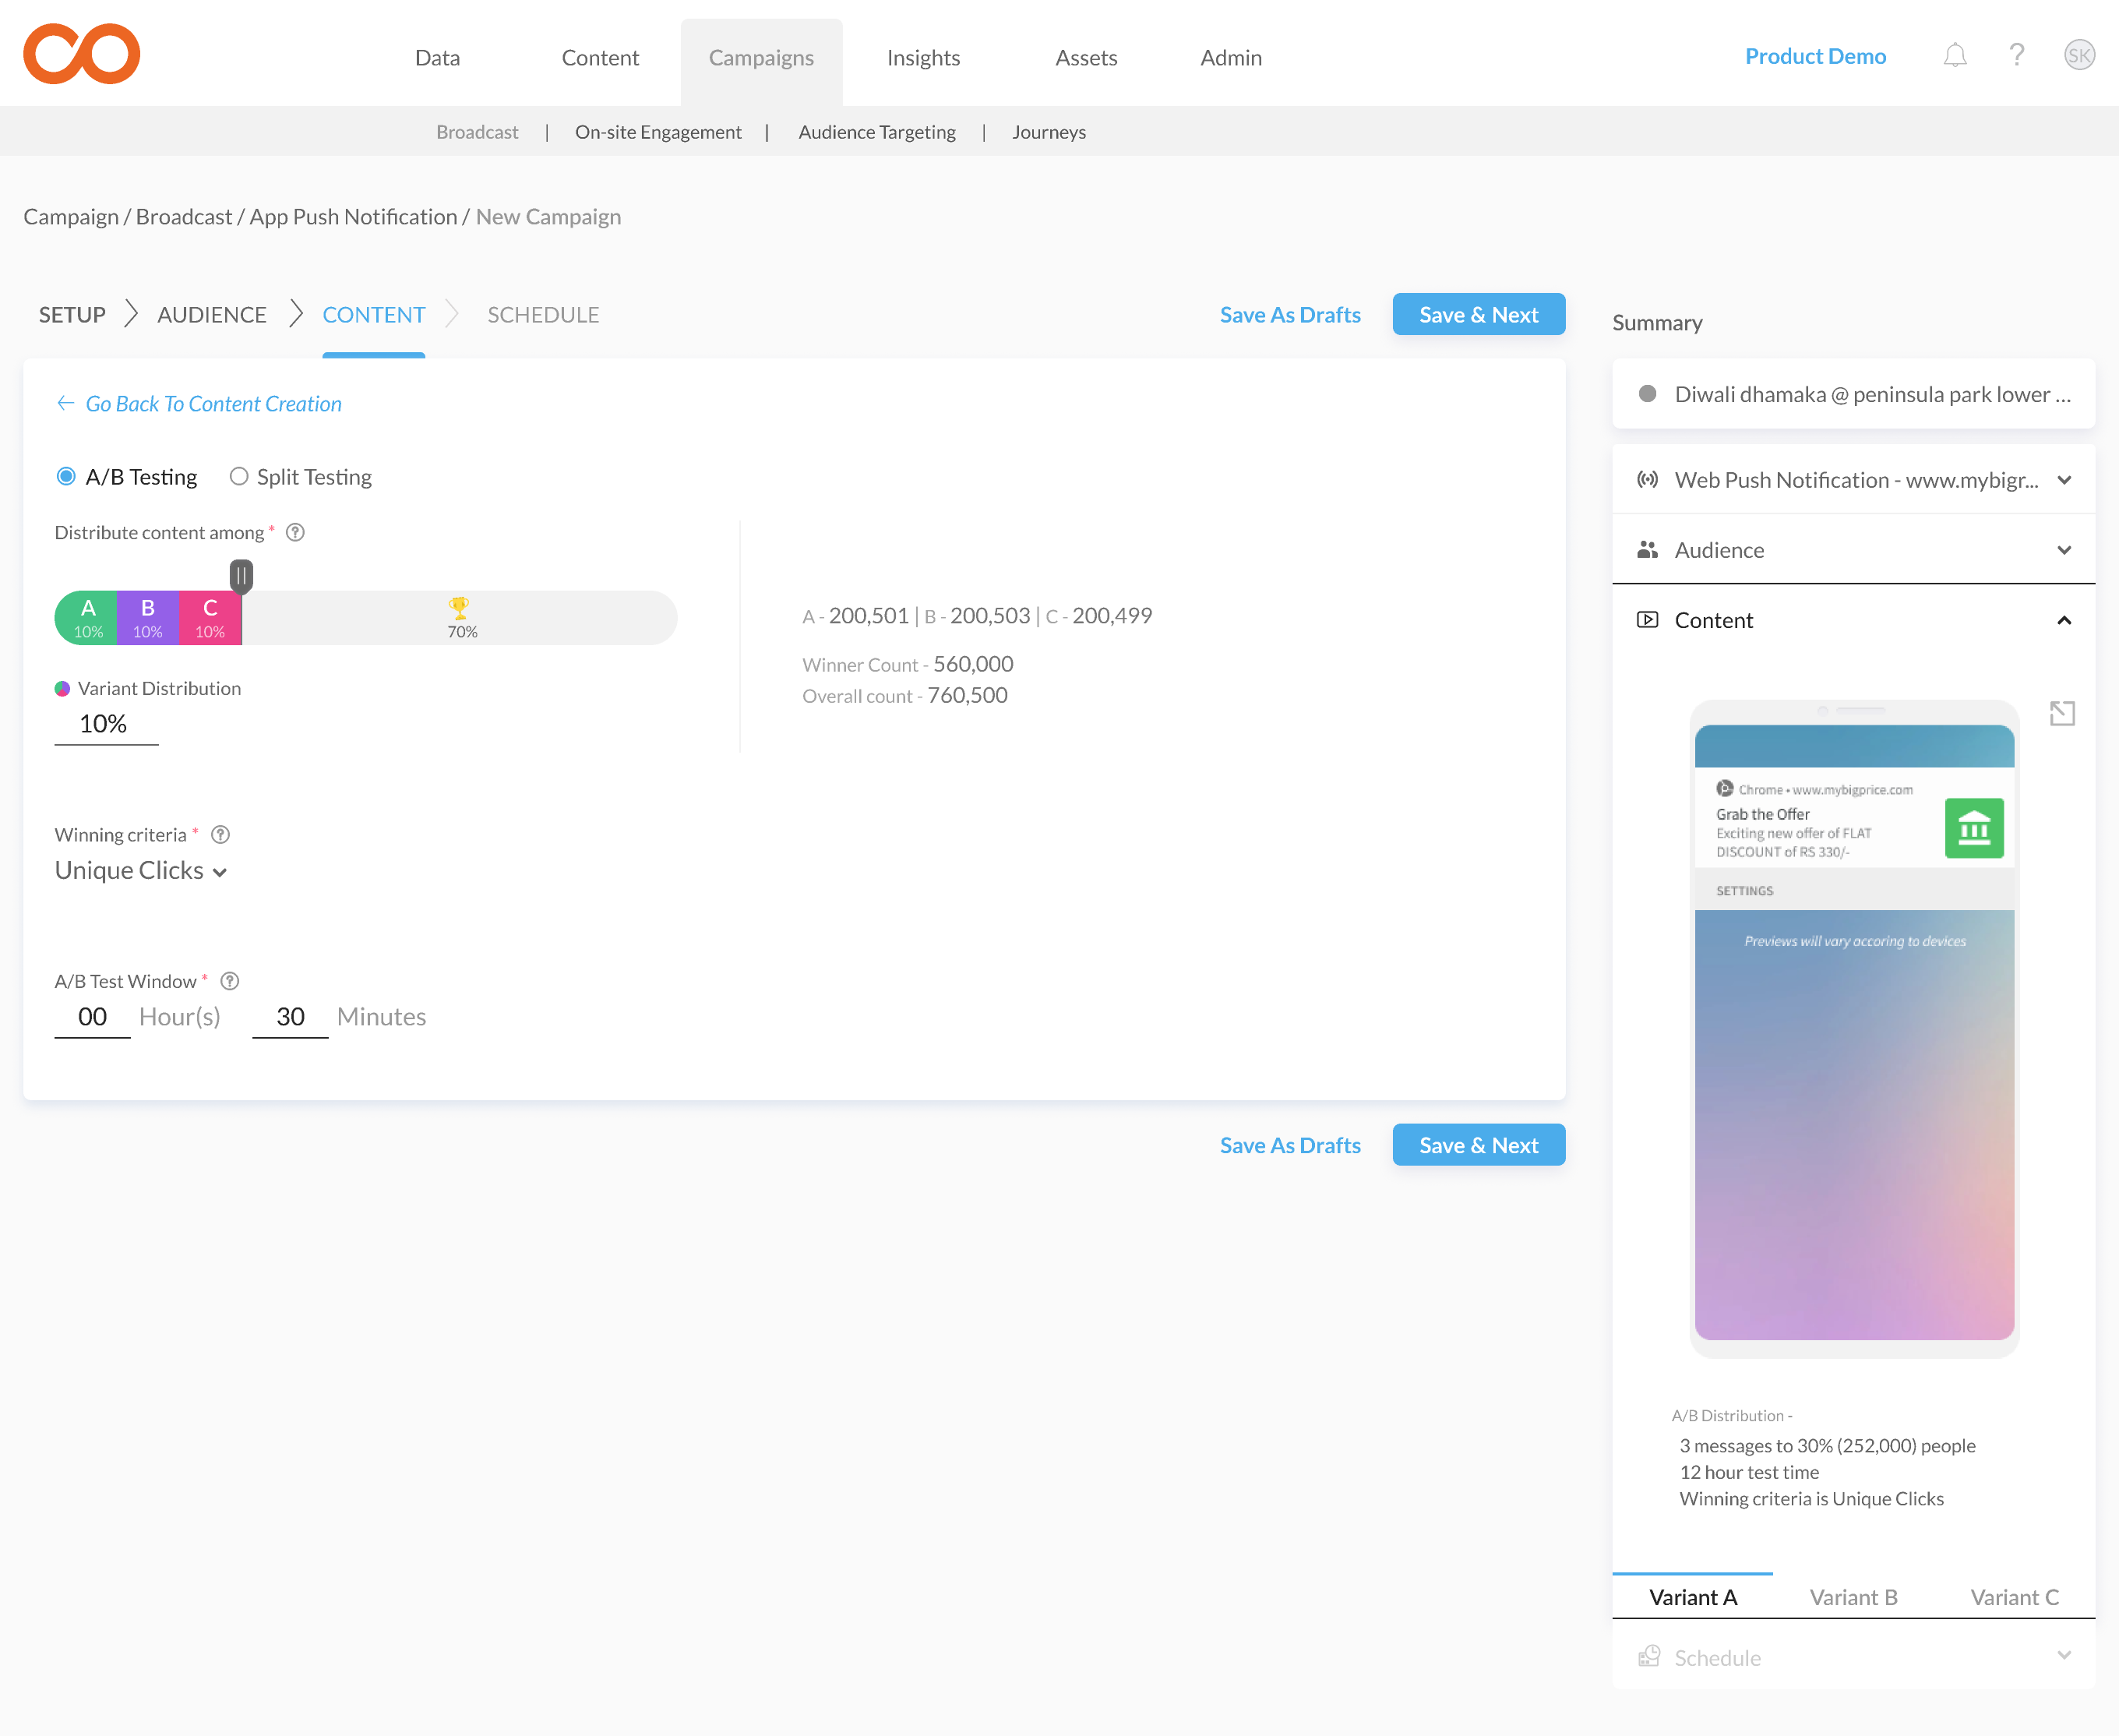
Distribute Variants for Split or A/B Testing
Every marketer needs a facility to change and optimize campaign messages.
Netcore Smartech provides 2 facilities Web push notification campaign :
- A/B testing
- Split Message
Smartech provides facility to create up to 3 variants of push notification message and test.
You can choose the audience size to whom campaign needs to be executed. When it comes to content section marketer can create a different message within 3 variants and plan these campaigns accordingly.
A/B testing
A/B testing has 3 things when these type of campaigns are planned -
- Create content variants
- Select the audience size for these variants and decide winner audience size
- Select winner selection criteria
Create content variants
You can create a new variant, you can try different image, text, tag, CTA.
Three variants can be created. Default variant will be A. New variants can be cloned or can be created from blank..
Select the audience size for multiple variants and winner size
Once the multiple variants are decided you can choose the audience size for all the variants.
The minimum limit will be 10% for variants or winner criteria.
Select winner selection criteria
Winner selection will be either click or conversion. In case of click, it’s a total number of click. If the conversion is selected then conversion needs to be defined at the start of the campaign.
Split Testing
Split testing is used to create multiple variants and distribute it among the audience without winner criteria.
Eg. A marketer can create 3 variants for a single campaign and distribute these 3 variants among the audience
The process of creating content and creating difference variant is same as A/B testing.
In audience selection, the audience size can be divided. The minimum limit will be 10% for a variant.
Under Advanced section there is
- Rich Media
- Action Buttons
Under Rich Media, you can provide icon and large image URL.
You can add max two action buttons with label and target URL.
Note
- Title max characters limit is 50.
- Message max characters limit is 1000.
- Supported image formats - jpg, jpeg, png.
- Recommended size for large image - 360px X 240px
- CTA Url character limit is 1000.
- Rich media options work only in case of Chrome Browser. Also, the URL should start with https.
- Aspect Ratio in case of Desktop WPN is 3:2 and Mobile is 3:1.
- Max image size allowed for icon image is 25KB and large image is 40KB for images uploaded on Smartech. If you wish to use larger size images, you can use self-hosted image url feature
Test Campaign
You can test web push campaign on your browser before publishing to the real audience
Schedule
In Schedule broadcast, if you wish to send the broadcast right away, select 'Now'.
Alternatively, if you wish to schedule the broadcast for a later date, select 'Later' and set the date and time accordingly.
Time to live
Time to Live – is the lifespan of the notification and it corresponds to the maximum period for which FCM stores and attempts to deliver the message.
You can define 'Time to Live' in hours or days within which your users should receive this push message
Once your scheduling is complete, click on 'Save & Preview'
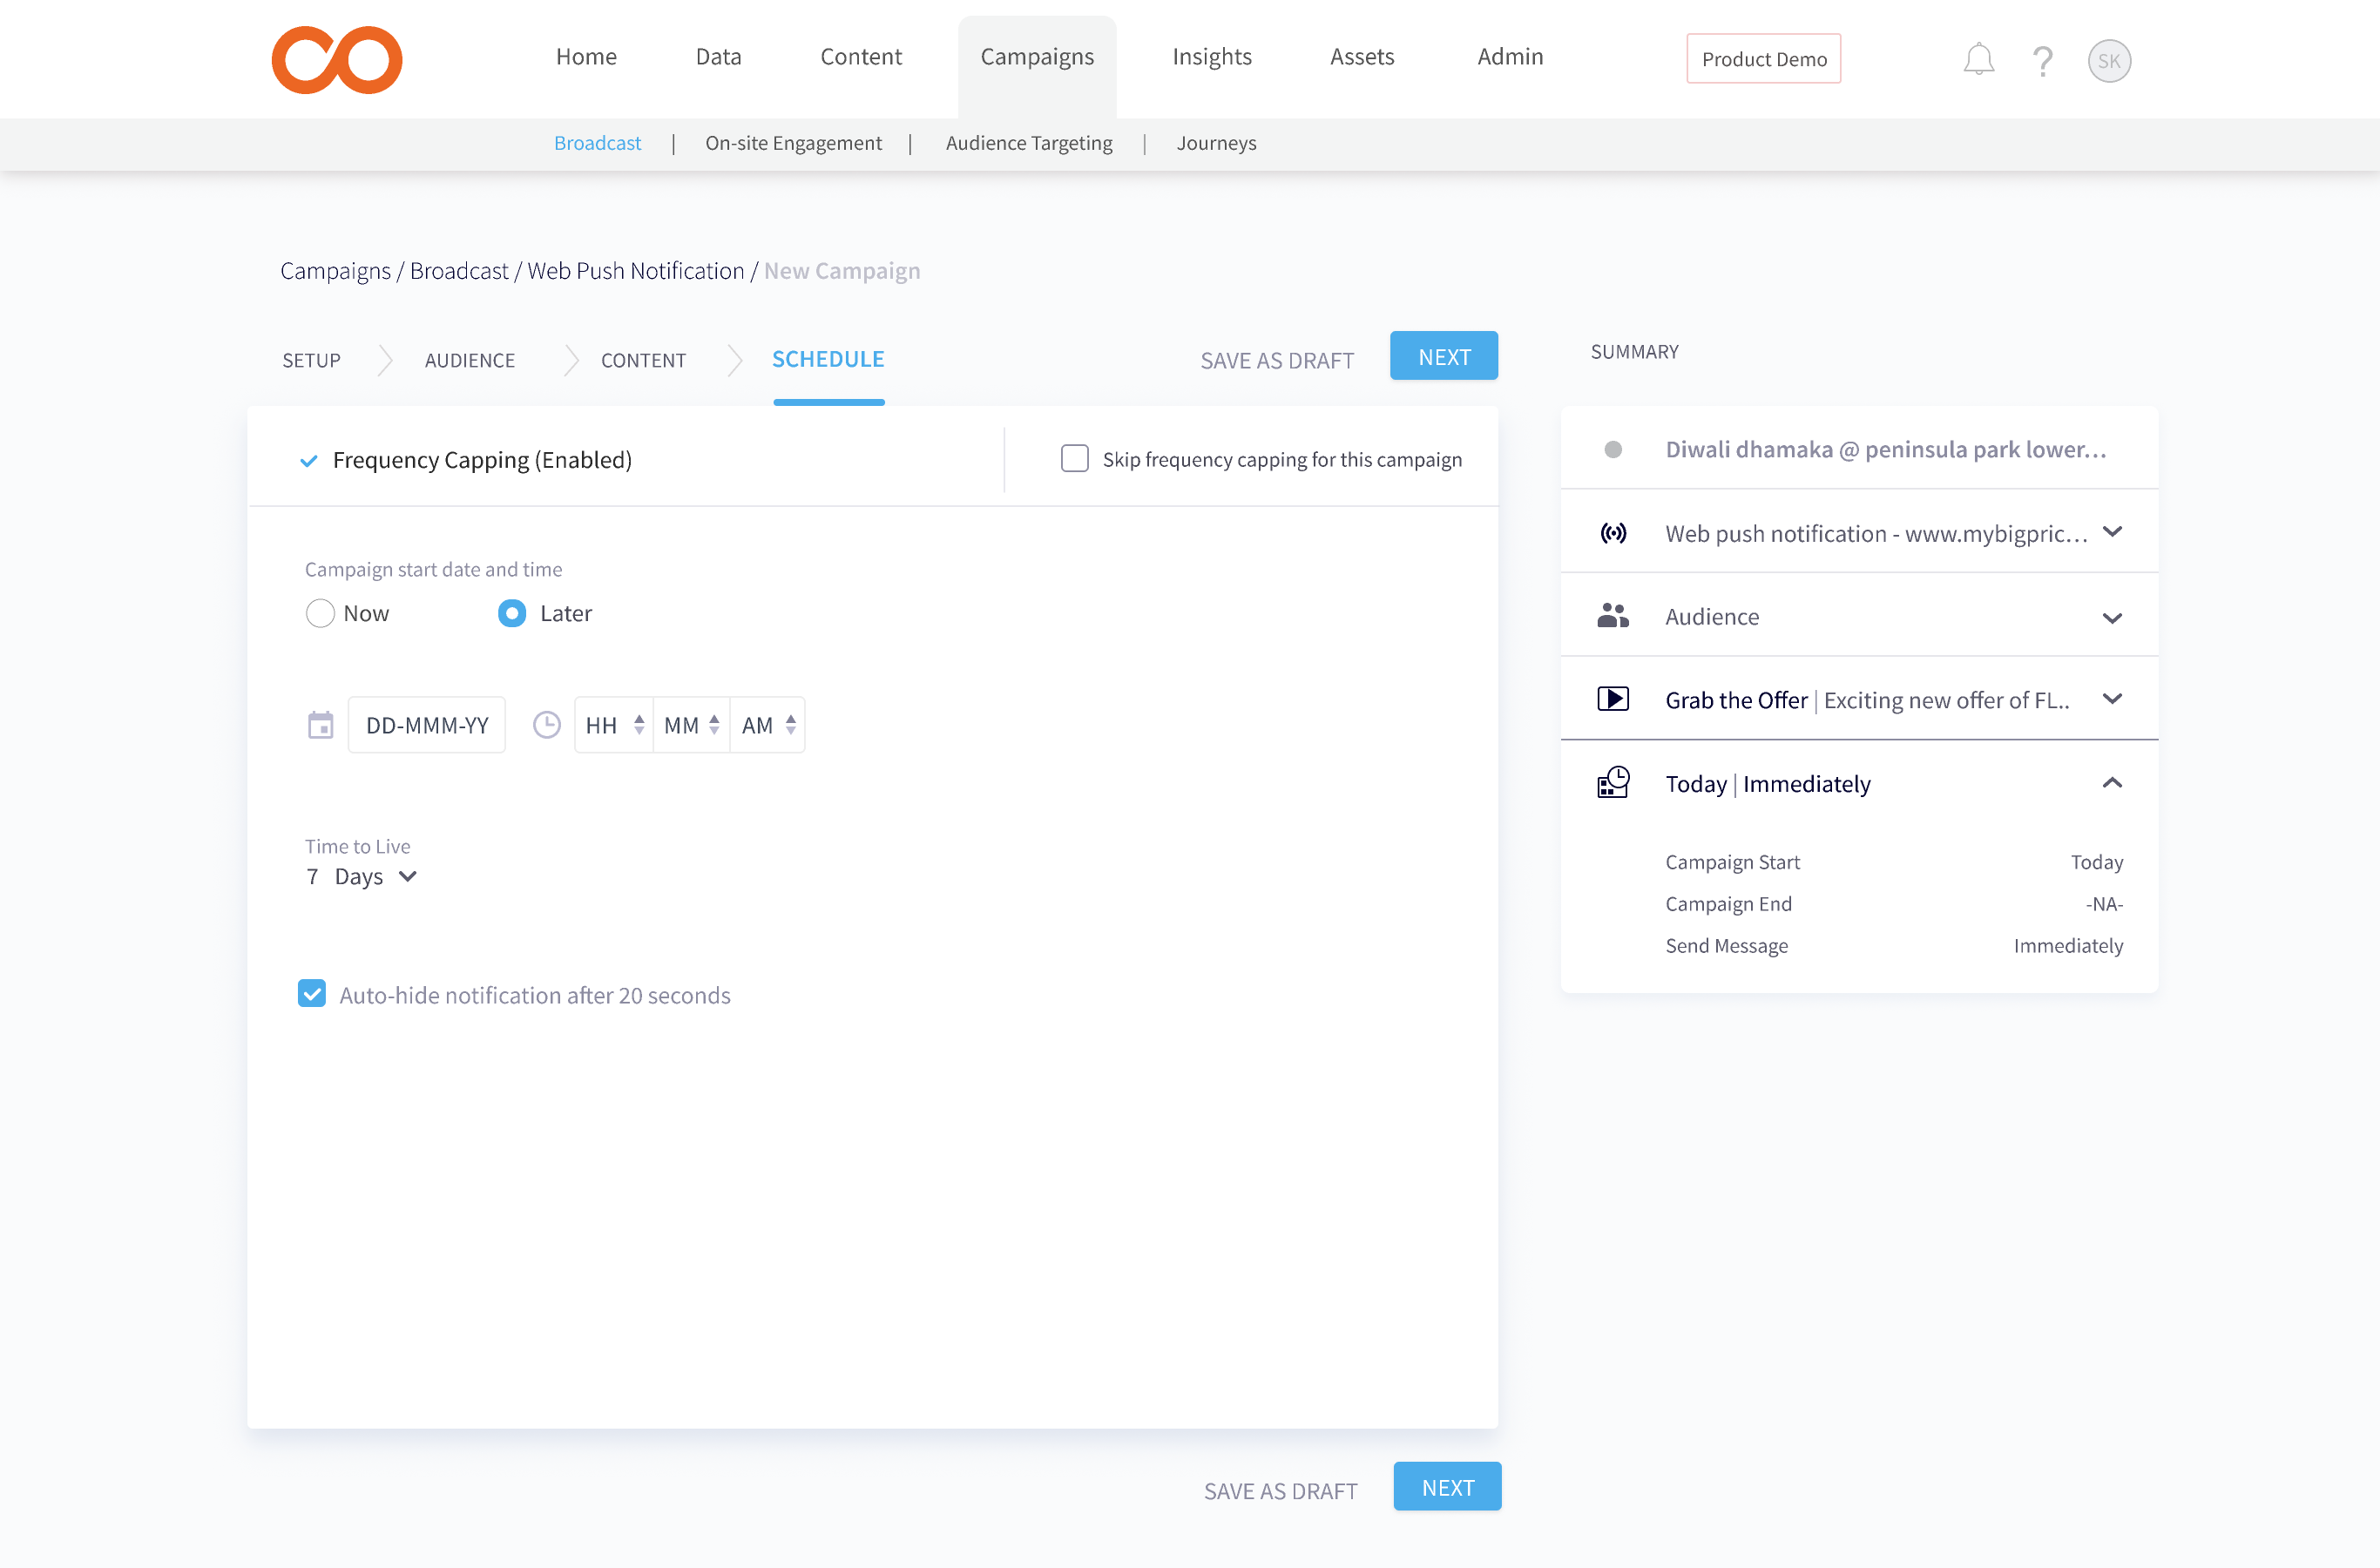
Autohide Notification after 20 seconds will work only in case of Chrome Browsers in Desktop. Autohide notification functionality doesn't work in case of Mobile Browsers.
Final Campaign Overview
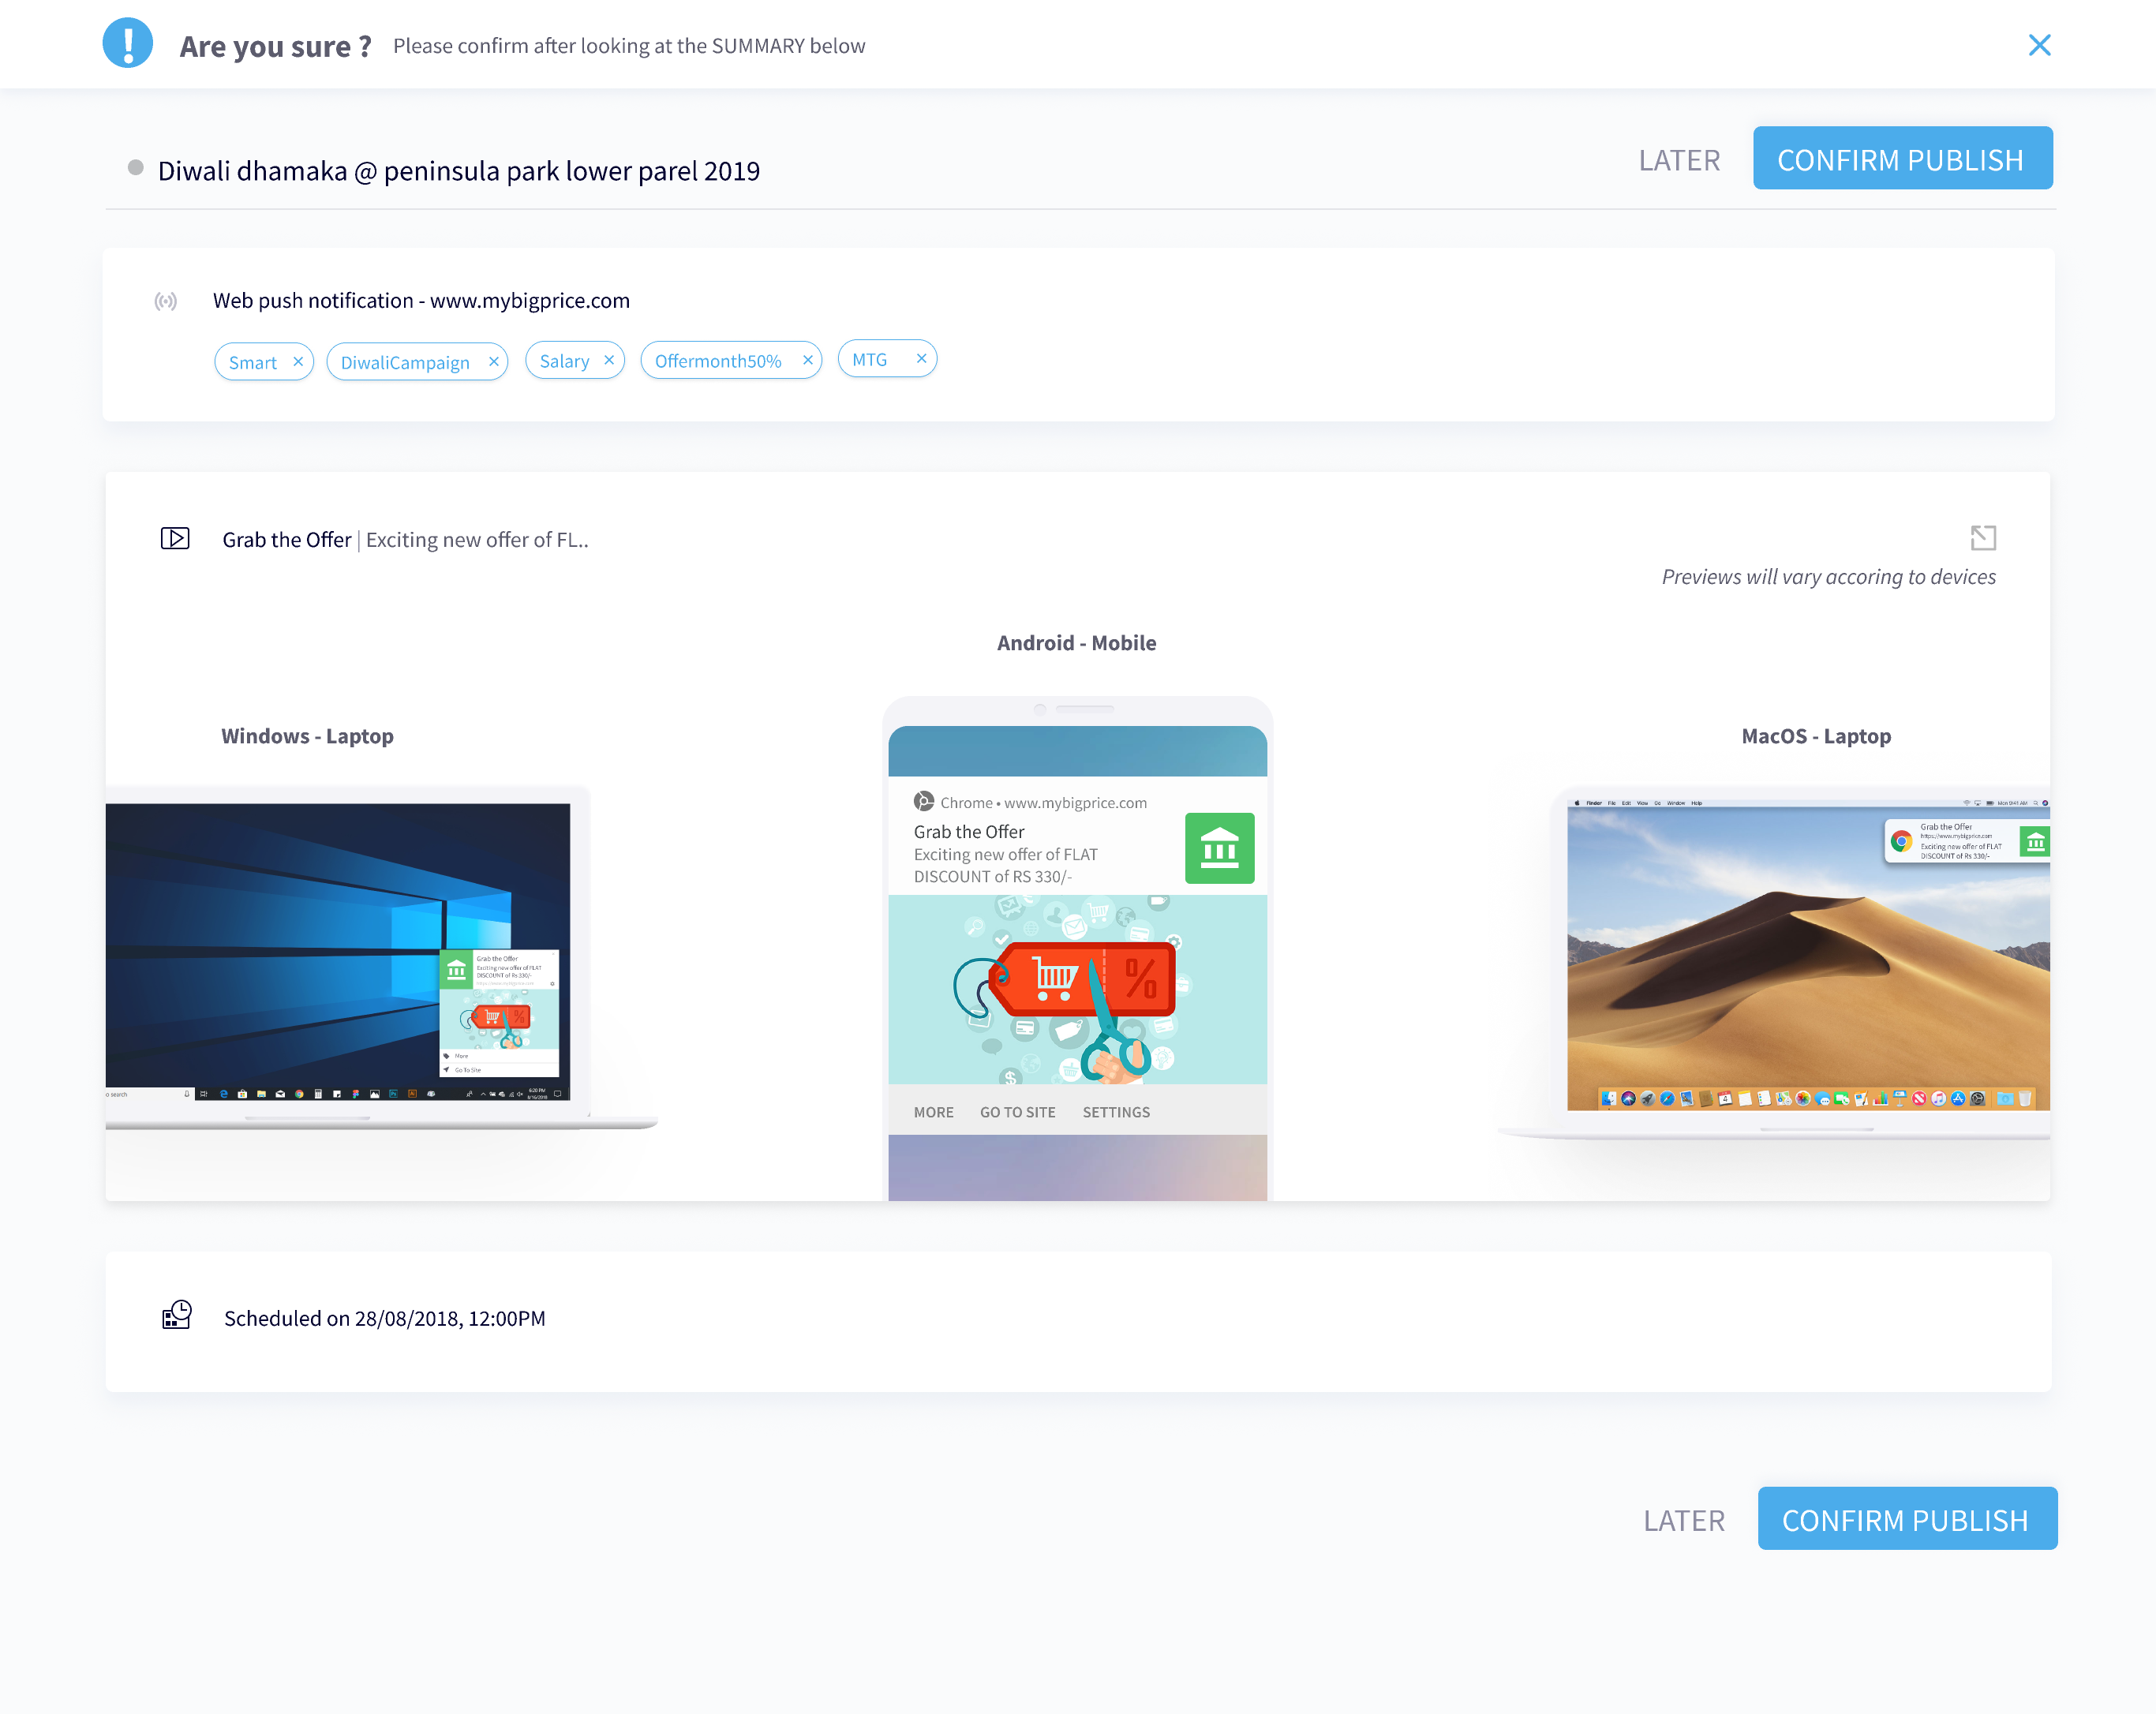
If there are no changes required in the campaign you have composed, publish the campaign.
You can view the reports of the broadcast in the Insights section.
Campaign Listing
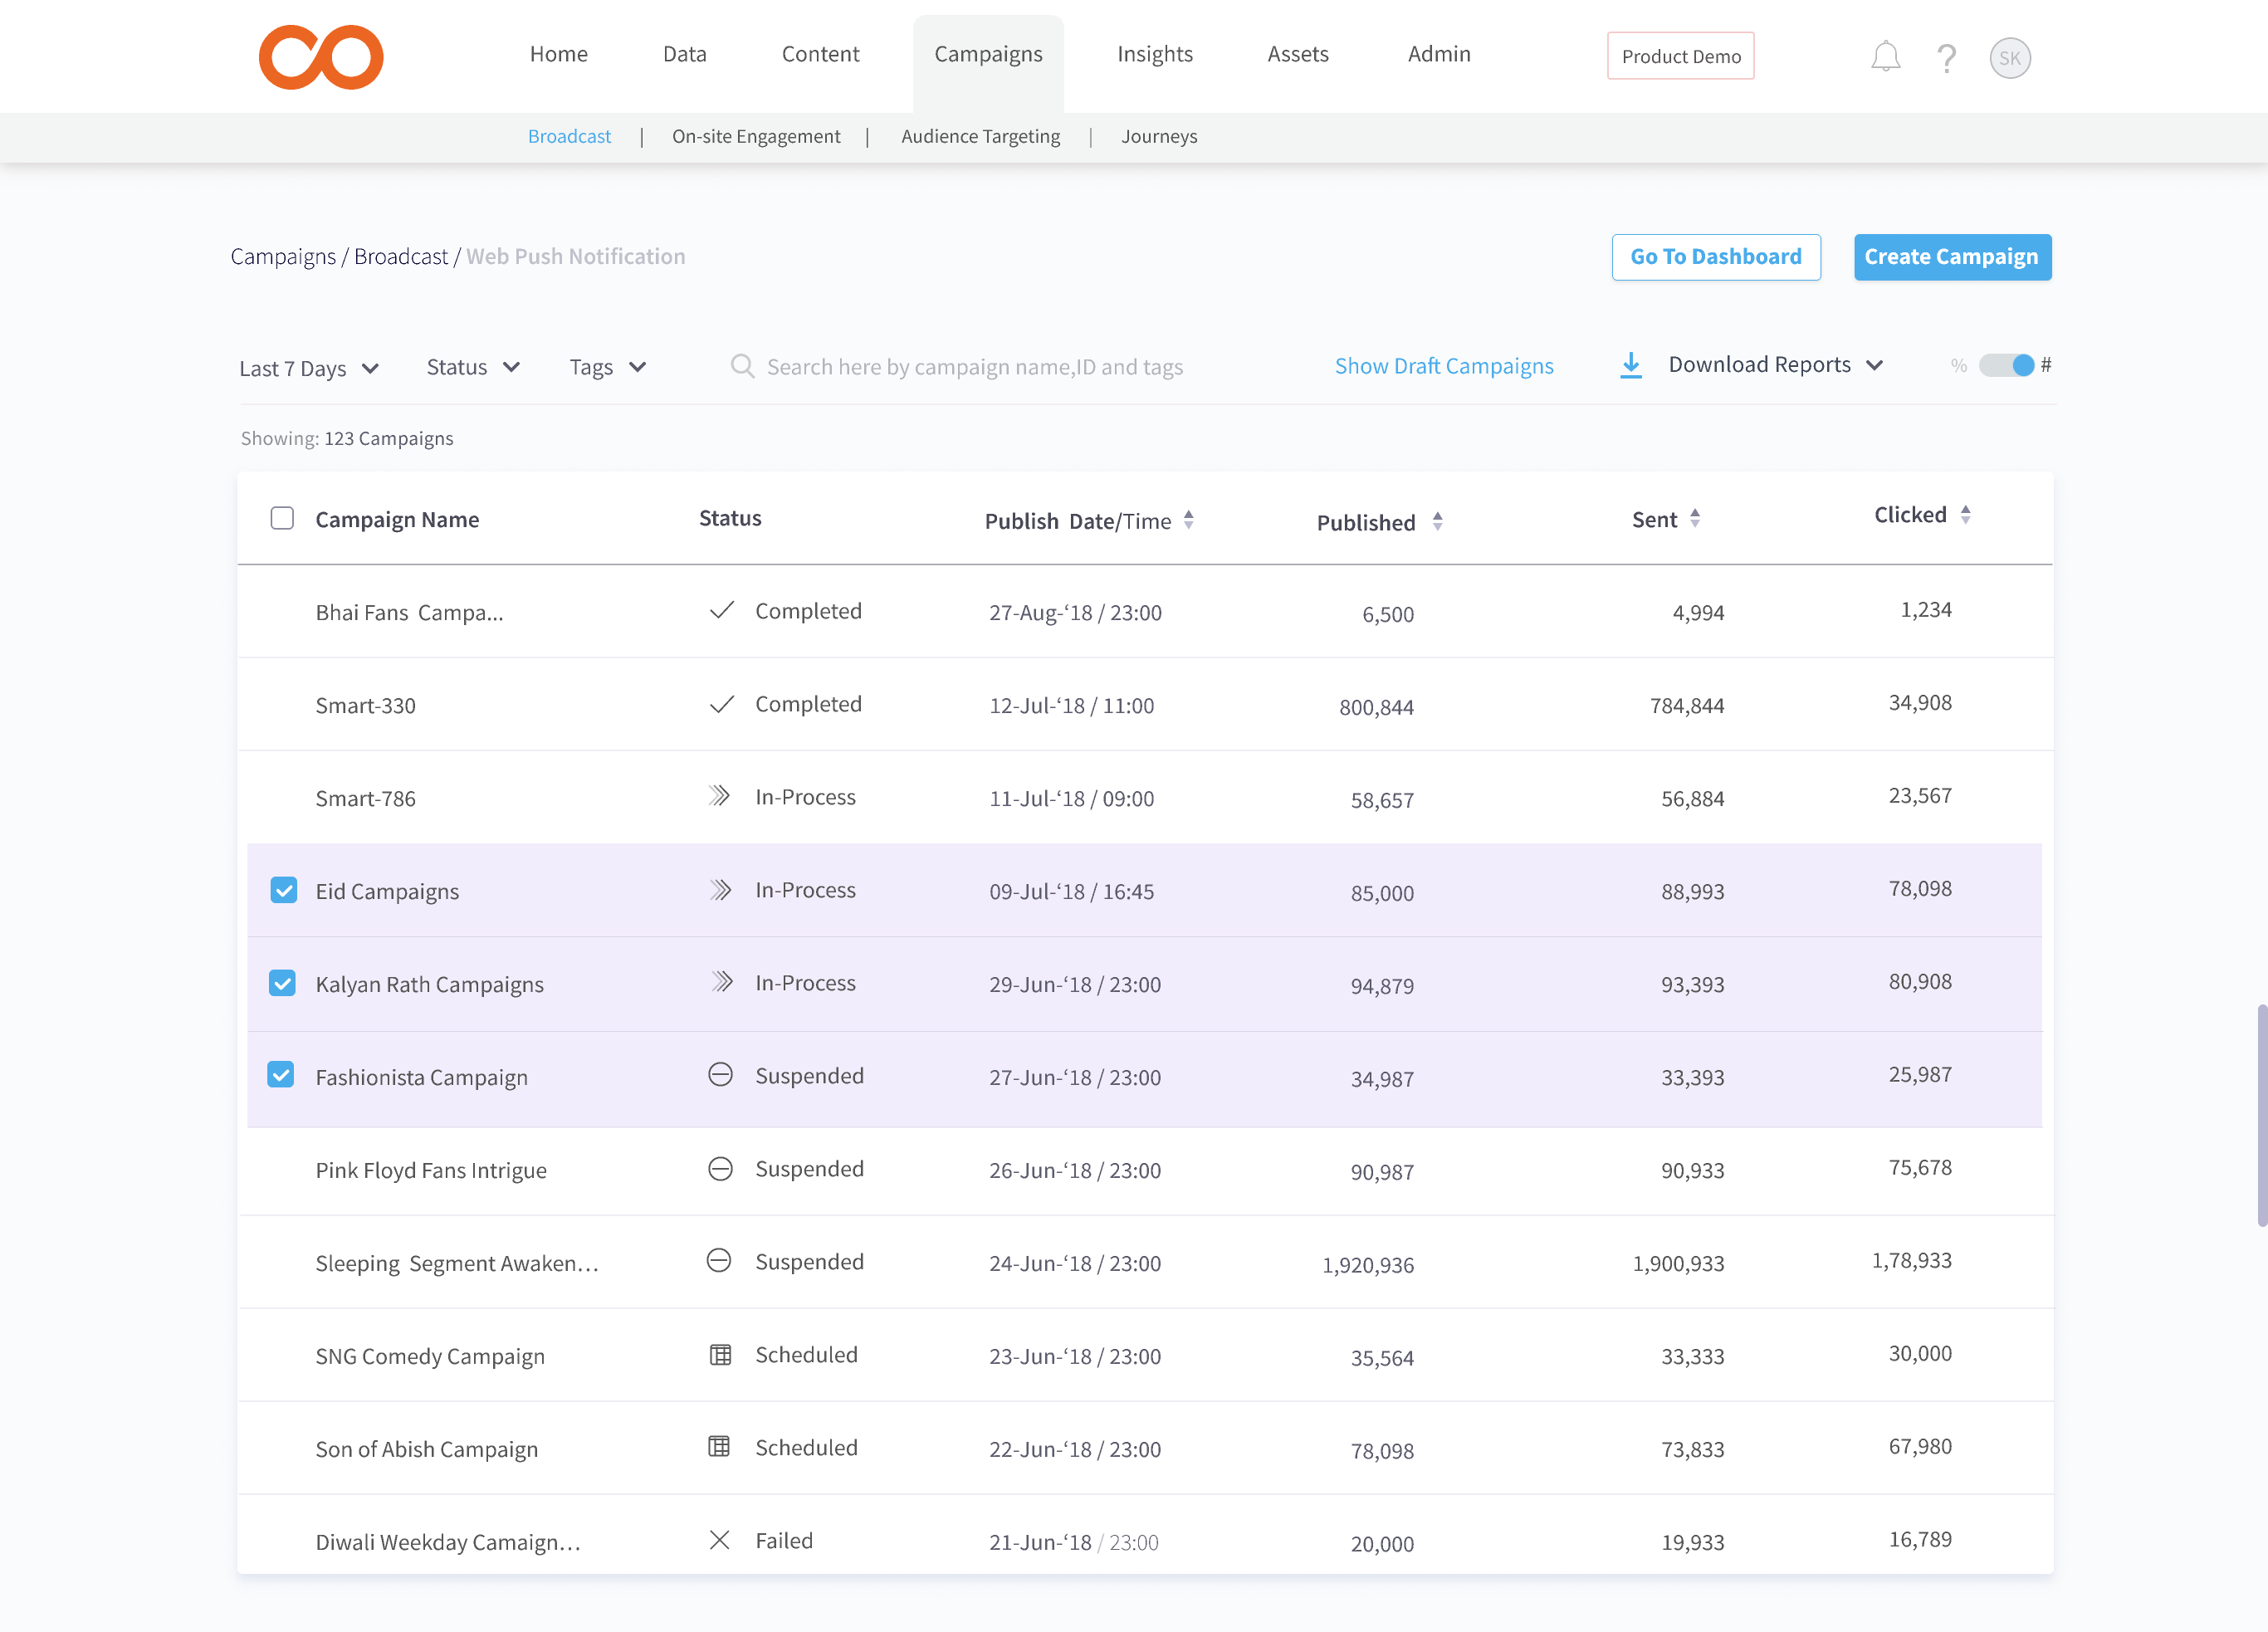
On mouse-hover, by clicking on the ellipsis (3 dots) you can Clone a given campaign as well as download its reports, or by clicking on campaign title you can see the preview of the campaign.
The entire campaign listing can be sorted published time, sent & clicked.
You can also toggle between percentage and numeric values of the entire listing.
Search
The campaign listing page allows you to search any campaign by its name or id.
Filter
You can also filter based on Campaign Status such as scheduled, completed, failed, suspended, etc. as well as based on the Tags
Download Reports
This feature allows you to download reports of all or selected campaigns.
Overall Web Push Notification campaign analysis are shown on the BPN dashboard. You can view the reports in the Insights section.
To personalise Attribute/Activity data in BPN
Click here
Emoji Compatibility
| Browser/Platform | Windows | Mac OS | Ubuntu Linux | CentOS Linux |
|---|---|---|---|---|
| Chrome | Colored | Colored | B & W | B & W |
| Firefox | Colored | Colored | B & W | |
| Safari | Colored |
In case of any queries, please contact [email protected]
Updated almost 5 years ago
