Learn how to create SMS using the Netcore CE dashboard.
The Netcore CE dashboard allows you to send and receive SMS messages in a few easy steps. You can also send bulk SMS messages to multiple customers, allowing for timely and cost-efficient communications.
🚨
Prerequisite
To enable the SMS feature, you can contact your Netcore Account Manager.
Create SMS
Follow the steps to create an SMS campaign.
Navigate to Engage > Campaigns and click the Create button to create your SMS.
Select Engage with users > SMS.
Add Basic Details to Create SMS
Click to get details on each steps.
Provide basic details about your campaign in the Setup section
Setup
Refer to the table below for details on the sections available under Setup.
Field Name
Description
Campaign name
Enter a unique name for this campaign.
Add tags
Add relevant tags to organize and categorize this campaign. You can select up to five tags.
The Advanced section has the following features:
In the Advanced settings section, you can configure the fields to track campaign performance.
Enable the UTM tracking to add UTM Parameters to track campaign efficacy under Google Analytics' campaign reports. Refer to the table below for details on UTM Parameters.
UTM Parameter
Description
Default Campaign Value
Default Journey Value
utm_source
The source identifies the platform or website from which the traffic originates, such as Google, Facebook, or the newsletter.
Netcore
Netcore
utm_medium
The medium specifies the marketing medium used to deliver the traffic.
{CHANNEL}
{CHANNEL}
utm_campaign
The campaign refers to the specific marketing campaign name or identifier. For example, summer_sale, holiday_promo, or new_product_launch.
{CAMPAIGN_NAME}
{JOURNEY_NAME}
utm_term
The term is used to identify specific keywords or phrases associated with paid search campaigns. For example, running shoes or discount coupons.
Campaign
Journey
utm_content
The content helps differentiate between various versions of an ad or link that direct to the same destination.
None
None
📘
Important Points to Remember
The UTM Parameter values defined in Global Advanced Settings appear automatically when you create a new campaign.
You can edit any of these default values before saving the campaign/journey. This would ONLY affect the campaign/journey settings not the Global Advanced Settings.
When the landing page URL already contains UTM parameters, the values you enter on the Setup page replace those values.
If you leave a UTM field empty on the Setup page, and that parameter exists in the URL, the URL value is kept.
UTM parameters gets added only to landing page URLs and action button URLs and not to non-URL actions like Dismiss, Copy Code, or Remind Me Later.
Set Conversion Goal
Refer to the table below to set up the conversion goal on the Setup page.
Advanced Fields
Description
Set Conversion Goal
Add conversion goals to monitor key business metrics and measure the success of your app push campaign. You can track one conversion goal per campaign. Select any activity as a conversion goal activity according to your objectives.
For example, if you want to track the number of customers who have purchased shoes after your campaign was sent. (Event: Product Search, Product: Shoes).
This is a mandatory field.
Payload parameters
You can define criteria for the conversion event payload. Up to five parameters can be added for customisation.
For example, specify a purchase event when the product price exceeds 10,000.
Conversion Window
Define the conversion window to link user actions to campaigns in a specific timeframe.
Revenue Parameter
Select this option to assign a value to each successful action to track financial impact. This is a mandatory field.
Set Conversion Goal
Define the target audience for your campaign in the Audience section.
Audience
The Audience section lets you select who to target your SMS. It has the following sections:
Target Audience
Choose a specific segment or list to define the audience for the SMS campaign. Pick up to five user segments or lists. Use for targeting based on historical behavior captured by server-side user segments. Target Audience has the following options:
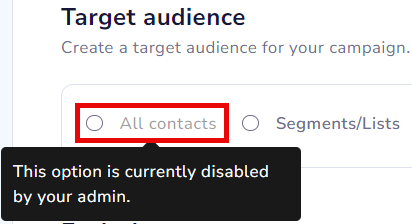
All Contacts: Target all users in your contact list when creating campaigns for broader outreach.
📘
All Contacts Setting
Admin users of the Netcore CE dashboard can disable the All Contacts option, if they prefer not to send a campaign to all contacts. This option is enabled by default, making the All Contacts option selection accessible. However, admin users can change it as needed.
To enable or disable the feature, navigate to Profile > Account Configuration > All Contact Enable/Disable >Active / Inactive.
Enable or Disable All Contacts option
Segments/List: Easily select from pre-defined lists or segments to target specific contacts. Search for the desired segment or list by name and add it to your campaign with a checkbox selection.
User Data Table: A User Data Table (UDT) is a temporary list of users where you can add specific attributes to personalize your campaigns. It is like a customized list where you can manage extra details needed for a particular campaign. The attribute values added in a UDT don’t affect the attributes available in the contact master, so your master data remains unchanged.
Reachable Contacts
Locate Reachable contacts to view the approximate number of users who can receive this campaign. It excludes users who have uninstalled the app, opted out of notifications, or have stale tokens. The actual number can vary because of blacklists, suppressions, frequency caps, or other delivery rules applied at send time.
View Reachable Contacts for a Messaging Campaign
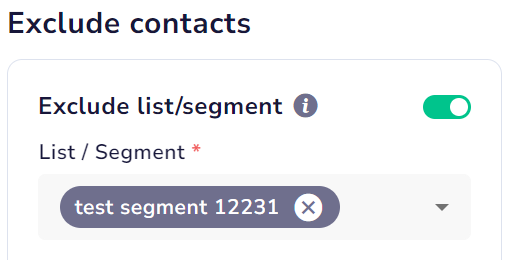
Exclude Contacts
Select segments or lists to exclude specific users from your campaign. You can choose up to 15 segments or lists for exclusion.
Exclude Contacts from your Campaign
Create the SMS content under the Content section.
Content
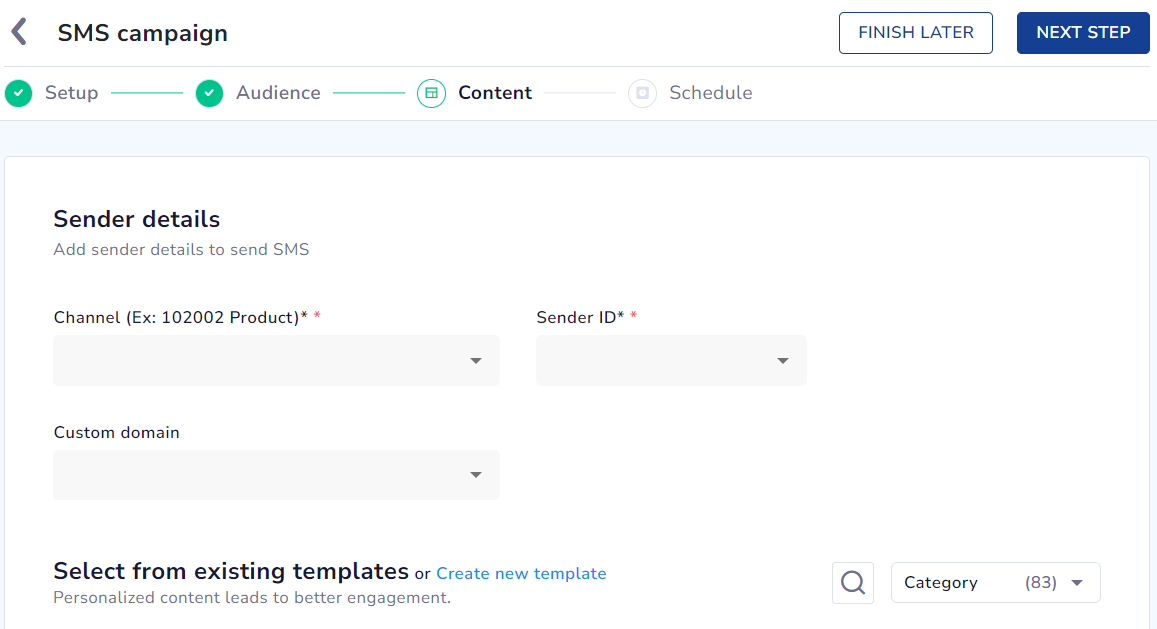
After the basic Setup and defining the target audience, Content is the section where you can create your SMS template and define the sender details for sending SMS. You can create or edit your campaign using various templates in this section.
Add sender details to send SMS
Refer to the table below for details on the sections under Sender details.
Field Name
Description
Channel
Select the communication channel through which the SMS will be sent.
Sender ID
Provide the name or number that appears as the sender of the SMS message.
Custom Domain
This helps you track clicks more effectively.
You can create the SMS template once you have added the relevant details. You can Select from existing templates or Create new template
Select from Existing Templates
Click to use, edit, or duplicate the existing template.
Refer to the table given to learn about the options available here.
Option
Description
Category
Allows you to organize and classify your templates based on their purpose or content type. You can select a specific category from the dropdown menu to view only the templates associated with that category.
Search
Allows you to quickly find specific SMS templates by entering keywords or phrases.
📘
Important Note
Verify the DLT template ID and SMS template before saving. Your message must match the SMS approved by DLT; otherwise, the operator will block it. Therefore, it is possible to edit only the dynamic parameters.
Create New SMS Template
🚨
Prerequisite
Before creating an SMS template on the Netcore CE platform, complete the following steps:
Create Template on DLT Platform
Log in to the DLT (Distributed Ledger Technology) platform associated with your telecom operator or SMS service provider.
Navigate to the section to create a new SMS template.
Define the template's content.
Submit the template for approval. The approval process may vary depending on the platform's policies.
Copy the DLT Template ID
When your template is approved on the DLT platform, you will receive a unique Template ID. This ID is crucial for tracking and verifying your template.
Copy this DLT Template ID, as you will need it for subsequent steps.
Create Template on Bizbond
Reach out to your Netcore Account manager to access your Bizbond account.
Use the copied DLT Template ID to register your template on Bizbond.
Ensure that the content and format of the template on Bizbond match precisely with the approved DLT template.
Create Template on Netcore CE dashboard
Paste the DLT Template ID when creating a template. Define the template content, ensuring it exactly matches the approved DLT template. This step is essential to comply with regulations and avoid message delivery issues.
Template Approval on Netcore CE
After creating the template, our system will automatically approve the template.
There are two sections available when you select Create SMS template:
Refer to the table given to learn about the fields available under Setup.
Field
Description
Template name
Provide a unique name for your SMS template. This name helps identify and organize your templates easily.
DLT Template ID
Provide the unique identifier assigned to the template by the Distributed Ledger Technology (DLT) system. This ID ensures compliance with regulatory requirements.
Category
Select a category that best describes the purpose of your template, such as Promotions, Alerts, or Notifications.
Content
Create SMS Template
Add the message body to the left pane and view the preview on the right pane. You can switch to Android and iOS modes to see how the message appears on different devices.
📘
Note
The character limit for messages is 160. If the message exceeds 160 characters, the content beyond that is sent separately.
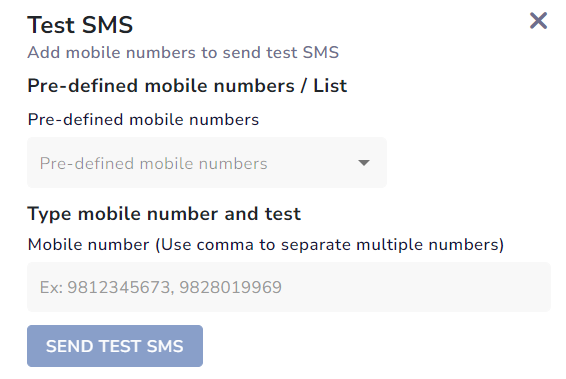
Send a Test SMS
Select the Send Test SMS option to preview your SMS before sending it to users.
Add mobile numbers to send test SMS
Refer to the table below for details on the sections under Send Test SMS.
Field Name
Description
Pre-defined mobile numbers / List
Select this option to add a mobile number saved in your account for testing purposes. This allows you to send a test SMS to these numbers without manually entering them.
Type a mobile number and test
Select this option to paste email ids. The emails should be comma-separated.
Define the campaign's delivery time and date under the Schedule section.
Schedule
You can create and preview your SMS campaign and then schedule your campaign.
Refer to the table below for details on the sections under Schedule campaign.
Option
Description
Frequency cap
Toggle communication frequency settings to limit the SMS messages a specific user can receive.
When to send
Select the options for when you want your SMS campaign to be sent.
Send now: You can immediately send the SMS campaign to recipients.
Send Later: You can schedule the SMS campaign at a specified date and time.
Optimise with Raman: You can use our AI engine (CoPilot), to optimize the send time based on user engagement metrics.
Send with throttle limit
Toggle the throttle limit to control the rate at which your SMS messages are sent. By setting a throttle limit, you can specify the maximum number of messages delivered per minute.
Limit on contacts
Set the maximum number of contacts for this campaign to whom to send emails. You can edit sent campaigns only when Set Limit has been enabled.
Click the Preview option to save your campaign and preview the SMS.

 to get details on each steps.
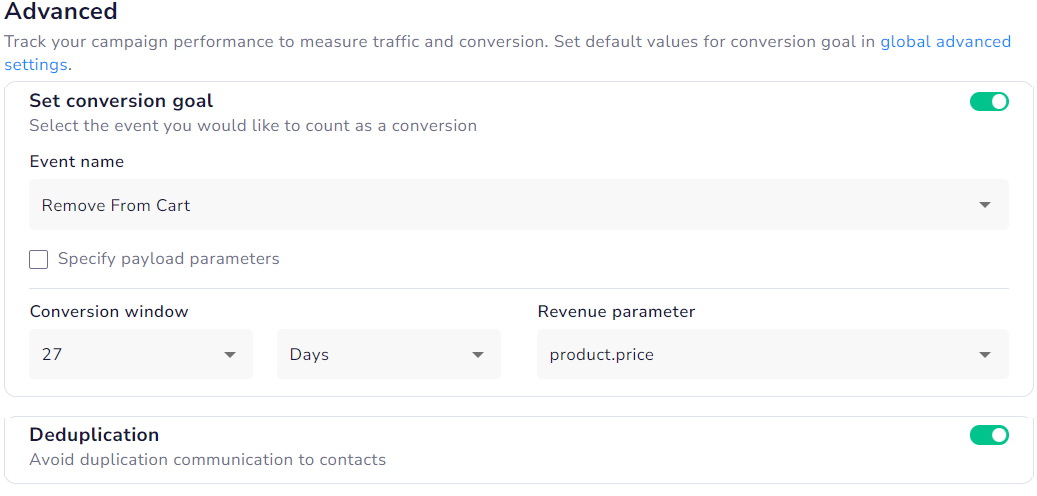
 to use, edit, or duplicate the existing template.