Shopify
This guide helps you learn about the Netcore and Shopify integration.
Overview
Shopify is an e-commerce platform that helps businesses create online stores to sell their products. It makes managing products, processing orders, and interacting with customers easy. Shopify also connects with other apps to improve how businesses run their stores.
Integration Overview
The integration between Netcore and Shopify offers significant advantages in enhancing marketing and customer engagement. This integration connects Netcore's engagement tools with Shopify's e-commerce capabilities. This integration allows streamlined communication and personalized marketing strategies. By linking Shopify with Netcore, businesses can use advanced features such as automated email campaigns, targeted messaging, and comprehensive analytics.
Integration Benefits
Here are the key benefits of this Integration.
- Enhanced Personalization: Tailor marketing messages based on customer behavior and purchase history from Shopify.
- Automated Campaigns: Set up automated email and SMS campaigns triggered by customer actions, such as cart abandonment or post-purchase follow-ups.
- Unified Data: Access detailed customer insights and metrics from Shopify and Netcore in one place.
- Improved Customer Engagement: Increase engagement through personalized recommendations and targeted promotions.
Use Cases for Integration of Shopify and Netcore
Click ![]() to read about your preferred use case.
to read about your preferred use case.
1. Recovering Abandoned Carts
Problem Statement: Customers often leave items in their cart without buying.
Solution: Set up an abandoned cart recovery journey to recover these sales. Create reminder emails or SMS messages that will be sent to customers who abandon their carts. Include incentives like discounts to encourage them to complete their purchase.
2. Personalized Recommendations
**Problem Statement**: Generic marketing messages don’t appeal to individual customer interests.Solution: On the Netcore CE dashboard, use the Shopify integration to create personalized product recommendation campaigns. Analyze customer purchase history and browsing data from Shopify. Set up targeted email or SMS messages with recommendations based on this data to increase engagement and drive sales.
3. Post-Purchase Follow-Ups
Problem Statement: Retailers miss opportunities to engage customers after a purchase, impacting retention and feedback.
Solution: Set up automated post-purchase follow-up messages on the Netcore CE dashboard. Set up emails or SMS messages that send thank-yous, product care tips, or requests for reviews after a customer completes a purchase on Shopify. Personalize these messages to enhance customer satisfaction and encourage repeat business.
Note
Headless website means your front-end (the user interface) is separate from the back-end (the content management system), allowing for more flexibility and customization.
Install Netcore Plugin on Shopify
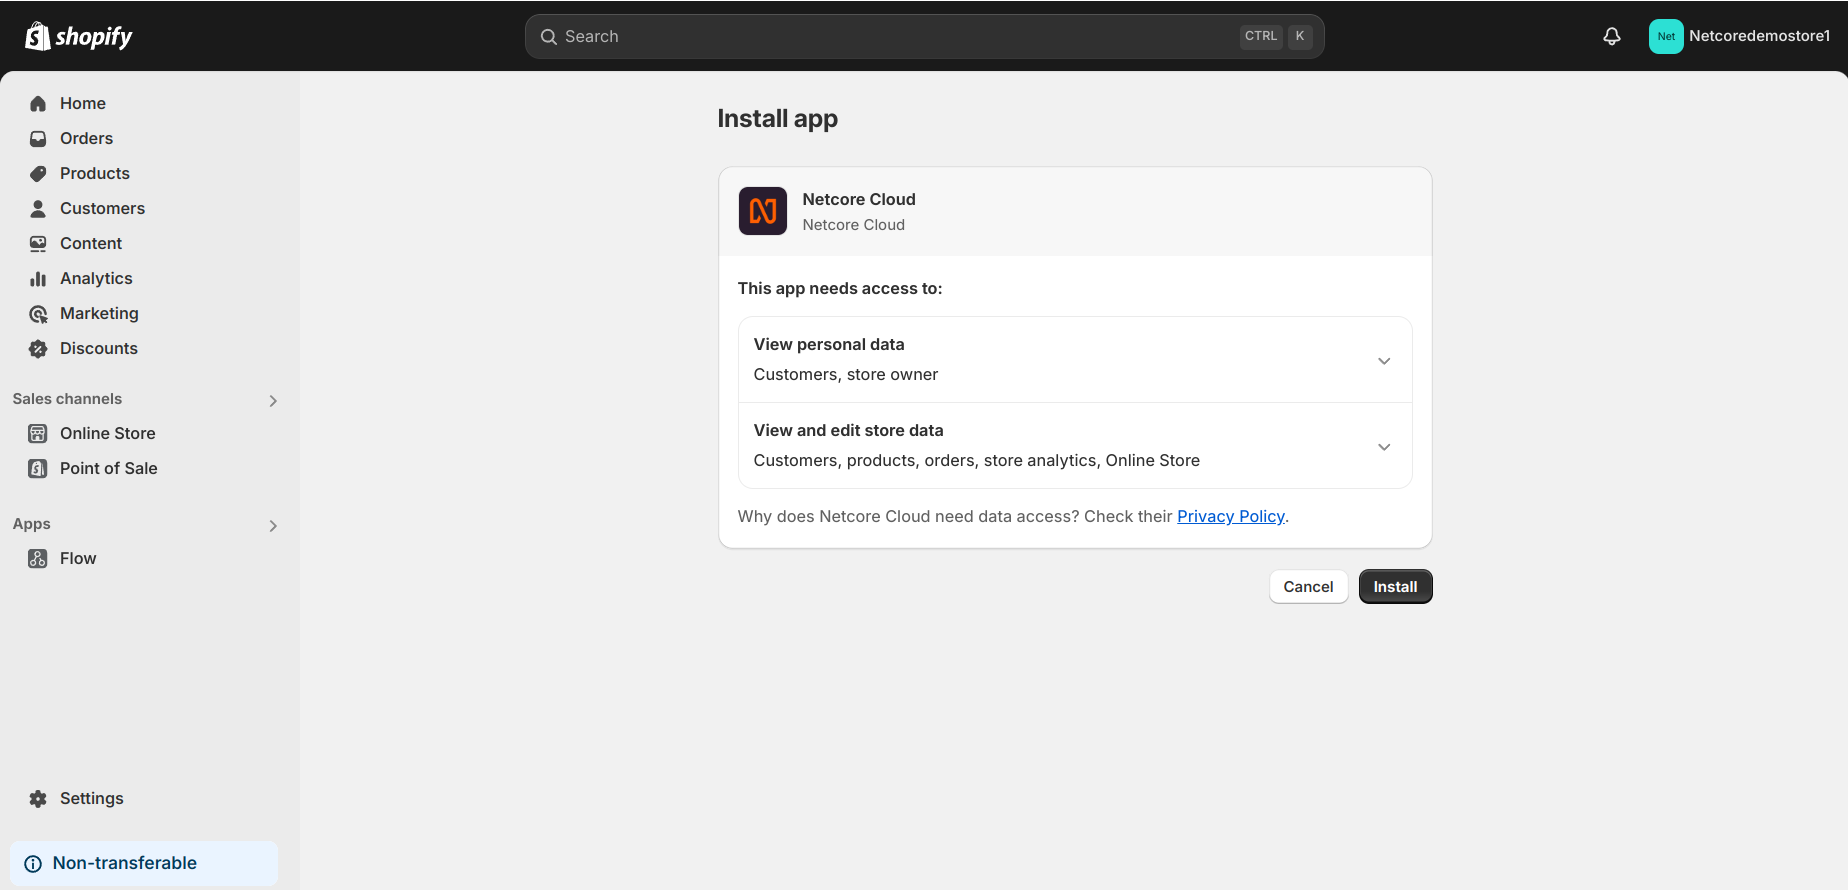
- Go to the Shopify App Marketplace and search for the Netcore Plugin or use the URL to access the plugin - app.shopify.com/netcore
- Click on the plugin to view the details page and Install App. You will be redirected to the Netcore platform.
.
Create Your Netcore Account
For New Users: Sign up
- Sign up to create a new CE account.
- Enter the following details: Business Email ID, Phone Number, or Password and click Submit.
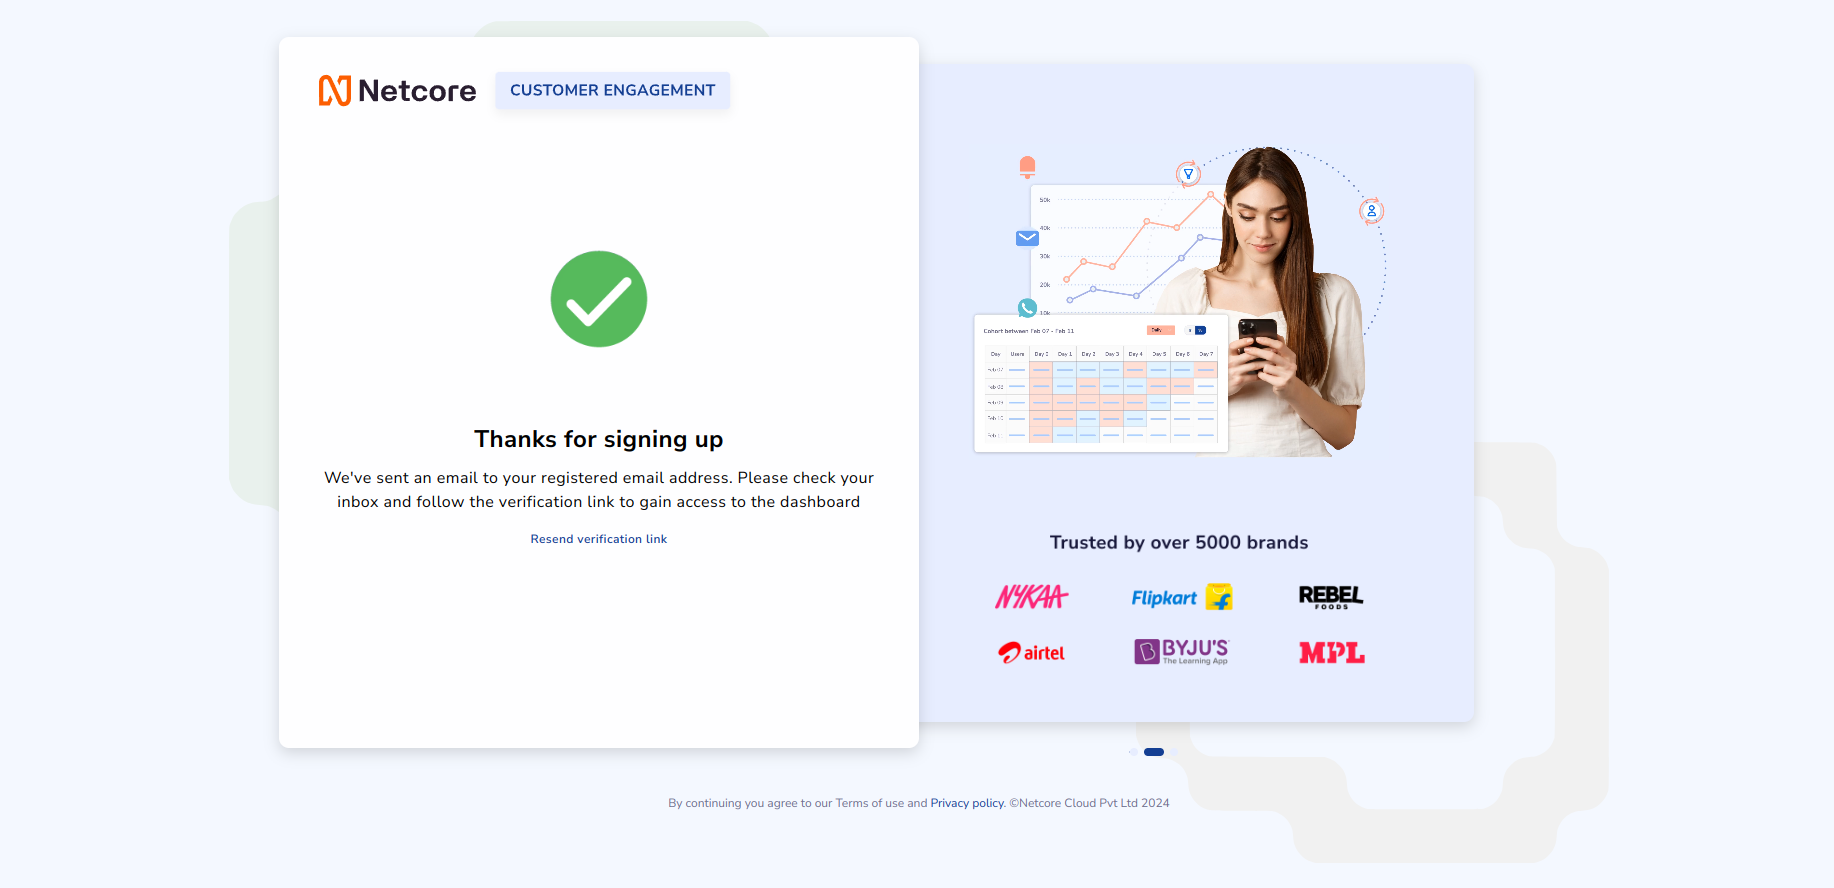
Verify Email
A verification link will be sent to you via email. Click the link to verify your email address.
Activate Your Panel
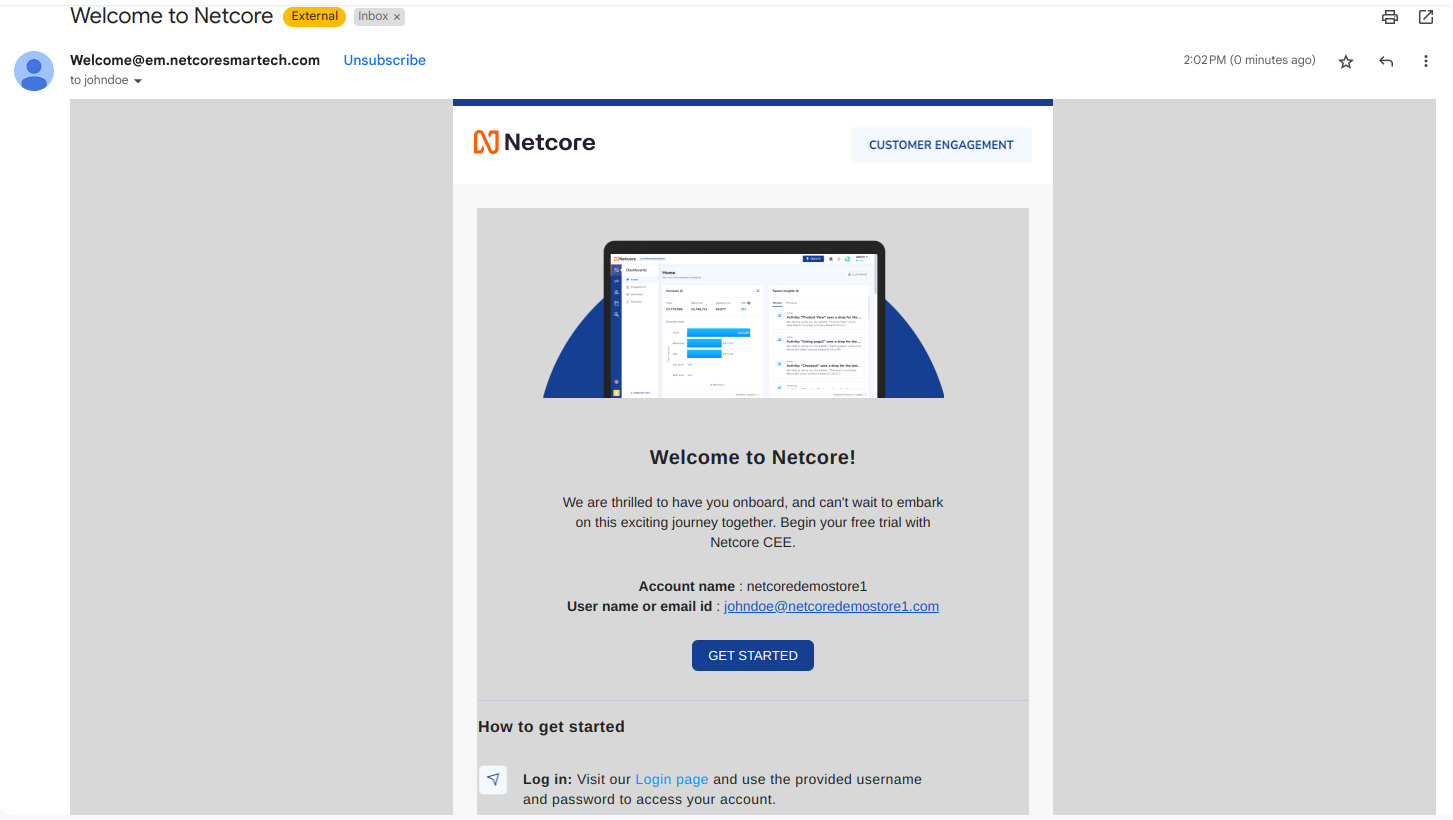
After verification, you will receive another email with panel details. Click the link to access the panel and login to the panel using the credentials shared in the email.
.
For Existing User
Login to your existing account. Enter the credentials to do the same.
Setup Your Netcore Account
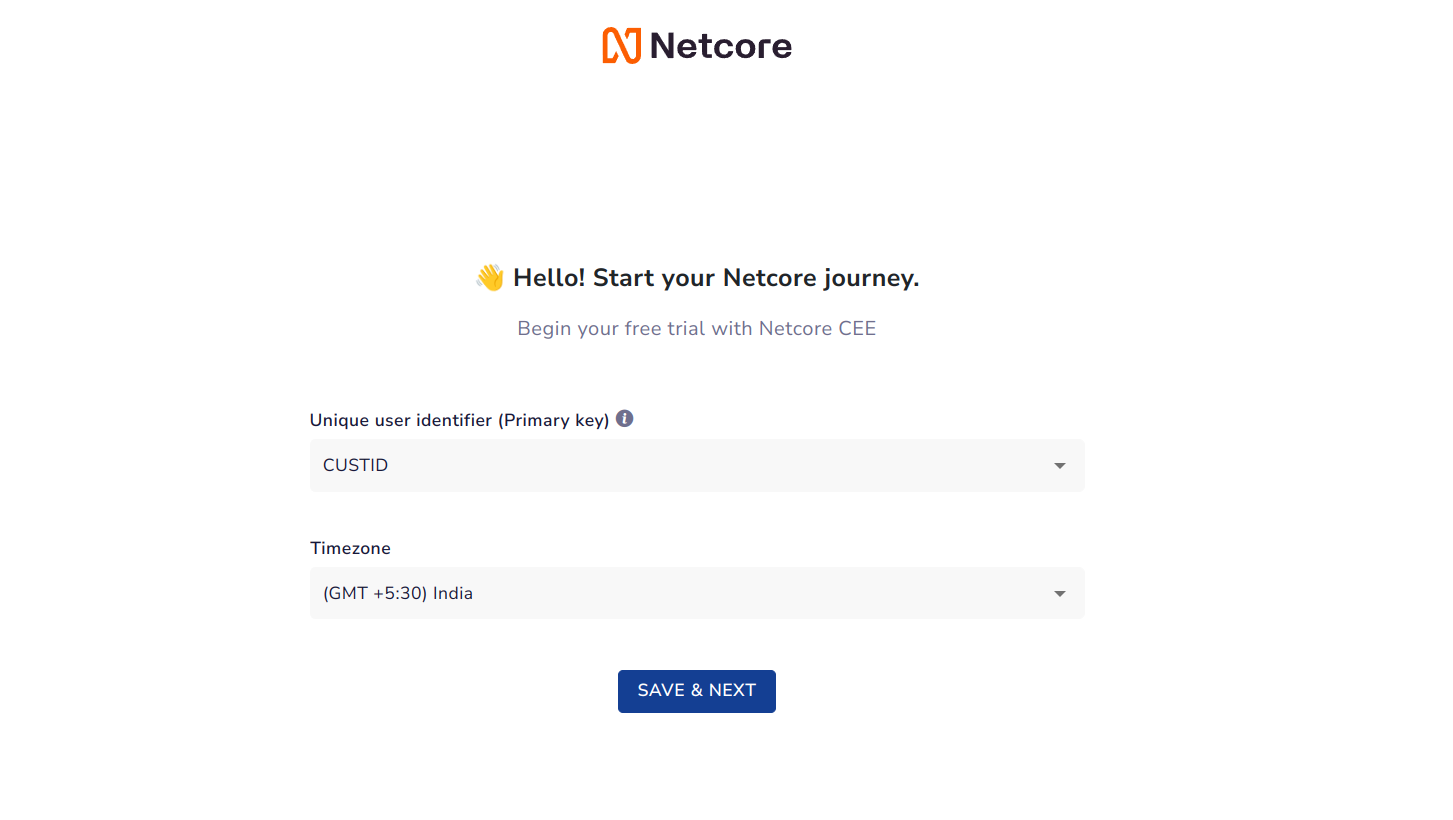
- Select the Primary Key for your account.
This will be the unique identifier for your customers. It is recommended to use 'Customer ID' as the primary key for Shopify account.
- On the next screen, you click on 'Integrate' on the Shopify card to begin your integration.
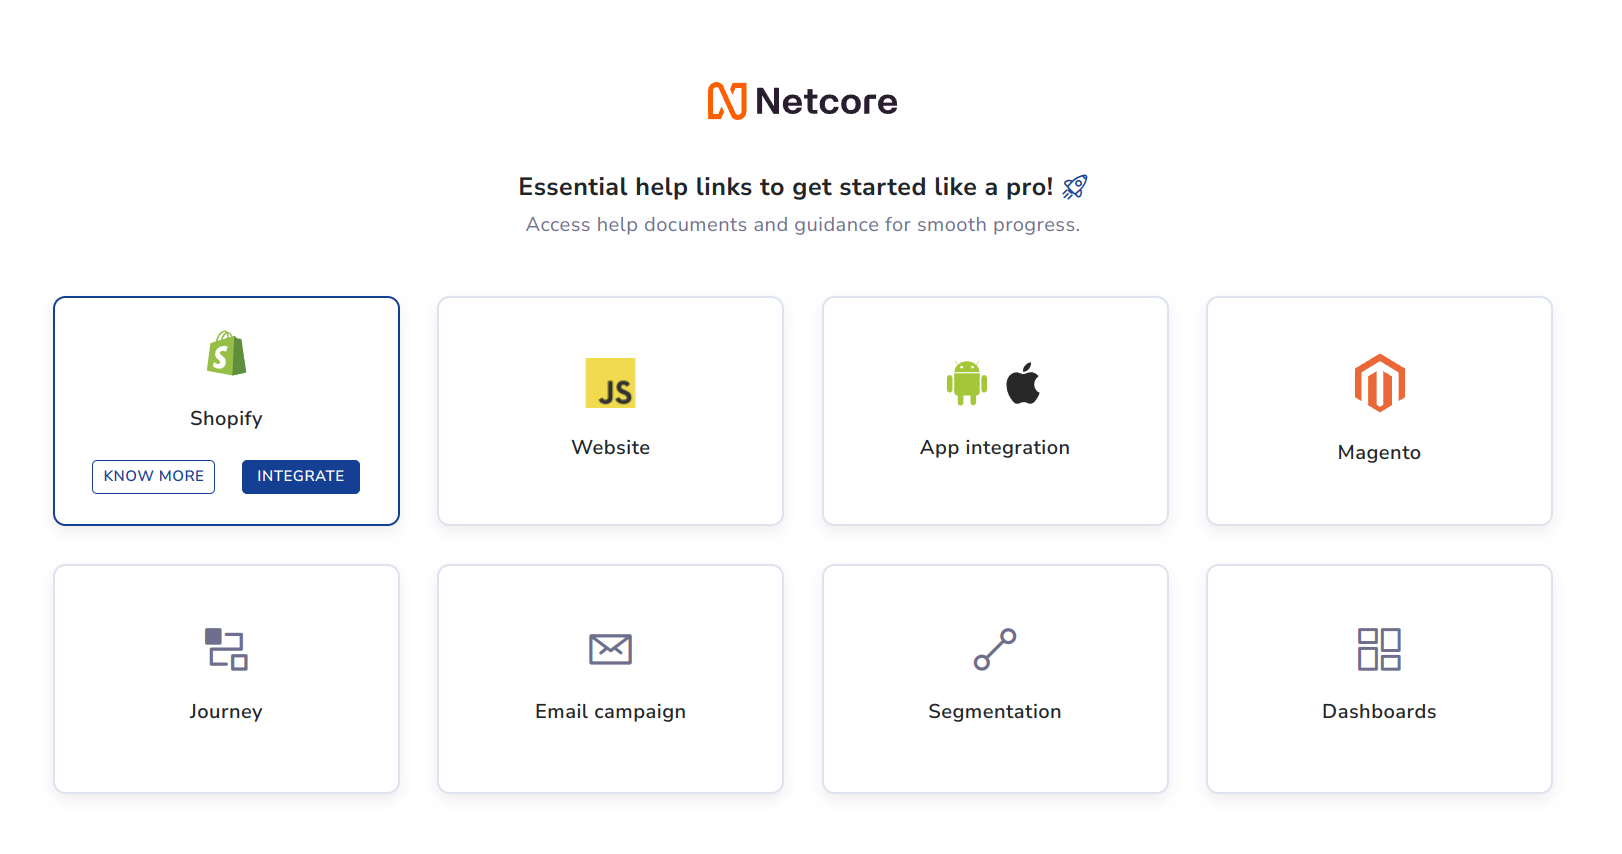
Enable Shopify Integration Settings
Here you will be taken to the website asset.
- Click on Save URL website details.
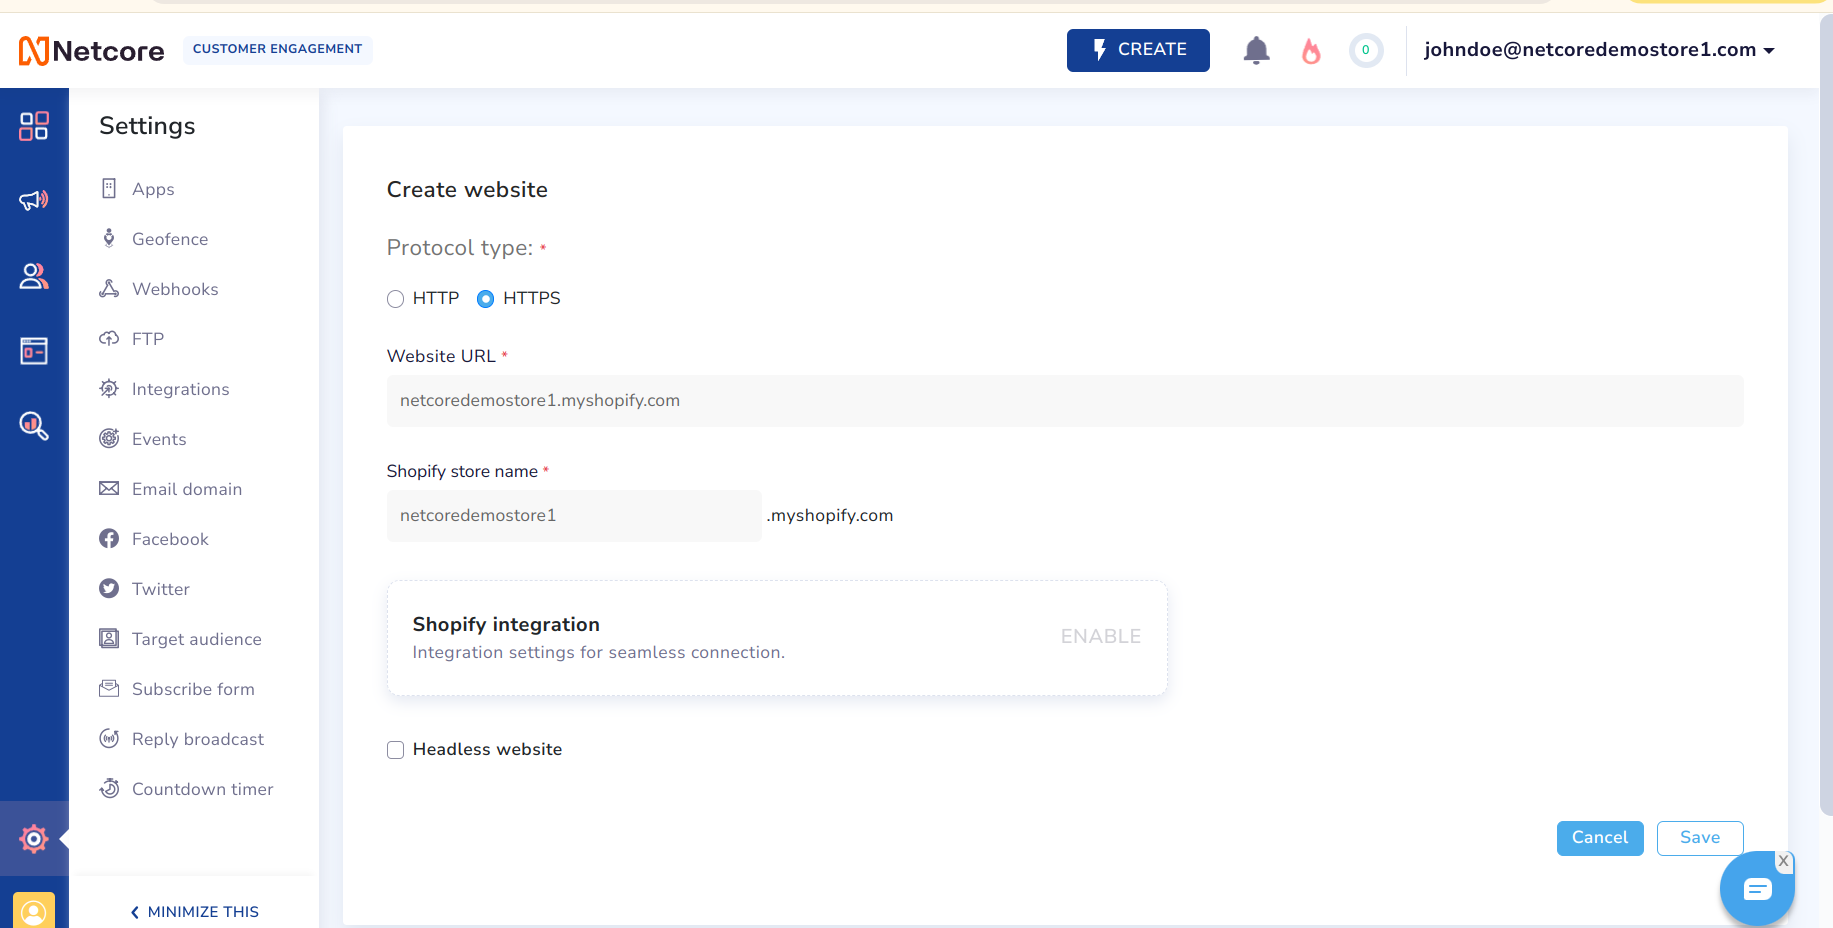
The Shopify integration settings screen has two sections: From Shopify and To Shopify.
You can adjust the settings anytime and click Save and Update to apply the changes.
- Click Enable to set up settings.
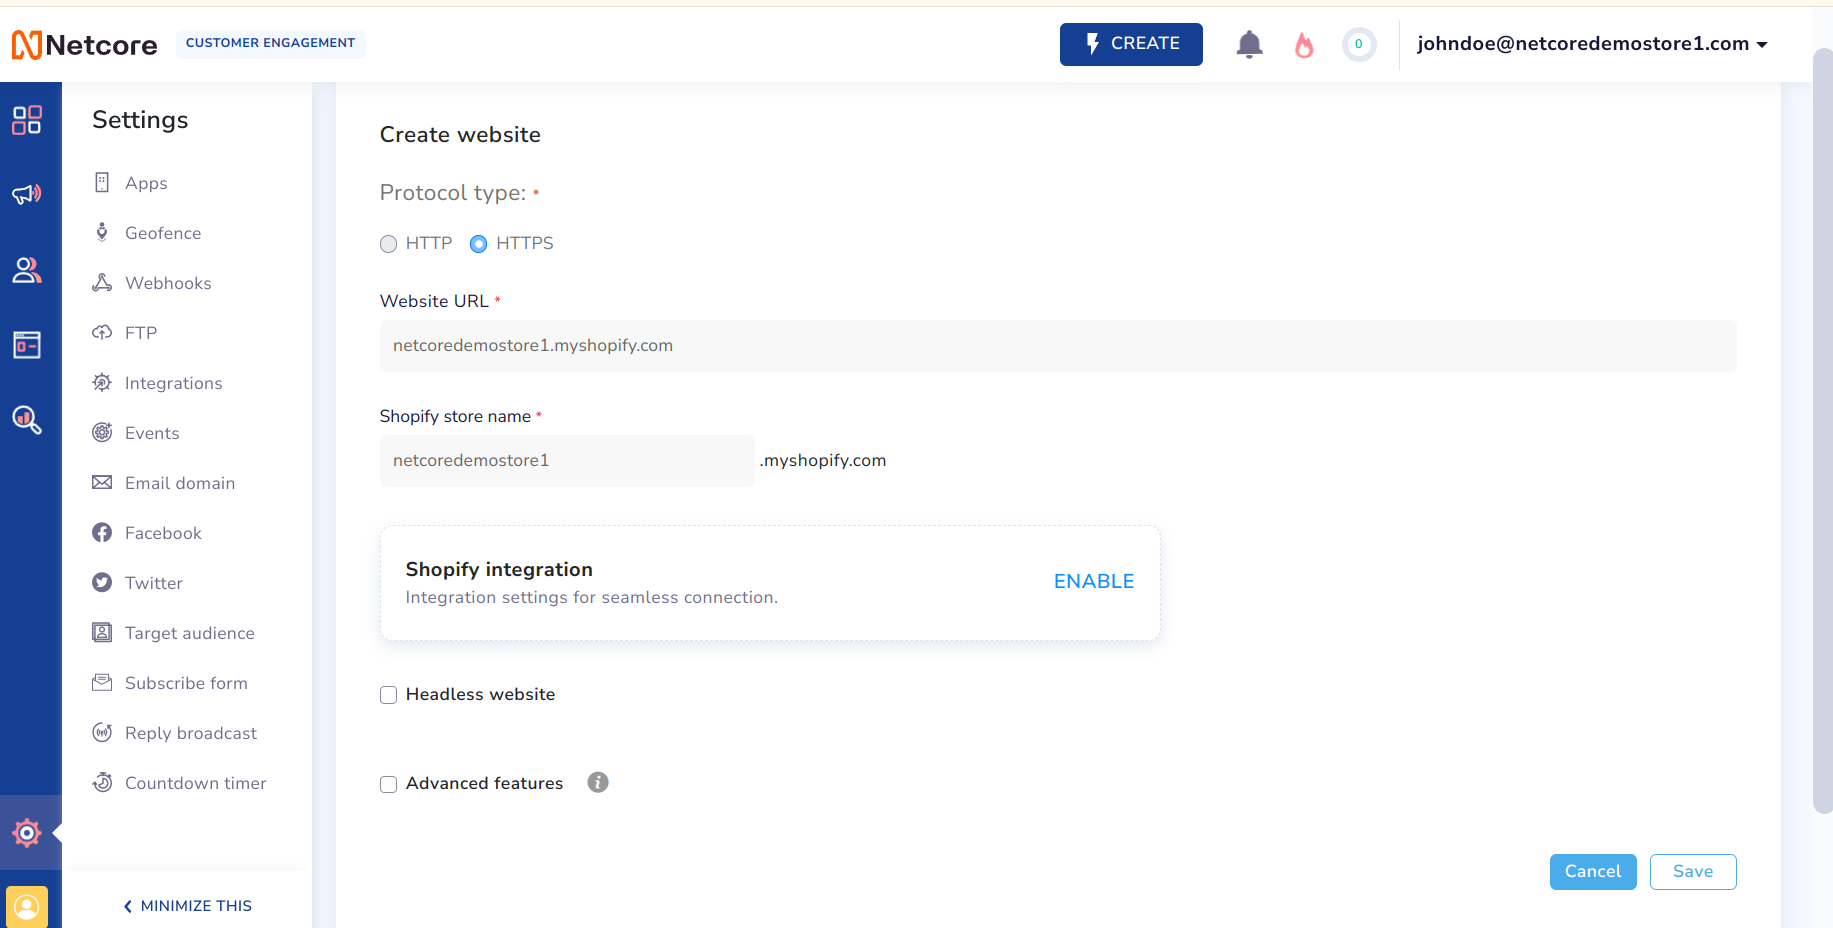
From Shopify
The From Shopify section allows you to pull data from Shopify into Netcore CE. This includes syncing customer contacts, historical orders, attributes, and events.
This section has four sub-sections:
- Historic sync
- Auto-created and synced attributes
- Webhook-based event tracking
- Sync subscription data.
Click ![]() to read your preferred section.
to read your preferred section.
Historic Sync Important Points to Remember
To enable Product Catalog Integration (PCI) for your Shopify store, you must grant the
read_locationspermission. This permission allows the system to access your store’s catalog information.This is only applicable for users who have Shopify integrated with Netcore already.
What you need to do?
- Go to your Shopify admin panel.
- Reauthorize the app and ensure that the
read_locationsscope is enabled.PCI functionality will only be available after this permission is granted.
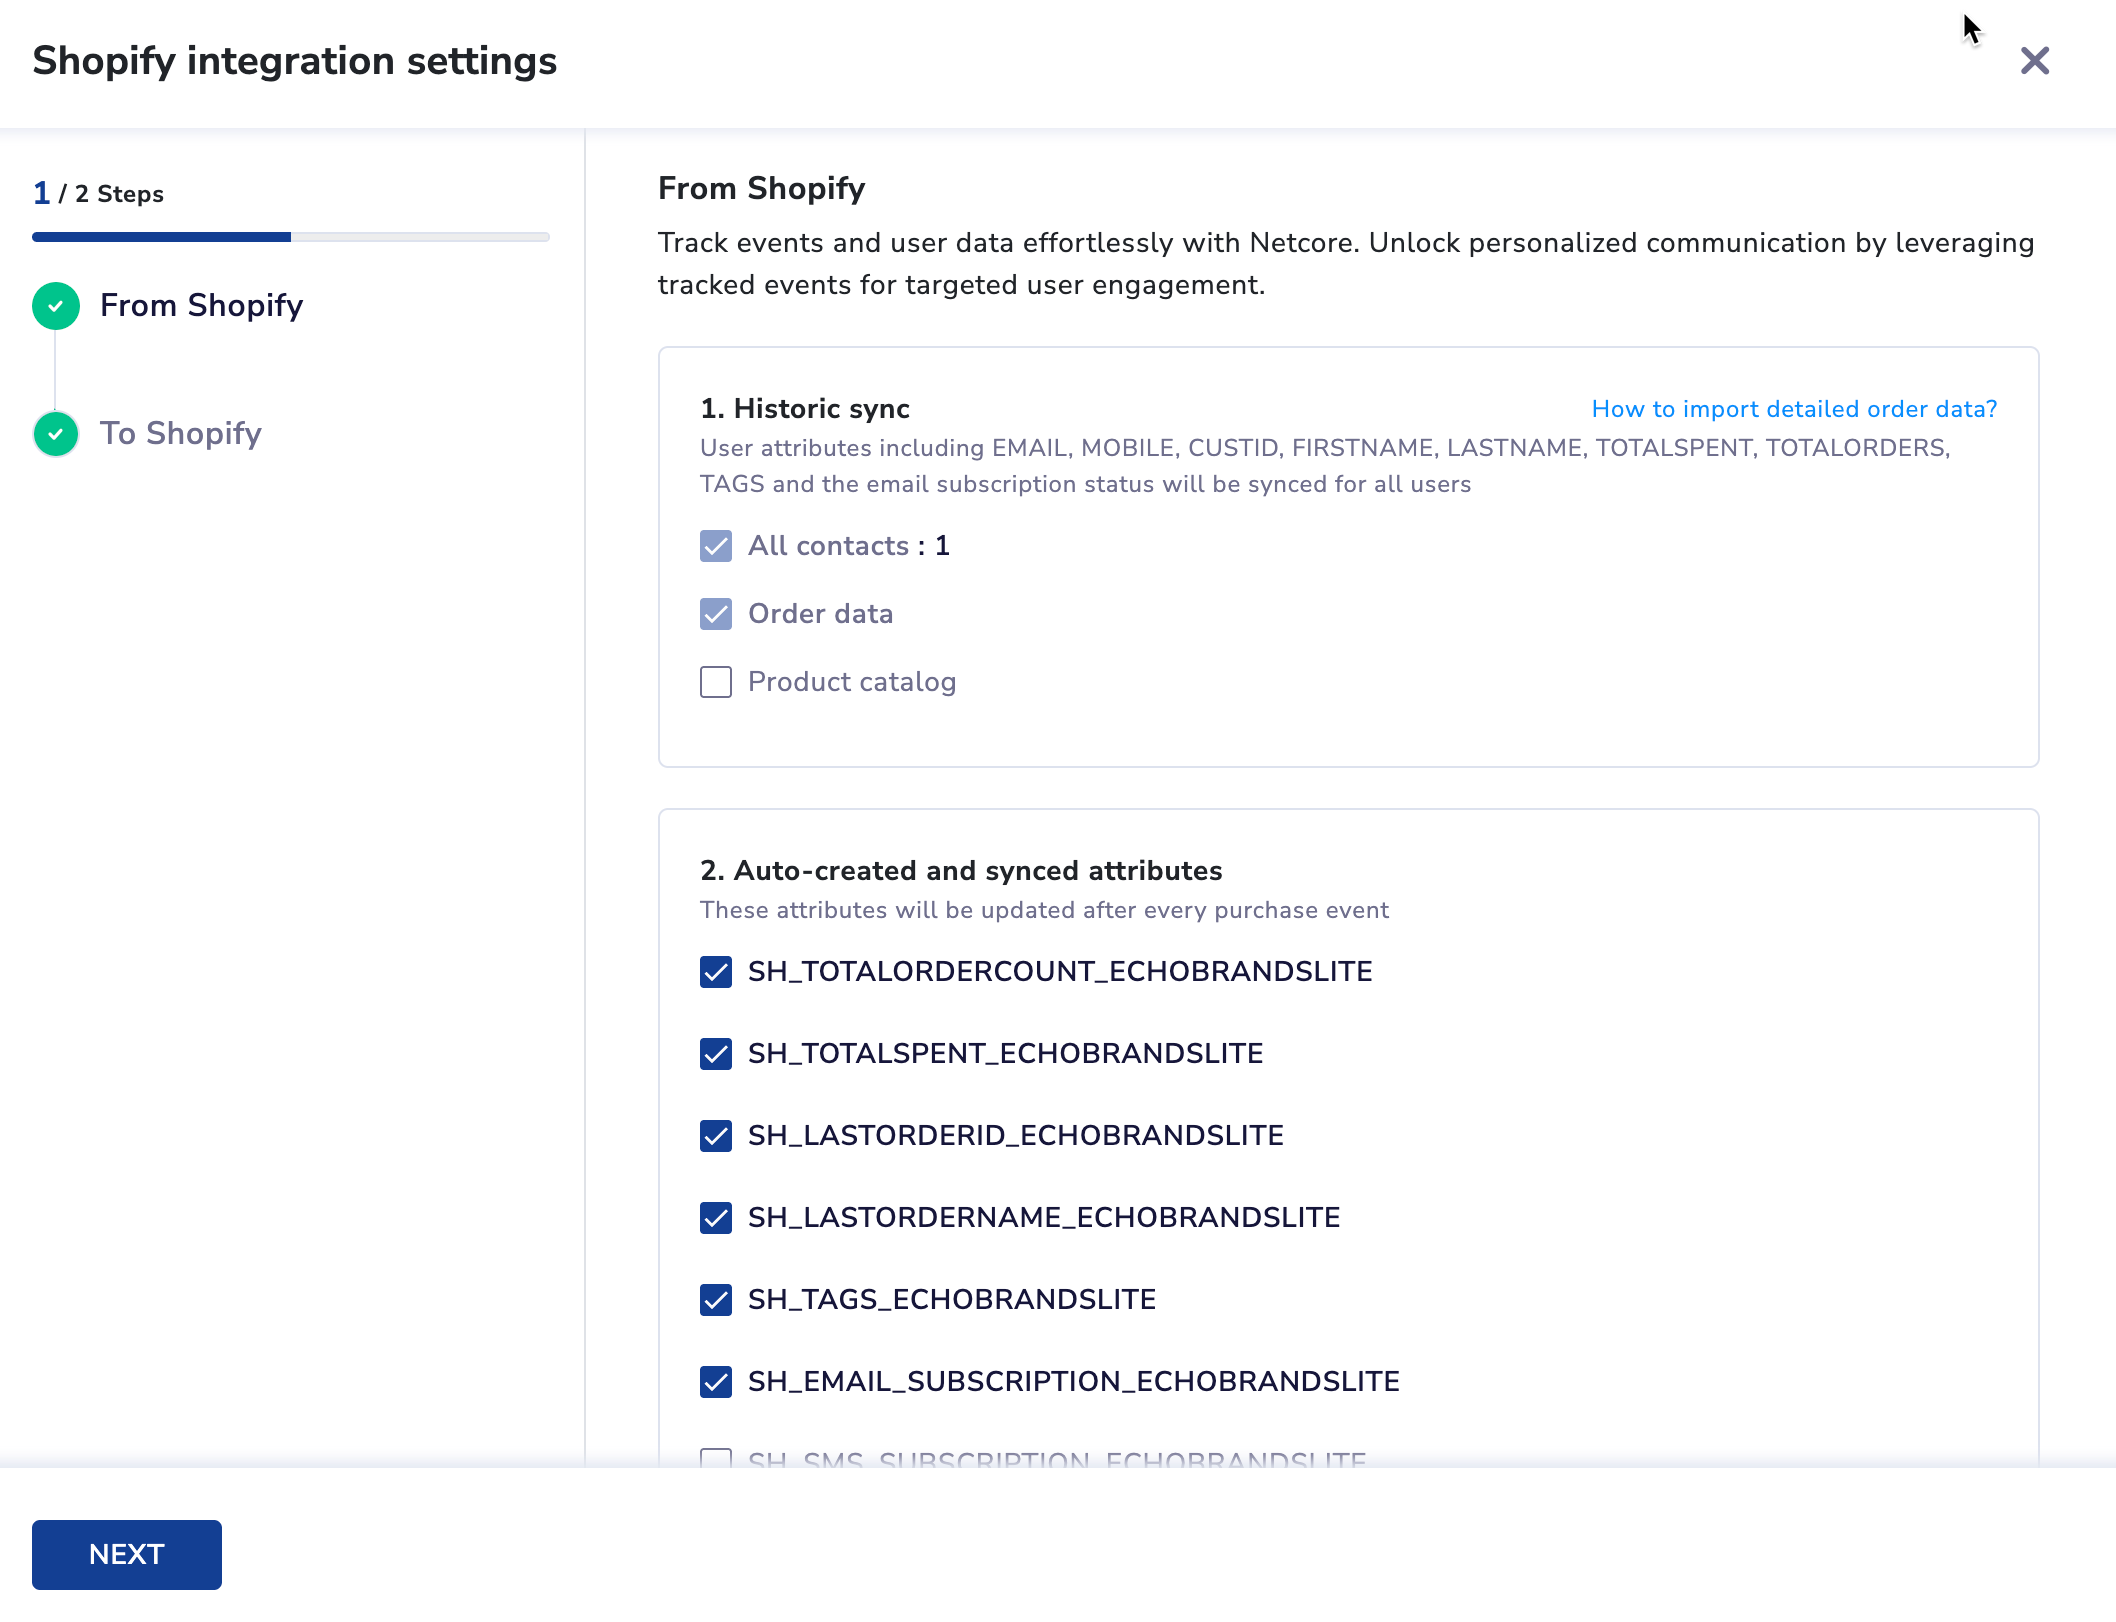
1. Historic Sync
Historic Sync allows you to synchronize user attributes from Shopify to Netcore CE.
This includes user attributes like
- MOBILE
- CUSTID
- FIRSTNAME
- LASTNAME
- TOTALSPENT
- TOTALORDERS
- TAGS
- Email Subscription Status for all users.
Important Points to Remember
- Historic Sync cannot be turned off once you enable this sync and save the settings.
- To sync Order Data, you must select ALL CONTACTS.
- To sync product catalog, you must select Product catalog.
- Complete historic data is synced through the plugin, however it might take from a few hours to a few days depending on the size of your data.
- By checking All Contacts, user attributes from Shopify will be automatically updated in the Netcore Contact master.
Refer to the table to know more about the attributes synced.
| Attributes | Description |
|---|---|
| CUSTID | Unique customer identifier. |
| Customer email addresses. | |
| MOBILE | Customer mobile numbers. |
| FIRSTNAME | First names of customers. |
| LASTNAME | Last names of customers. |
| TOTALSPENT | Total amount spent by the customer. |
| TAGS | Tags assigned to customers. |
| TOTALORDERS | Total number of orders placed by the customer. |
2. Auto-created and synced attributes
These attributes are automatically generated in Netcore and updated with each purchase event from Shopify.
- SH_TOTALSPENT_STORENAME
- SH_TOTALORDERS_STORENAME
- SH_TAGS_STORENAME
- SH_LASTORDERID_STORENAME
- SH_LASTORDERNAME_STORENAME
- SH_EMAIL_SUBSCRIPTION_STORENAME
You can choose which attributes to track and enable or disable them. Follow the naming format provided when creating any new attribute.
Naming Convention
- Sample Attribute Name: SH_TOTALORDERCOUNT_VAPID_STORE
- SH: Shopify
- TOTALORDERCOUNT: Attribute
- VAPID_STORE: Shopify store name
Email Subscription Status Details
Shopify maintains three statuses: Not Subscribed, Subscribed, and Unsubscribed:
- Not Subscribed: Default status when a new user registers. In Shopify, it means no action was taken by the user; in Netcore,you can still send emails to these users as they are not blacklisted unless they explicitly unsubscribe.
- Subscribed: Triggered when a user opts in during newsletter signup or at checkout. This status is synced to Netcore as Subscribed.
- Unsubscribed: Triggered when a user opts out of emails by unchecking the subscription box or clicking an unsubscribe link. This status is synced to Netcore as Unsubscribed, and such users are blacklisted in Netcore.
Blacklisting Approach
Not Subscribed users are not blacklisted in Netcore to allow for marketing and transactional emails. Create a segment to exclude these users from your campaigns.Unsubscribed users are blacklisted, preventing both marketing and transactional emails.
Use Case:
Leverage SH_EMAIL_SUBSCRIPTION_STORENAME to create precise segments, e.g., exclude Not Subscribed users from marketing campaigns.
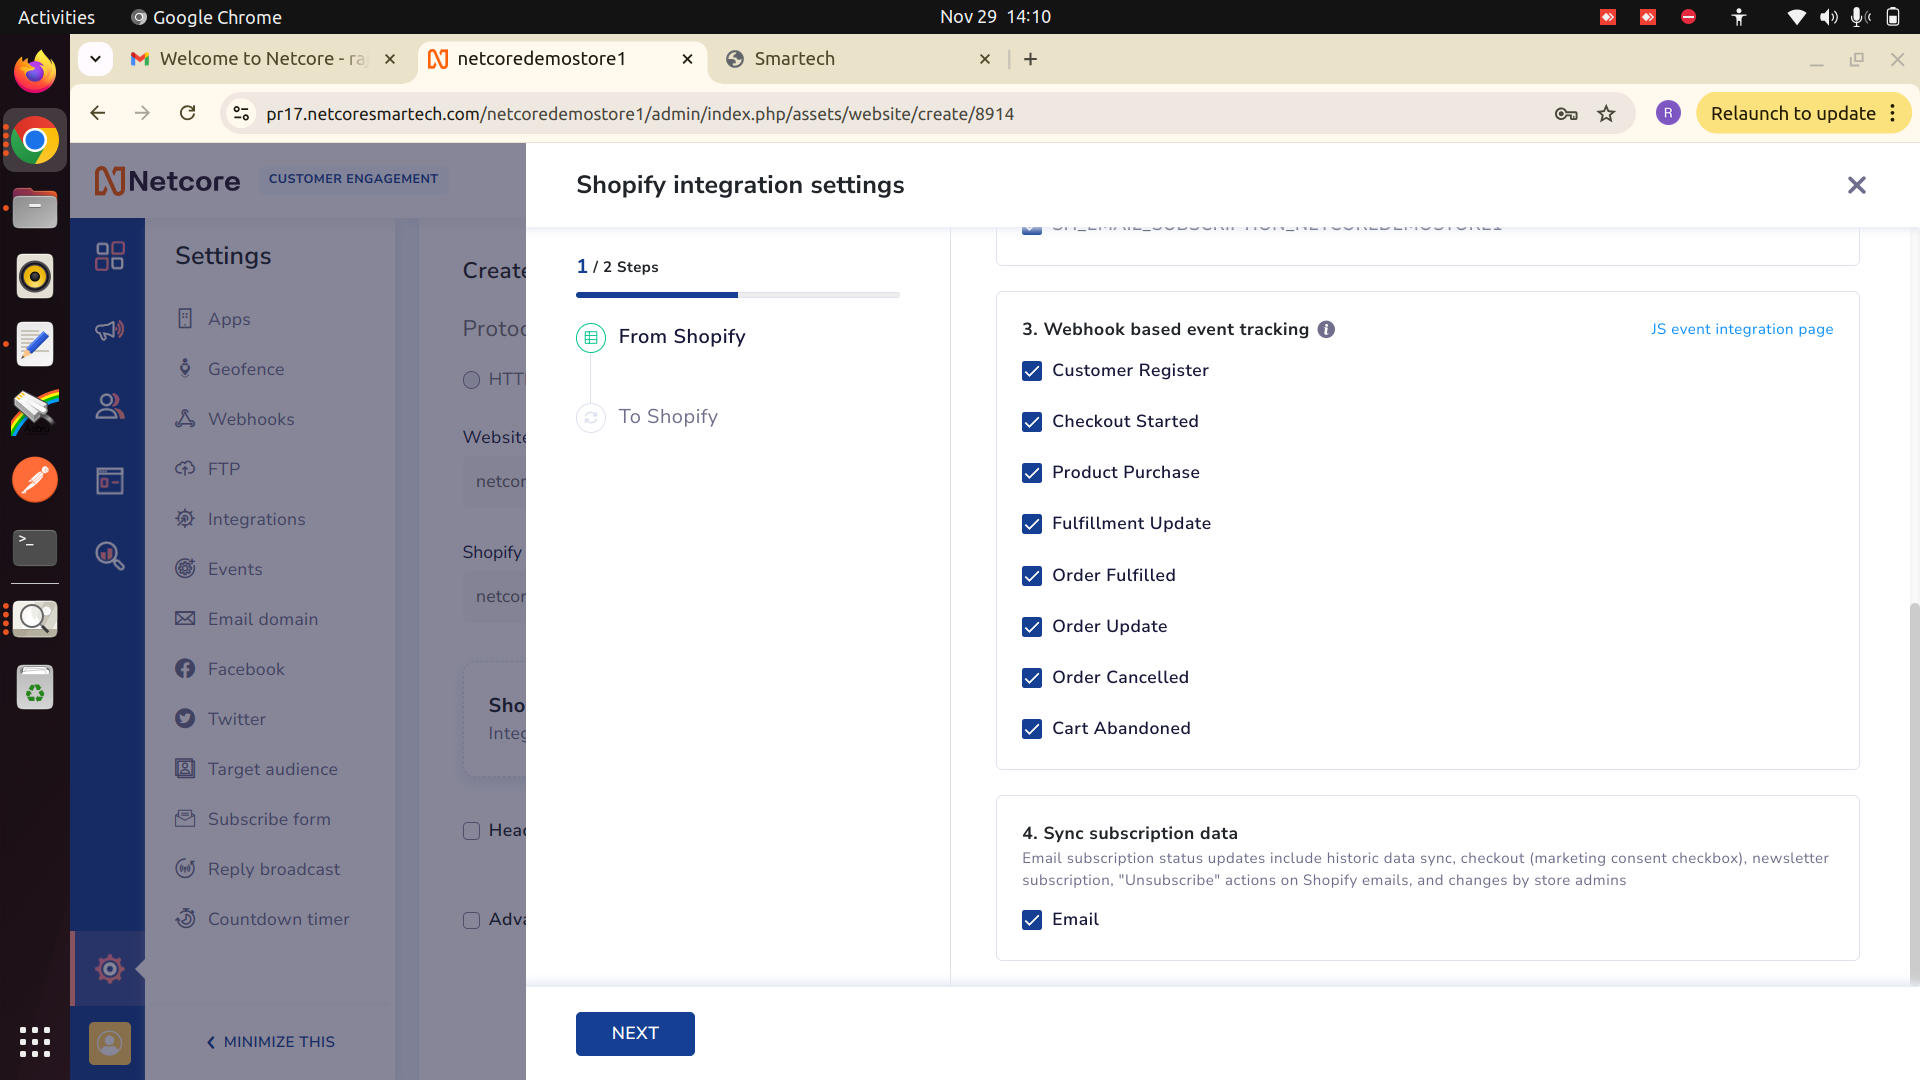
3. Webhook based event tracking
Webhook-Based Event Tracking from Shopify to Netcore allows you to automatically send updates about specific events from your Shopify store to Netcore. Webhooks work by notifying Netcore in real-time whenever predefined events occur in Shopify.
For example, if a customer registers, abandons a cart, or updates their details, a webhook sends this information to Netcore. This allows you to track these actions, analyze customer behavior, and take appropriate marketing actions. This ensures you always have the latest event data.
Note
JavaScript events are tracked automatically with the plugin. Additional JavaScript integration is required to integrate other events.
Use Case: Imagine a customer buys a product from your Shopify store. A webhook can be set up to send this purchase information to Netcore instantly. This way, Netcore CE can track and manage this purchase event without manual input.
Refer to the table below for the descriptions of webhook-based events. Click here for details on the events and payloads captured.
| Event | Description |
|---|---|
| Customer Registration | Allows you to receive data on new customer registrations, including contact details. |
| Checkout Started | Allows you to capture the initial cart and customer details when checkout begins. |
| Product Purchase | Allows you to receive completed purchase details, including product and transaction info. |
| Fulfillment Update | Allows you to track order status. |
| Order Fulfilled | Allows you to track when an order has been fuffilled. |
| Order Updates | Allows you to receive updates on modifications to existing orders. |
| Order Cancelled | Allows you to be notified of canceled orders, including details of the items canceled. |
| Cart Abandonment | Allows you to track when customers add items to their cart but do not complete the purchase. |
4. Sync Subscription Data
Syncing subscription data includes updating information about email subscriptions from several sources: historical data, marketing checkbox, newsletter sign-ups, unsubscribe actions on Shopify emails, and changes by store admins.
Example: At the bottom of a promotional email, there's a checkbox for users to subscribe to newsletters. Sync Subscription Data tracks how many users have subscribed or unsubscribed from newsletters, ensuring that Netcore CE stays updated with the latest subscription status.
To Shopify
This section manages the data sent from Netcore CE to Shopify. This section has two sub-sections: Sync unsubscription data, Profile sync : Netcore to Shopify. Click ![]() to read your preferred section.
to read your preferred section.
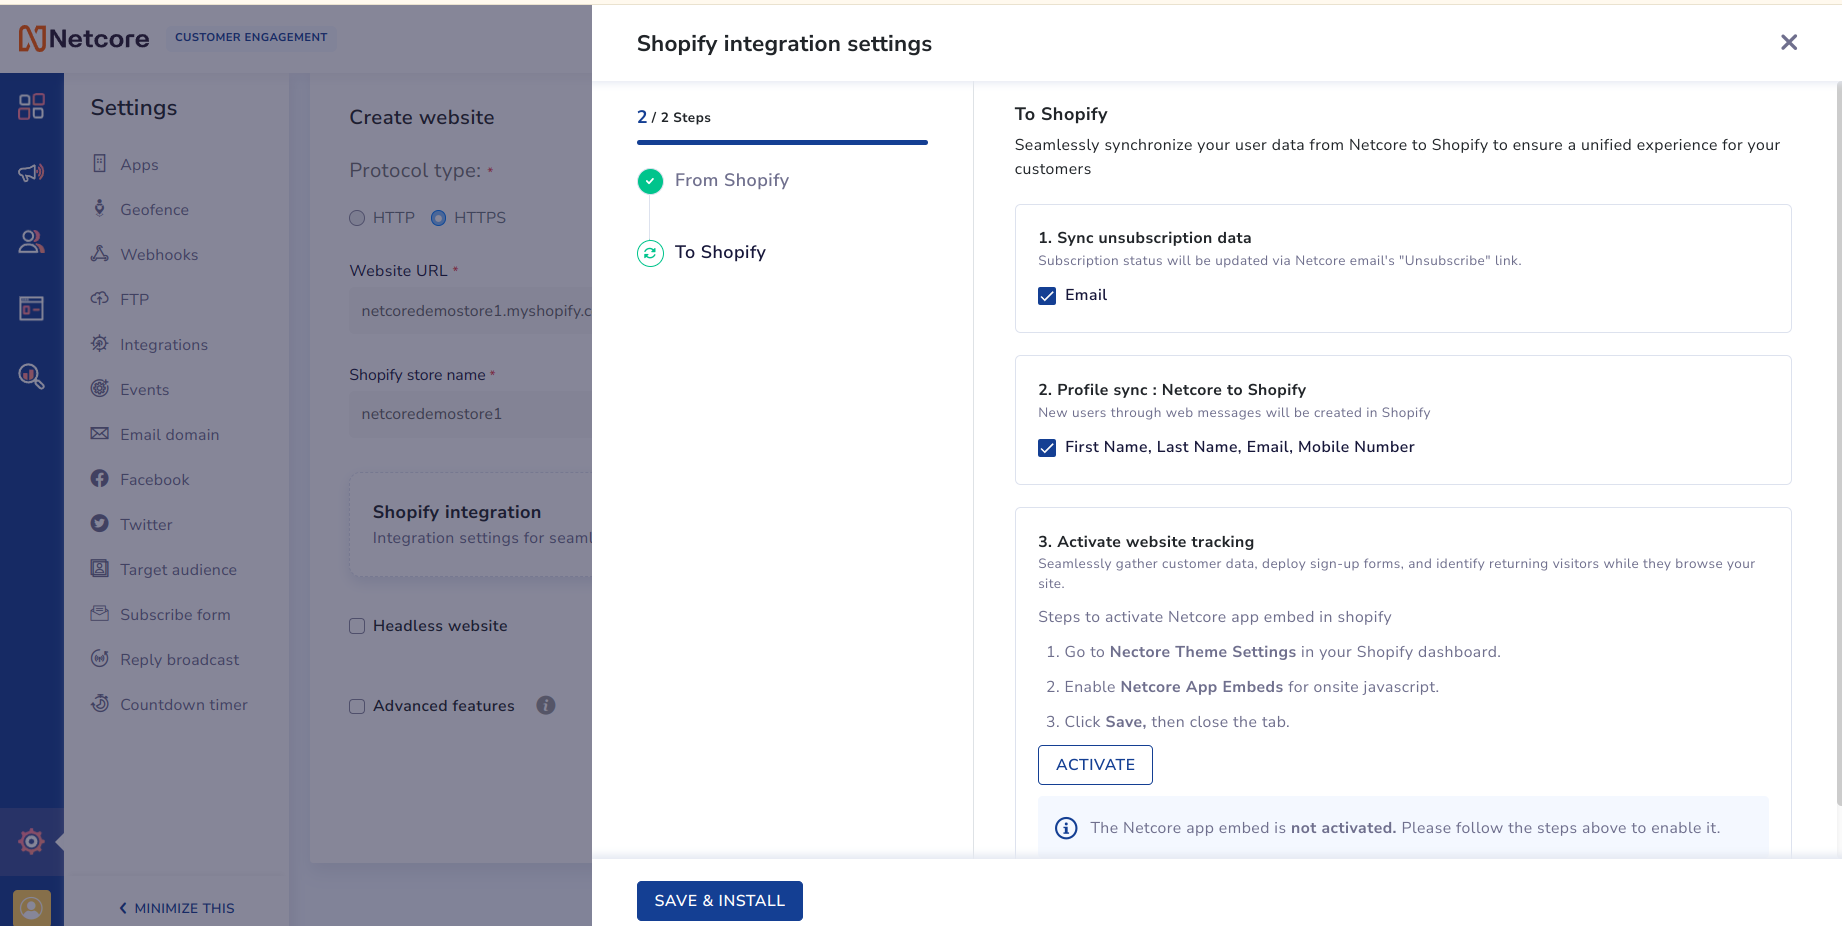
1. Sync Unsubscription Data
Sync Unsubscription Data ensures that when users unsubscribe from emails sent via Netcore, their unsubscription status is updated in Shopify. This means that when a user clicks the Unsubscribe link in an email sent via Netcore, Shopify will be notified and will reflect this change in the user's subscription status.
2. Profile sync: Netcore to Shopify
This option ensures that any new profiles created or updated in Netcore through web messages will be synced with Shopify.
3. Activate Website Tracking
Seamlessly gather customer data, deploy sign-in forms, and identify returning visitors while they browse your site.
Follow the steps given below to activate the Netcore app embed in Shopify. This also enables the JS events for your Shopify store.
- Go to Netcore Theme Settings in your Shopify dashboard.
- Enable Netcore App Embeds for onsite JavaScript.
- Click Save, then close the tab
Events tracked through JS
- Page Browse
- Product Search
- Page View
- Add to Cart
- Remove from Cart
- Checkout
Note
Data will only be collected for the events that you select by checking the box. You can uncheck these boxes at any time if you no longer wish to track the data. If you decide to track an event again, check the box and click UPDATE. Data collection will resume from that day forward, but no historical data will be synced. All user profile information from the Shopify store will be automatically imported into the Netcore CE dashboard.
Once you have finished adding the necessary settings, click Install to complete the setup. You can adjust the settings anytime and click Save and Update to apply the changes.
Updated 4 months ago
