Web Push
Send personalized Web Push Notifications to targeted user segments.
Overview
Web Push Notifications are messages sent to users' browsers, even when they are not on your site. These messages appear on their screens even when not on your website. Use Web Push to engage users, deliver important updates, and drive traffic to your site.

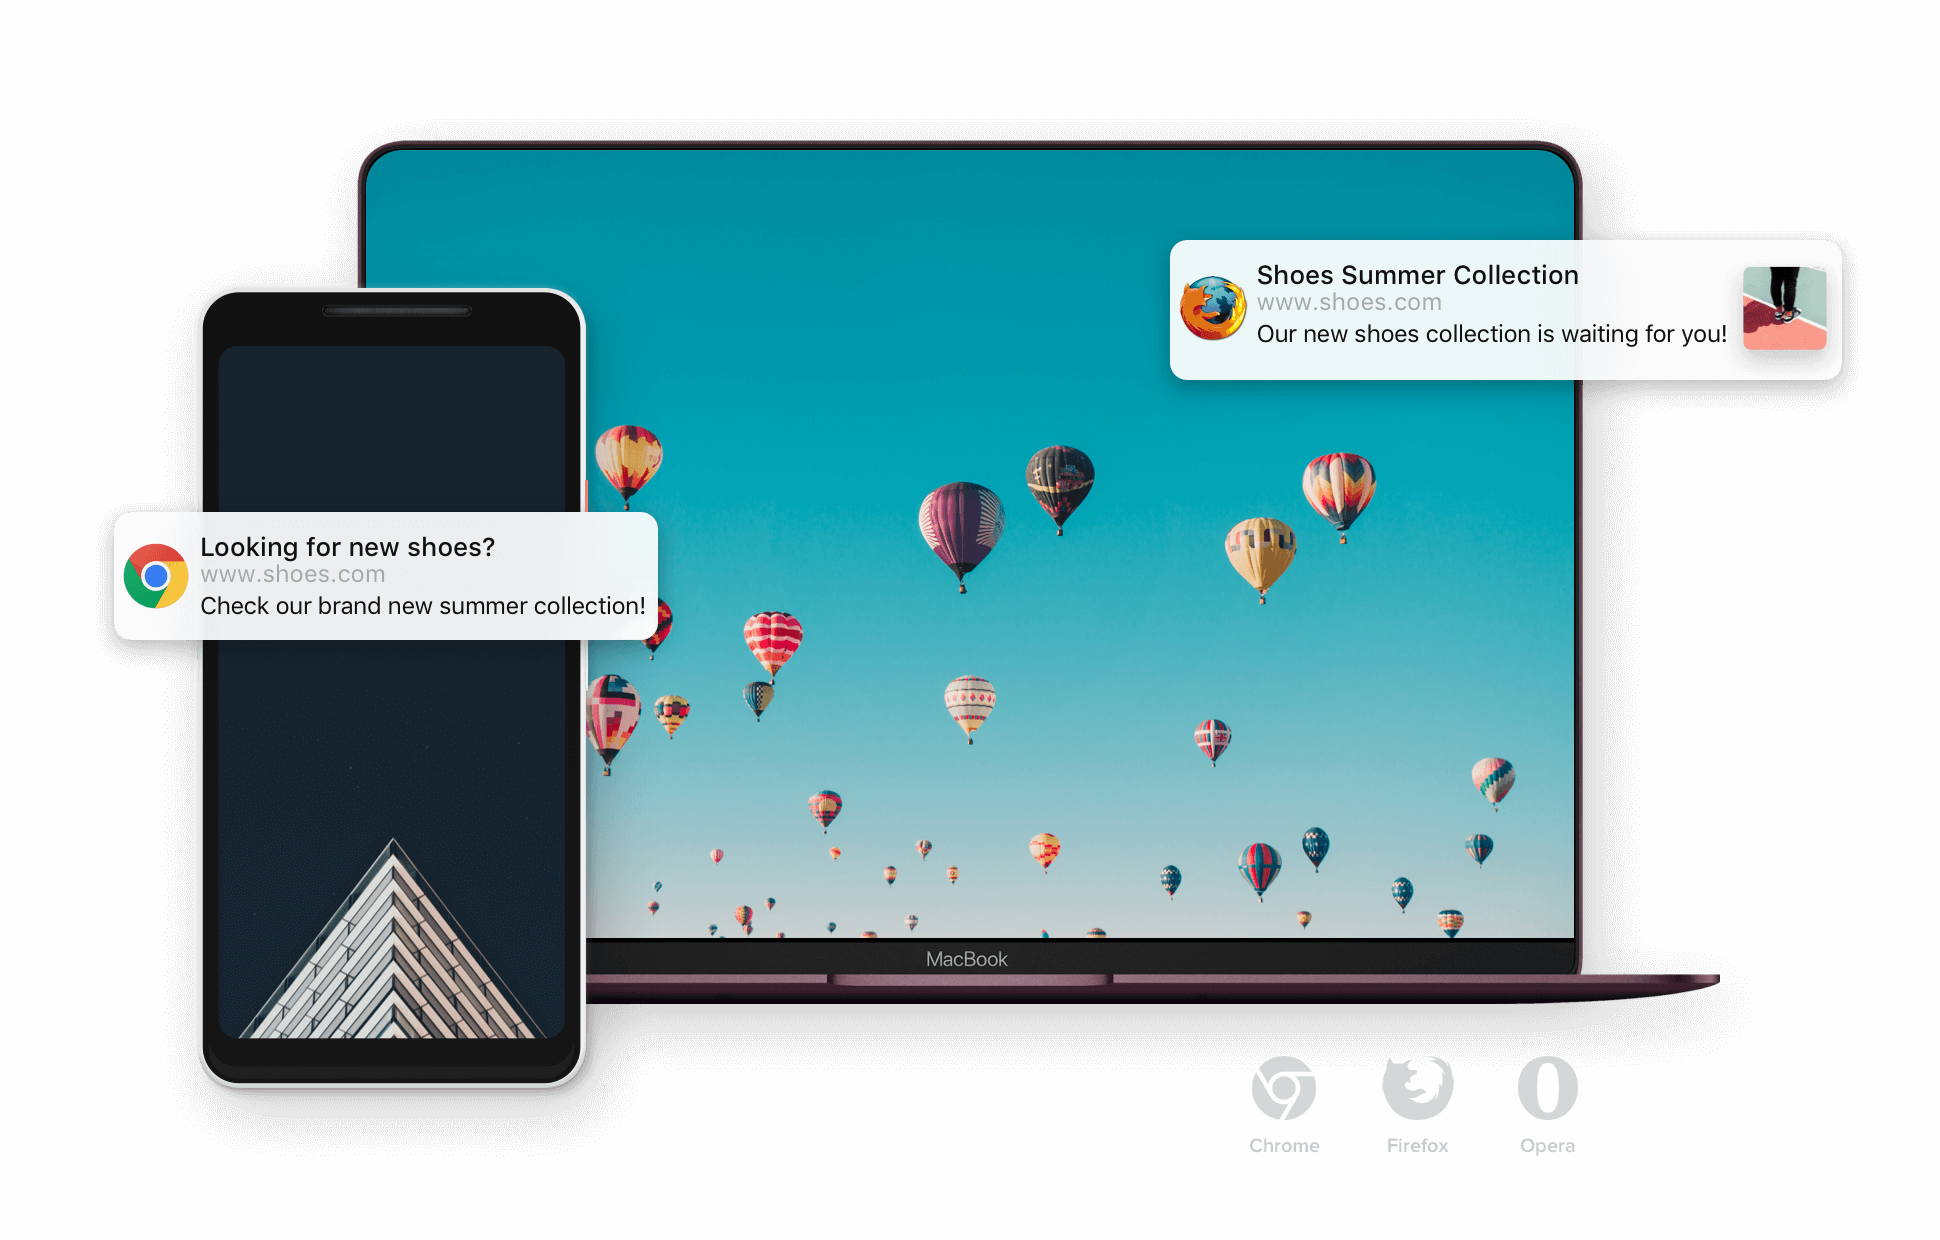
Example of Web Push Notifications
Benefits
Here are the key benefits of Web Push Notifications.
- High Visibility: Notifications appear on the user’s screen, catching their attention even if they are not on your website.
- Real-Time Updates: Deliver messages instantly to inform users about new content, promotions, or important updates.
- Enhanced Engagement: Encourage users to return to your site through personalized and relevant messages.
Journey of a Web Push Notification
To make the most of web push notifications, understand the entire process from start to finish. It starts when a user subscribes and ends when they interact with your message. Knowing this process helps ensure timely, relevant, and engaging notifications. Here’s a simple overview of how a web push notification gets to your users and what happens at each step.
- A user visits your website and clicks the Allow button to subscribe to web push notifications.
- You create a web push notification message in the Netcore CE dashboard, defining the content and target audience.
- The web push is sent to the user’s browser.
- The user receives the notification on their desktop or mobile screen, even if they are not browsing your site.
- The user clicks on the notification, which directs them back to your website or a specific page.
Browser Support for Browser Push Notifications
With our comprehensive support, you can ensure your push notifications reach users across various browsers. The table below lists the browsers and versions supporting Browser Push Notifications.
| DEVICE | OS | BROWSER |
|---|---|---|
| Mobile | Android | Chrome 50+, Firefox 50+ |
| Tablet | Android | Chrome 50+, Firefox 50+ |
| Windows | Chrome 50+, Firefox 50+ | |
| Desktop | Windows | Chrome 50+, Firefox 50+ |
| Linux | Chrome 50+, Firefox 50+ | |
| Mac OS | Safari 9.1 +, Chrome, Firefox |
Anatomy of a Web Push Notification
To create effective web push notifications, it's crucial to understand their key components. Each element plays a role in making the notification engaging and functional.

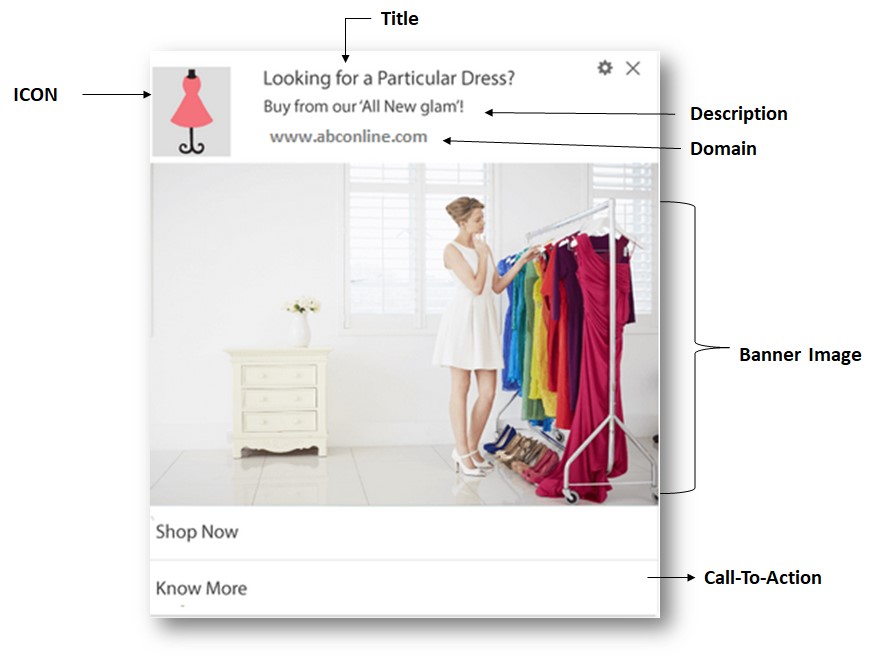
Anatomy of a Web Push Notification
Refer to the table to know the components of a web push notification and their description.
| Content | Description |
|---|---|
| Title | The main heading of the notification. |
| Body | The core content or description of the notification. |
| Icon | An image representing your brand or message. Recommended size: 100x100 pixels, less than 20KB. |
| Banner Image | Optional visual that enhances the message. Recommended dimensions: 360x240 pixels, less than 240KB. |
| URL | The link users are directed to when they click the notification. |
| Call to Action | Optional buttons within the notification for direct actions. You can include up to 2 Call to Action Buttons. |
| Domain | Shows the website domain from which the notification originated, helping users identify the source. |
Prerequisite
You need to integrate your website with Netcore CE.
Enable Web Push Notifications
Follow these steps to Web Push Notifications for your website:
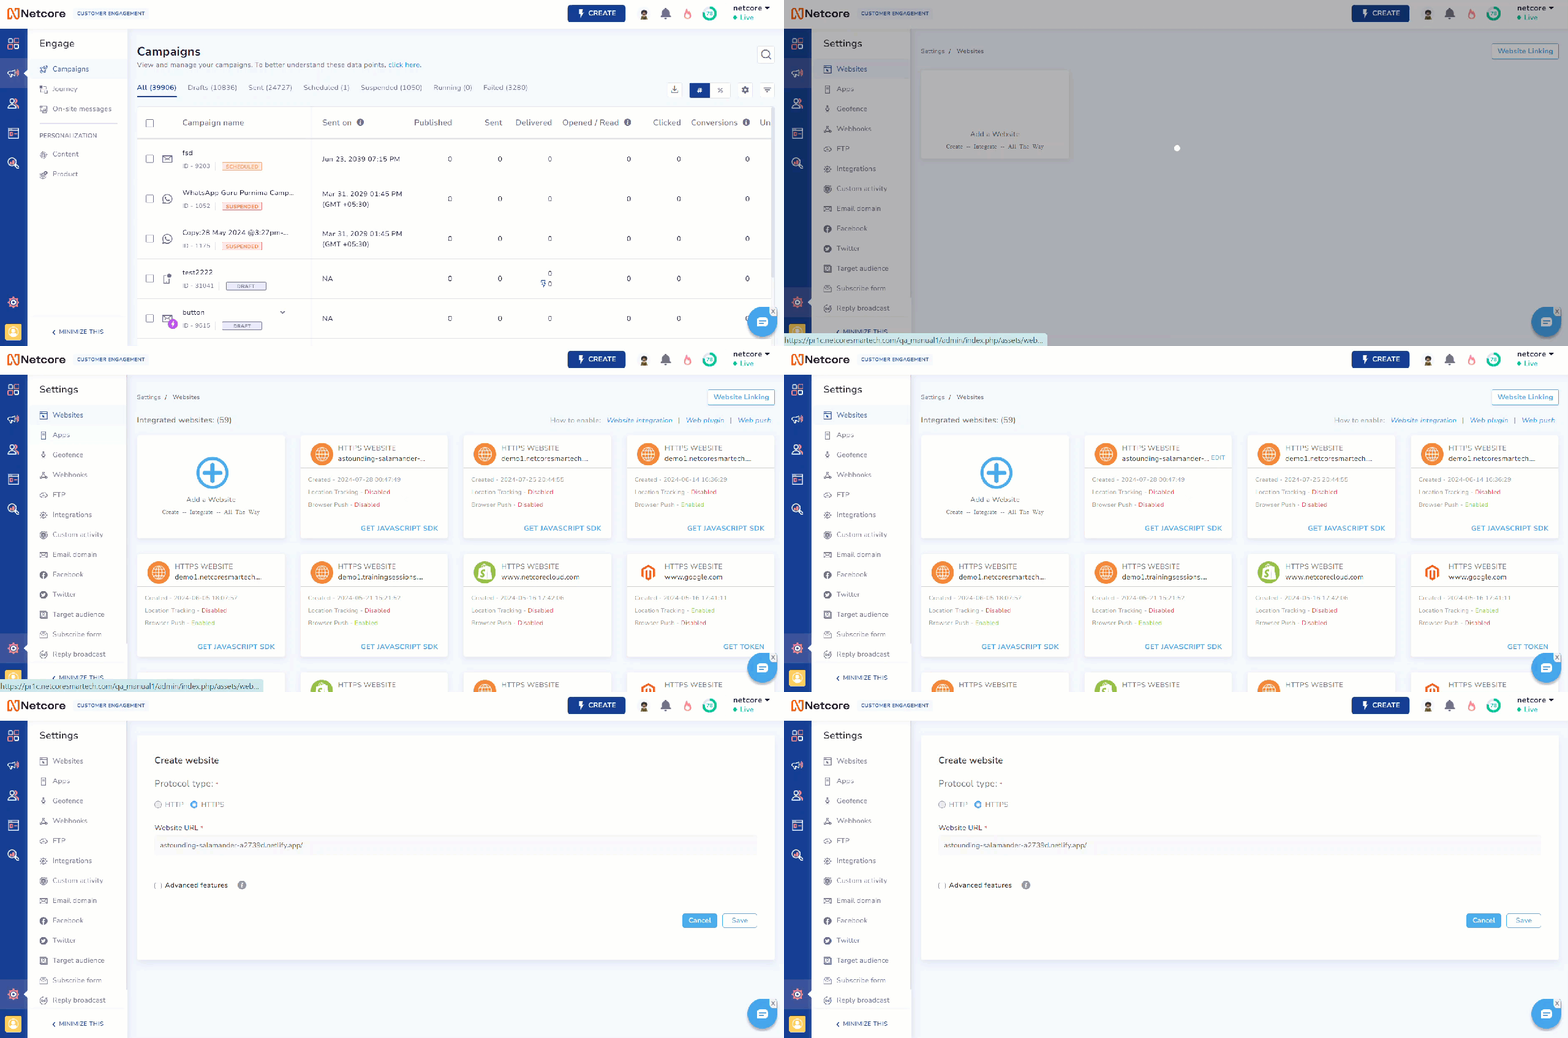
- Log in to the Netcore CE dashboard.
- Navigate to Settings> Website.
- Click Edit for the website where you want to enable Web Push Notifications.

Enable Web Push Notifications
For HTTP Domains: Web Push Notifications require HTTPS, so you must first configure your site to use HTTPS. Add a subdomain to your domain settings. Complete the necessary setup to secure your site with HTTPS.
For HTTPS Domains: Enable Browser Push Notifications without adding a subdomain. Check the Advanced Features box, then toggle the Browser Push Notification option to enable it. Once you turn it on, the following options appear.
| Browser | Description |
|---|---|
| Web Push for Chrome/Firefox | Sends web push notifications to users on Chrome and Firefox browsers. Supports both single and two-step opt-in processes. |
| Web Push for Safari | Sends web push notifications to users on the Safari browser |
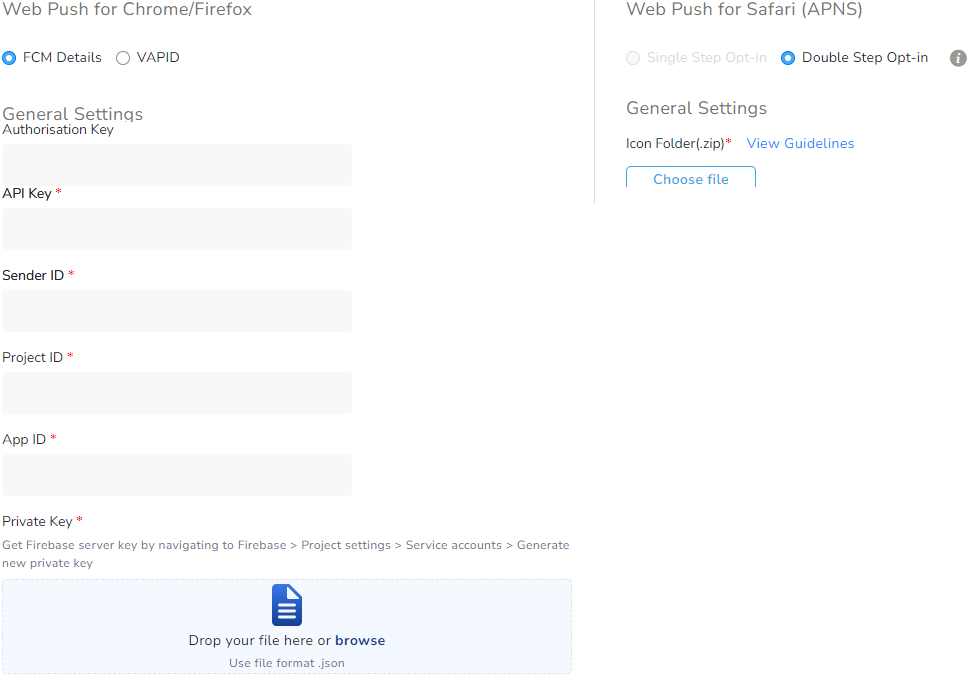
- Provide the FCM details to enable Web Push Notifications in Chrome and Firefox.

Set up Web Push for Chrome/ Firefox or Safari browser
Refer to the table to learn more about the options.
| Options | Description |
|---|---|
| Authorization Key | Set the key used to authorize web push notifications. |
| API Key | Identify and authenticate your API requests. |
| Sender ID | Specify the ID of the message sender for notifications. |
| Project ID | Identify your project with this ID. |
| App ID | Uniquely identify your application for notification purposes. |
Web Push for Safari
Refer to the following document to set up web push notifications for your website on Safari.
- Upload the Firebase Private Key. Upload the Firebase Private Key file. This credential authenticates Netcore's server with Google's Firebase Cloud Messaging (FCM) service, allowing secure push notifications to be sent to your subscribed users.
Note
Get the Firebase server key by navigating to Firebase > Project settings > Service accounts > Generate new private key. Refer to Firebase Cloud Messaging documentation for more details.
With web push notifications enabled, choose between Single Opt-In or Double Opt-In.
Single Opt-In
Single opt-in allows users to subscribe to web push notifications with a single click. Upon clicking the subscription promptly, users immediately opt in and start receiving notifications without any additional confirmation. Refer to the table below for information about the options when editing the double opt-in templates.
| Option | Description |
|---|---|
| Overlay | Adds a background color behind the opt-in form. |
| Overlay Text | Adds text on the background color for extra context. |
Double Opt-In
Double opt-in requires users to confirm their subscription to web push notifications. After clicking the initial subscription prompt, users receive a follow-up message or email to verify their intent. Only after this second confirmation are they fully subscribed and can receive notifications.
You can edit the two templates by selecting the double opt-in option. For information about the options, refer to the table below.
| Option | Description |
|---|---|
| Layout | Allows you to arrange the elements of the opt-in. |
| Image | Allows you to upload or select an image displayed in the opt-in. |
| Text | Allows you to customize the message content shown to users. |
| Background | Allows you to change the background color of the opt-in. |
| Call to Action | Allows you to customize the button or link that prompts users to take action, such as subscribing or accepting notifications. |
Opt-in Rules
Opt-in rules let you target users for subscription prompts based on their behavior. Setting these rules allows you to customize when and how users see subscription requests. Refer to the table below to learn more about Opt-in rules.
| Features | Description |
|---|---|
| Page URL | Specify web pages to display the subscription prompt, using All and Or conditions. |
| Scroll percentage | Show the subscription prompt after the user scrolls a certain percentage. |
| Time spent on a page | Show the subscription prompt after the user spends a set amount of time on the page. |
| Time spent on the website | Show the subscription prompt after the user spends a set amount of time on the website. |
| Repeat subscription prompt | Set the interval for repeating the subscription prompt if the user hasn't subscribed yet. |
With web push notifications enabled, you can create your web push notifications.
Updated about 1 year ago
