
Integrate Android Application
Integrate your android application with the Netcore CE dashboard.
Android app integration simplifies onboarding process and integrates app features. This allows you to integrate your app features and validate their functioning simultaneously.
The integration flow is categorized into four parts as follows:
- Setup - Create your app with basic information.
- Integrate - Integrate your base SDK, enabling in-app messages and system event tracking.
- Add device- Add 'Test devices' to validate the correct real-time integration of all the features.
- Features - Here, you can add and test all the available features for your app.
Once you log in to the Netcore CE dashboard, click on the 'Settings' icon in the down-left corner of the panel. Here you will find an 'Apps' option which is the listing page of all your app assets.
You can click the 'ADD NEW' button to start integrating your App!
App Integration
A window would open up where you can select target operating system for your app - Android or iOS.
NOTE: Currently, the new DIY flow is only available for Android.
Setup
Android App Integration
App name - You can define a name for your app.
App platform - Choose the platform on which your app is built (Android or iOS). Please note that once you select and save the platform, it cannot be changed later.
Clicking on 'Next' will save the Setup section and move to the next step.
Integrate
Basic Integration for Netcore SDK
In this section, your unique APP ID will be generated.
- Depending on the app platform selection, the steps to integrate the basic SDK would be listed along with the code snippets.
- As you complete each step, make sure to check the 'Mark as done' boxes to confirm all the steps are followed and implemented correctly.
NOTE : Once you have checked on 'Mark as done' and moved to the next step, you cannot uncheck them.
- Integrate the basic SDK would enable features such as In-app messages and System events tracking automatically.
Native - Click here for Native integration steps
React native - Click here for React Native integration steps
Cordova - Click here for Cordova integration steps
Flutter- Click here for Flutter integration steps
Clicking on 'Next' will save the Integrate section and move to the next step.
Add device
Adding a test device will enable you to validate your basic integration as well as all other features for the app.
- Clicking on the 'ADD TEST DEVICE' button would open up a drawer with steps to add a test device.
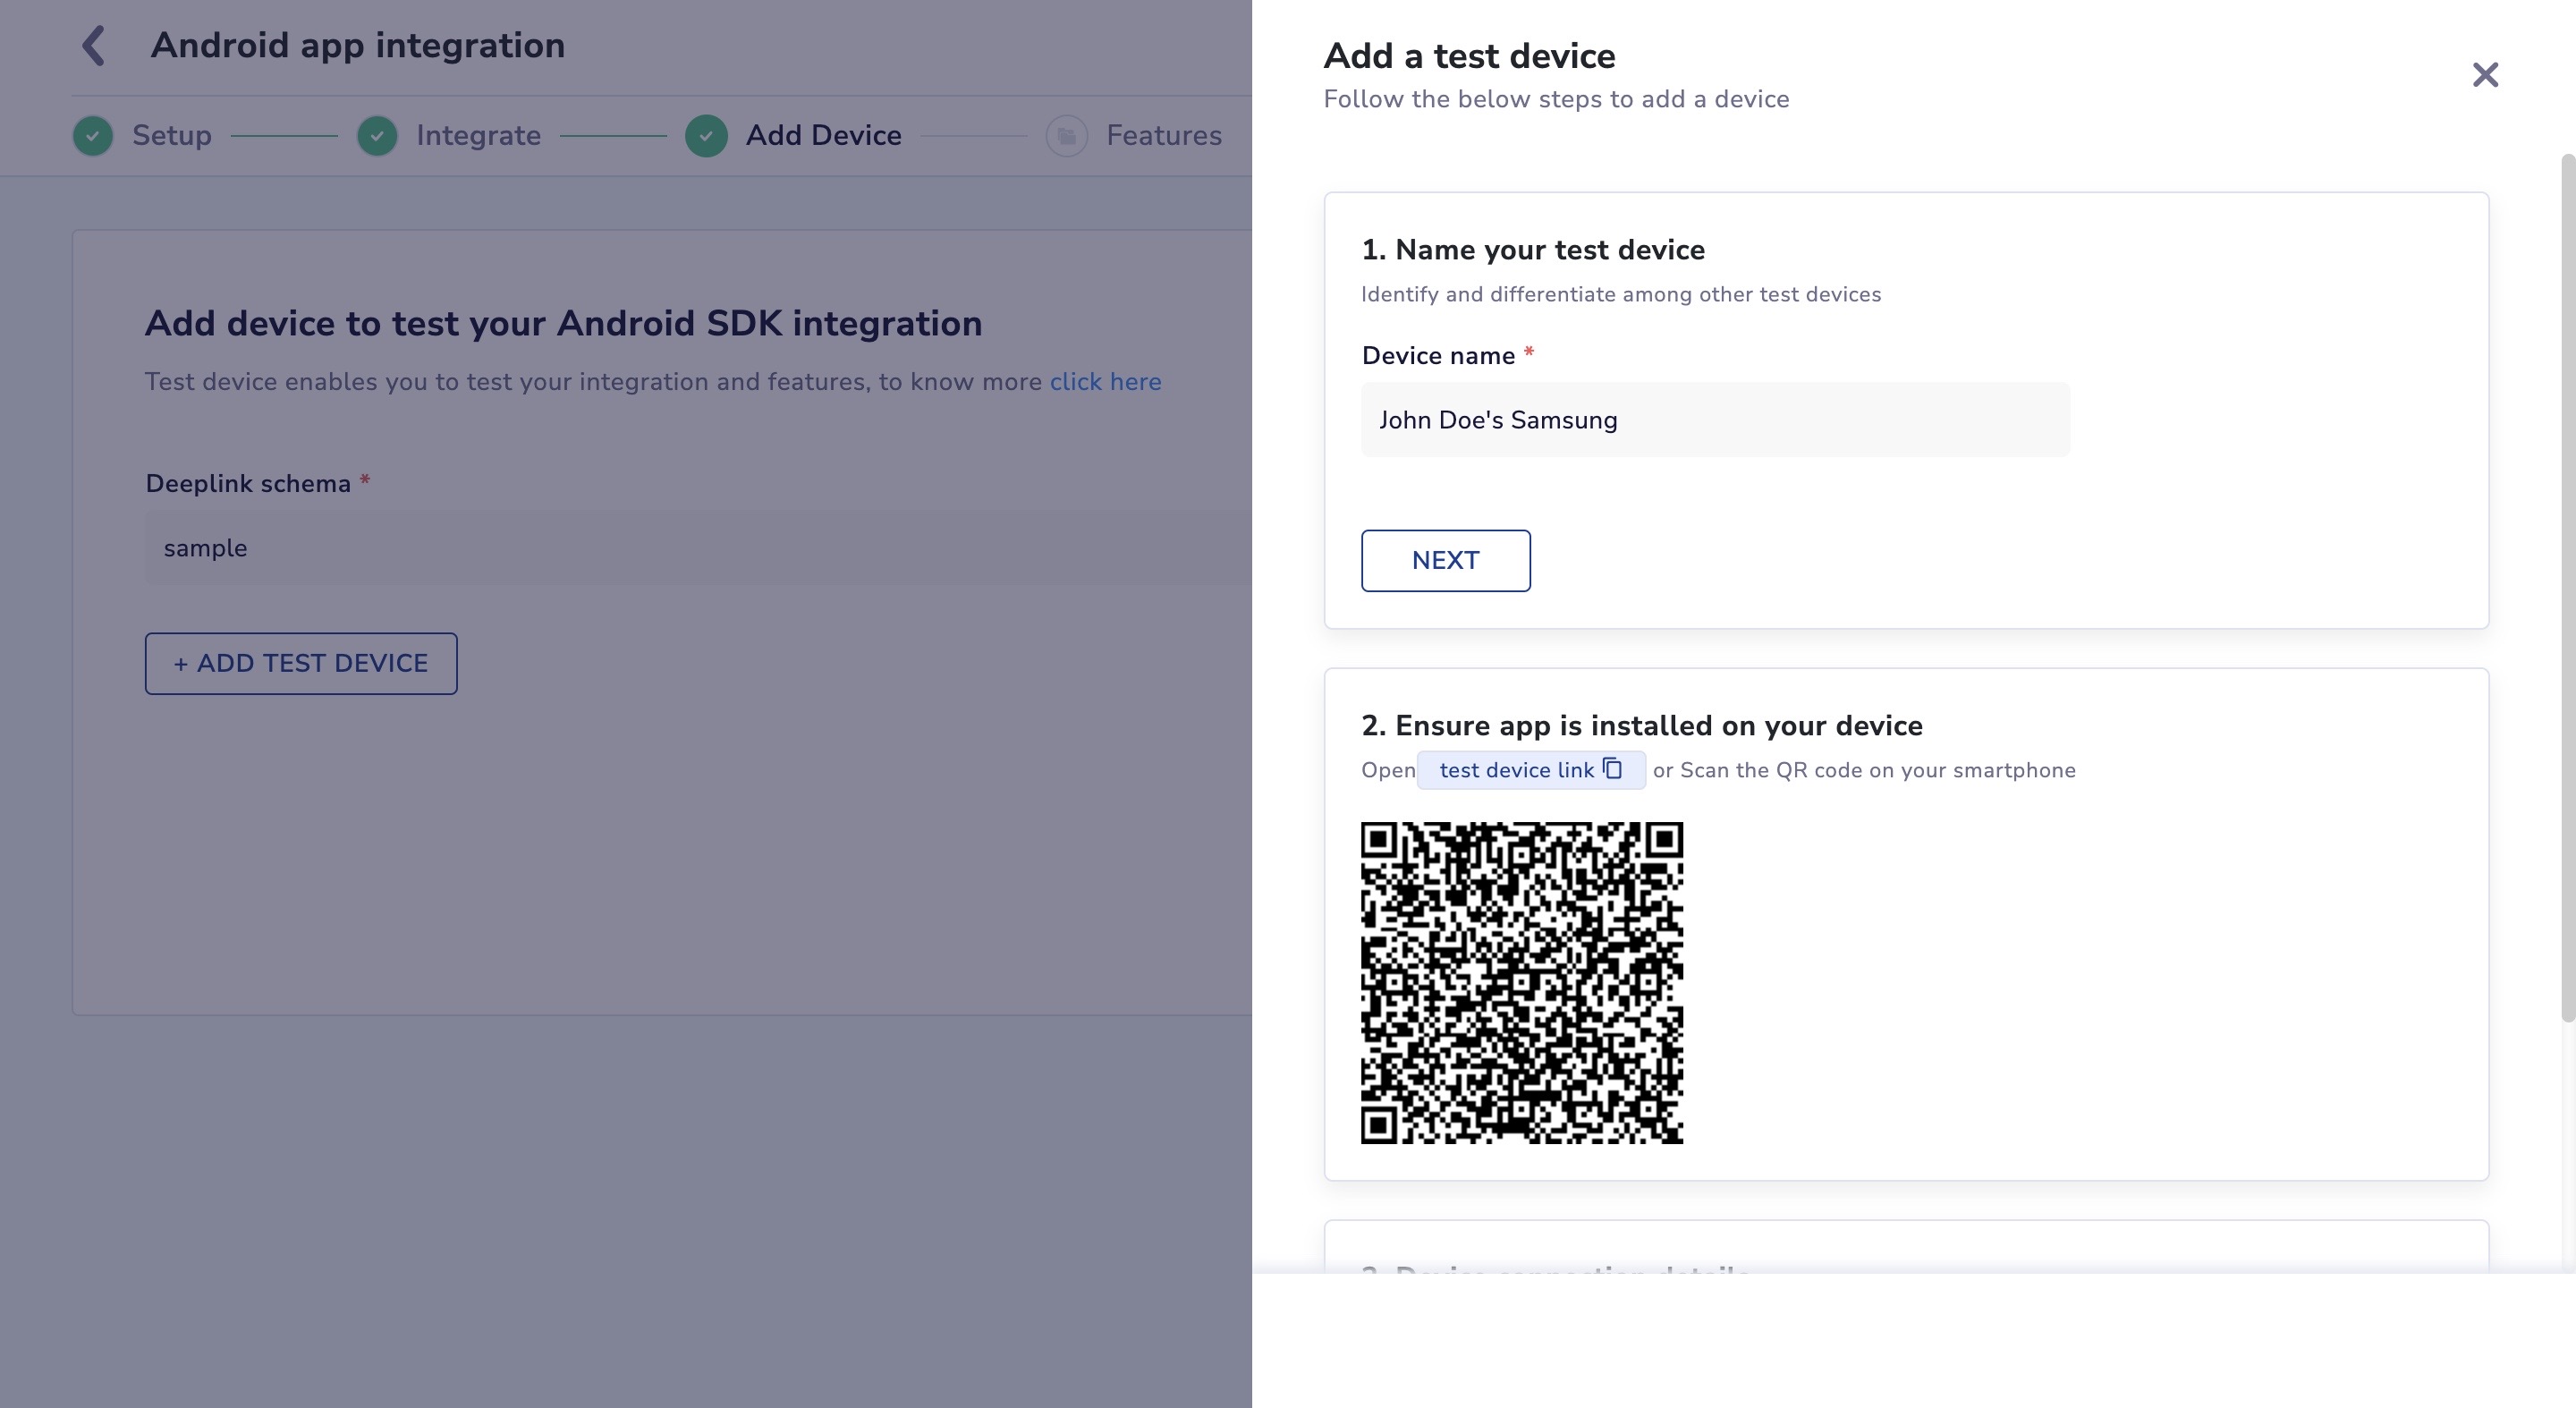
Add a Test Device
Deeplink Schema - You are required to define a custom URL scheme for pairing your device as a test device. Kindly follow the below steps to configure a custom URL scheme.
- Assign a name for your test device before proceeding.
- Click "NEXT" to generate a QR code and link. Open the link on the device you wish to use as a test device, after ensuring that the app is installed on it. Scan the QR code to proceed.
- Close and re-launch your app after scanning the code.
- A confirmation message will be displayed on the panel and on your device, indicating that the device has been added as a test device. The app and SDK version on the device will also be displayed.
- If you receive an error message, retry a few times. If the error persists, it means that the basic SDK integration was not done correctly. Check the integration steps and try again to add a test device.
- Note that adding a test device is optional. You can skip this step and move directly to the "Features" section.
Features
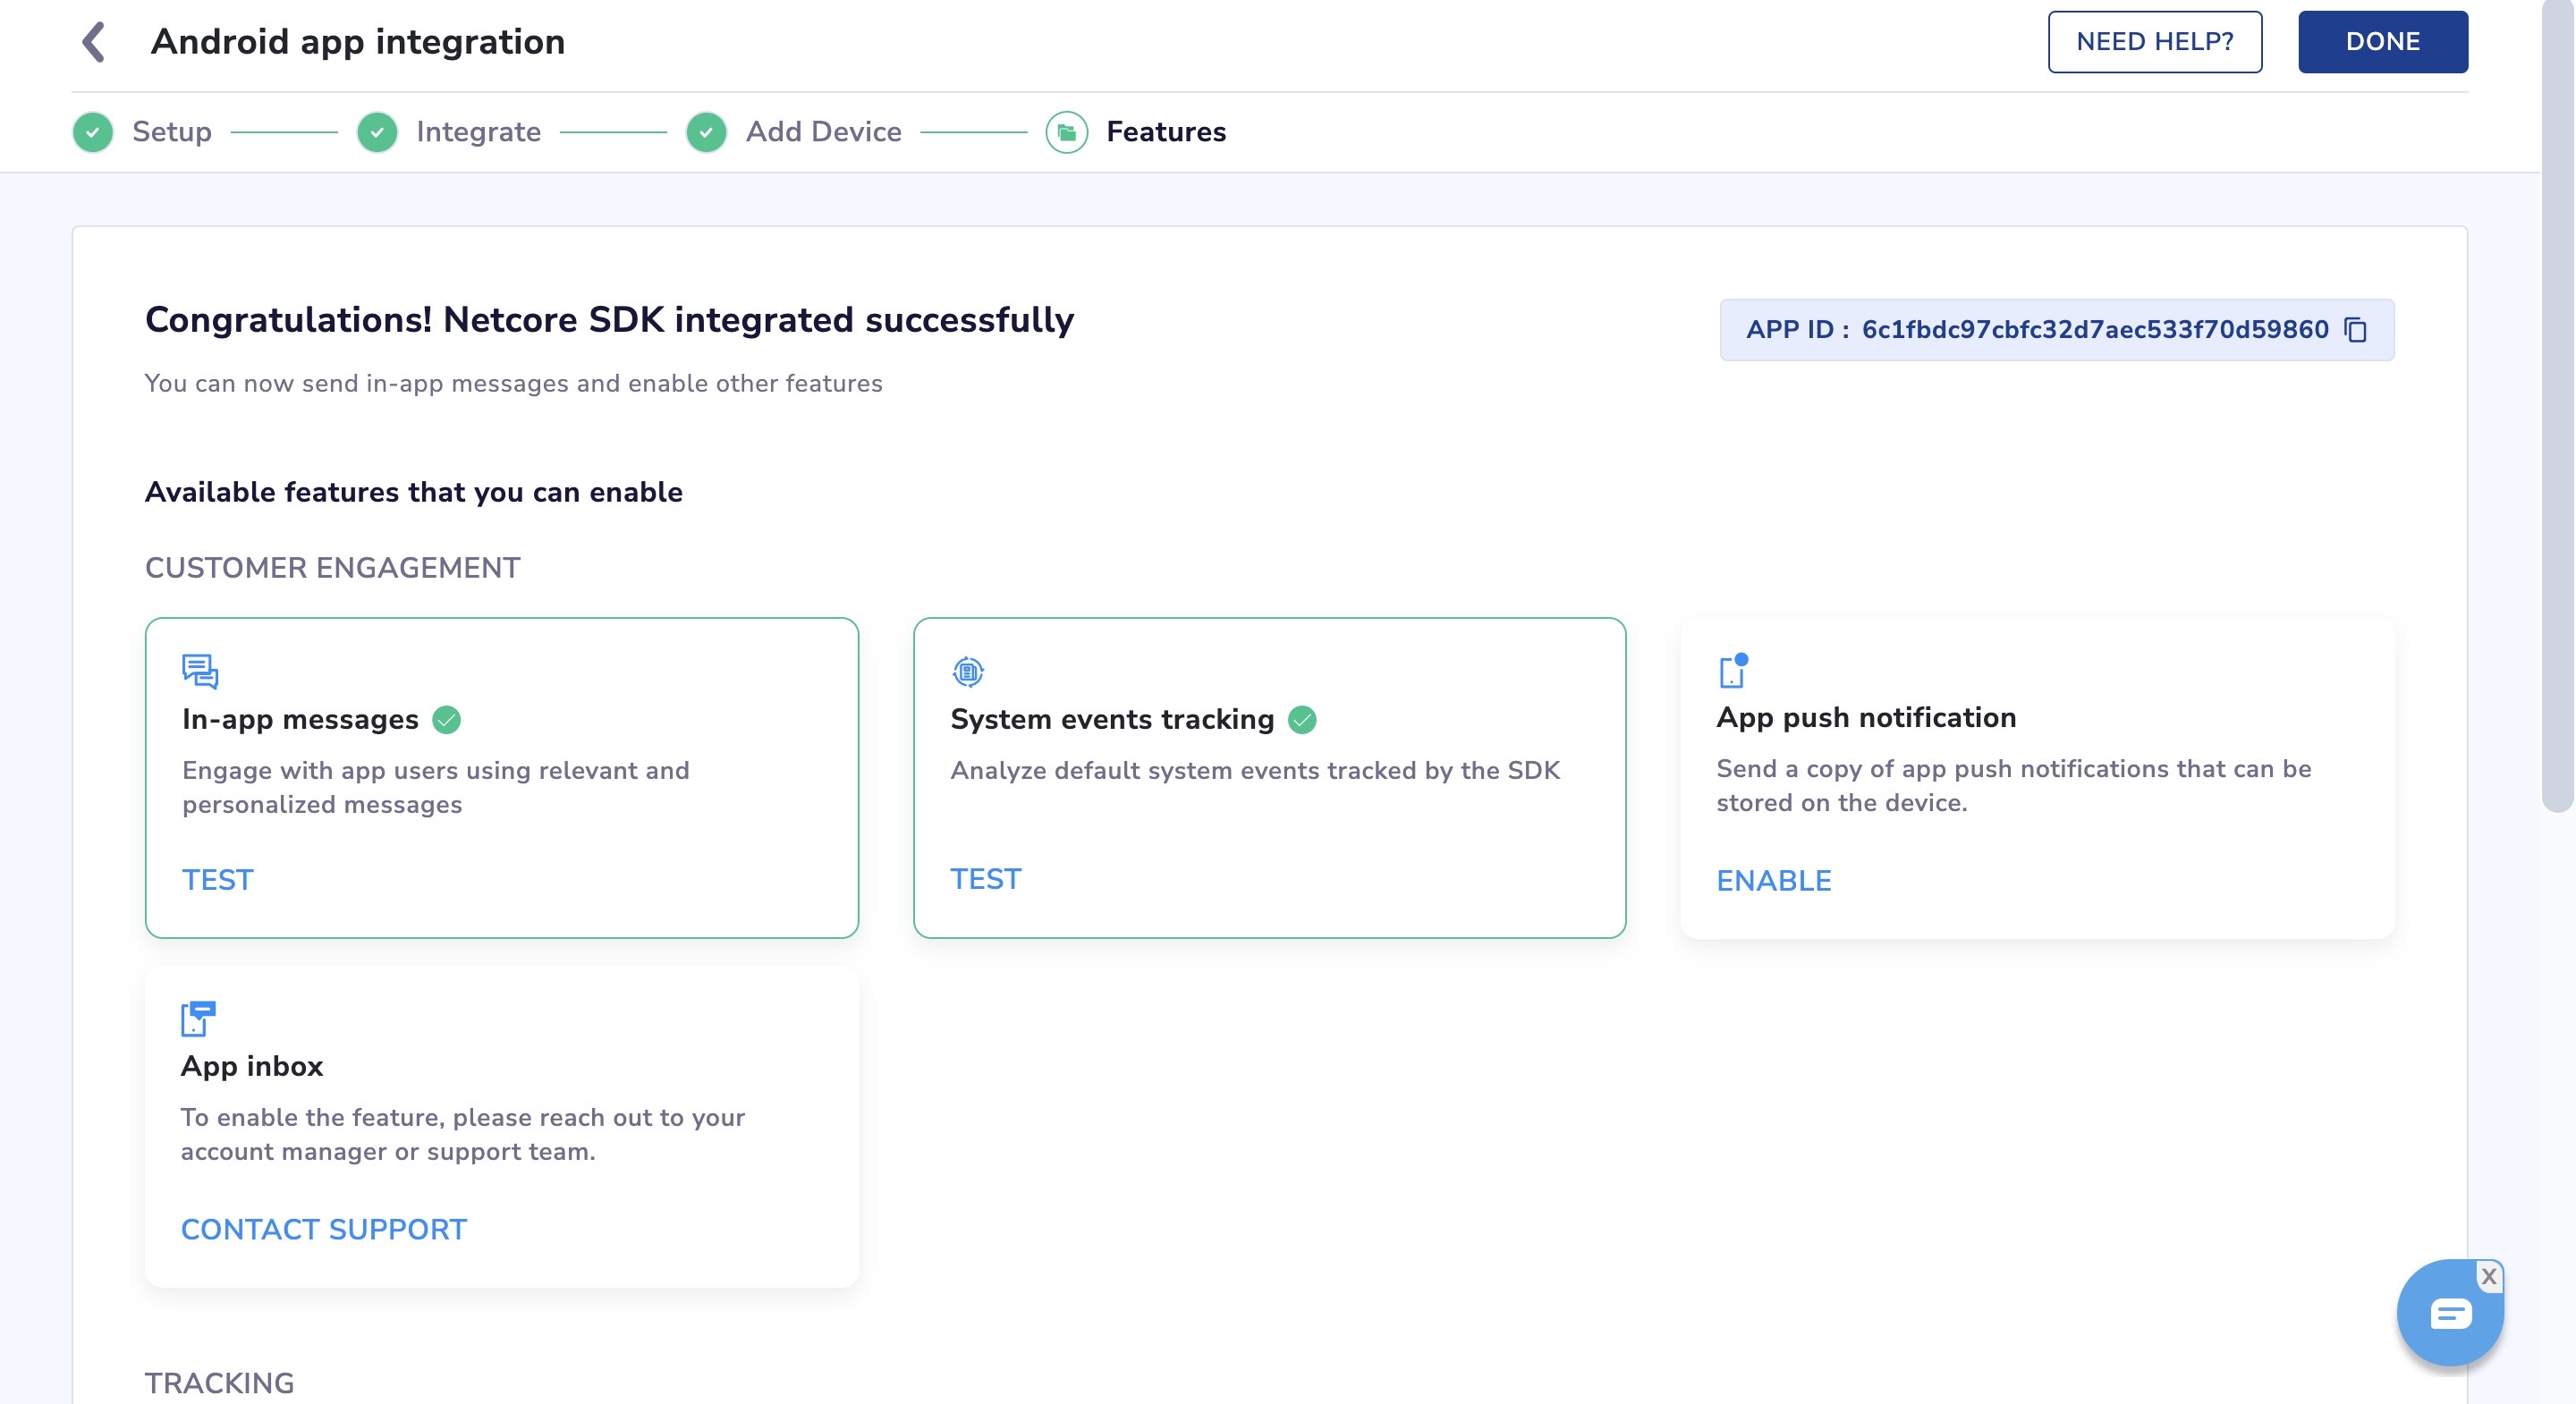
Available Features to Enable
In this section, you will be able to see all the features that are available for your app.
In-app messages and System events tracking are in 'TEST' mode as they get enabled automatically along with the base SDK integration.
You can now directly test these two features here if you have added a test device in the previous section.
In-app messages
To send a test in-app to your test device, click on 'TEST' on the in-app messages card.
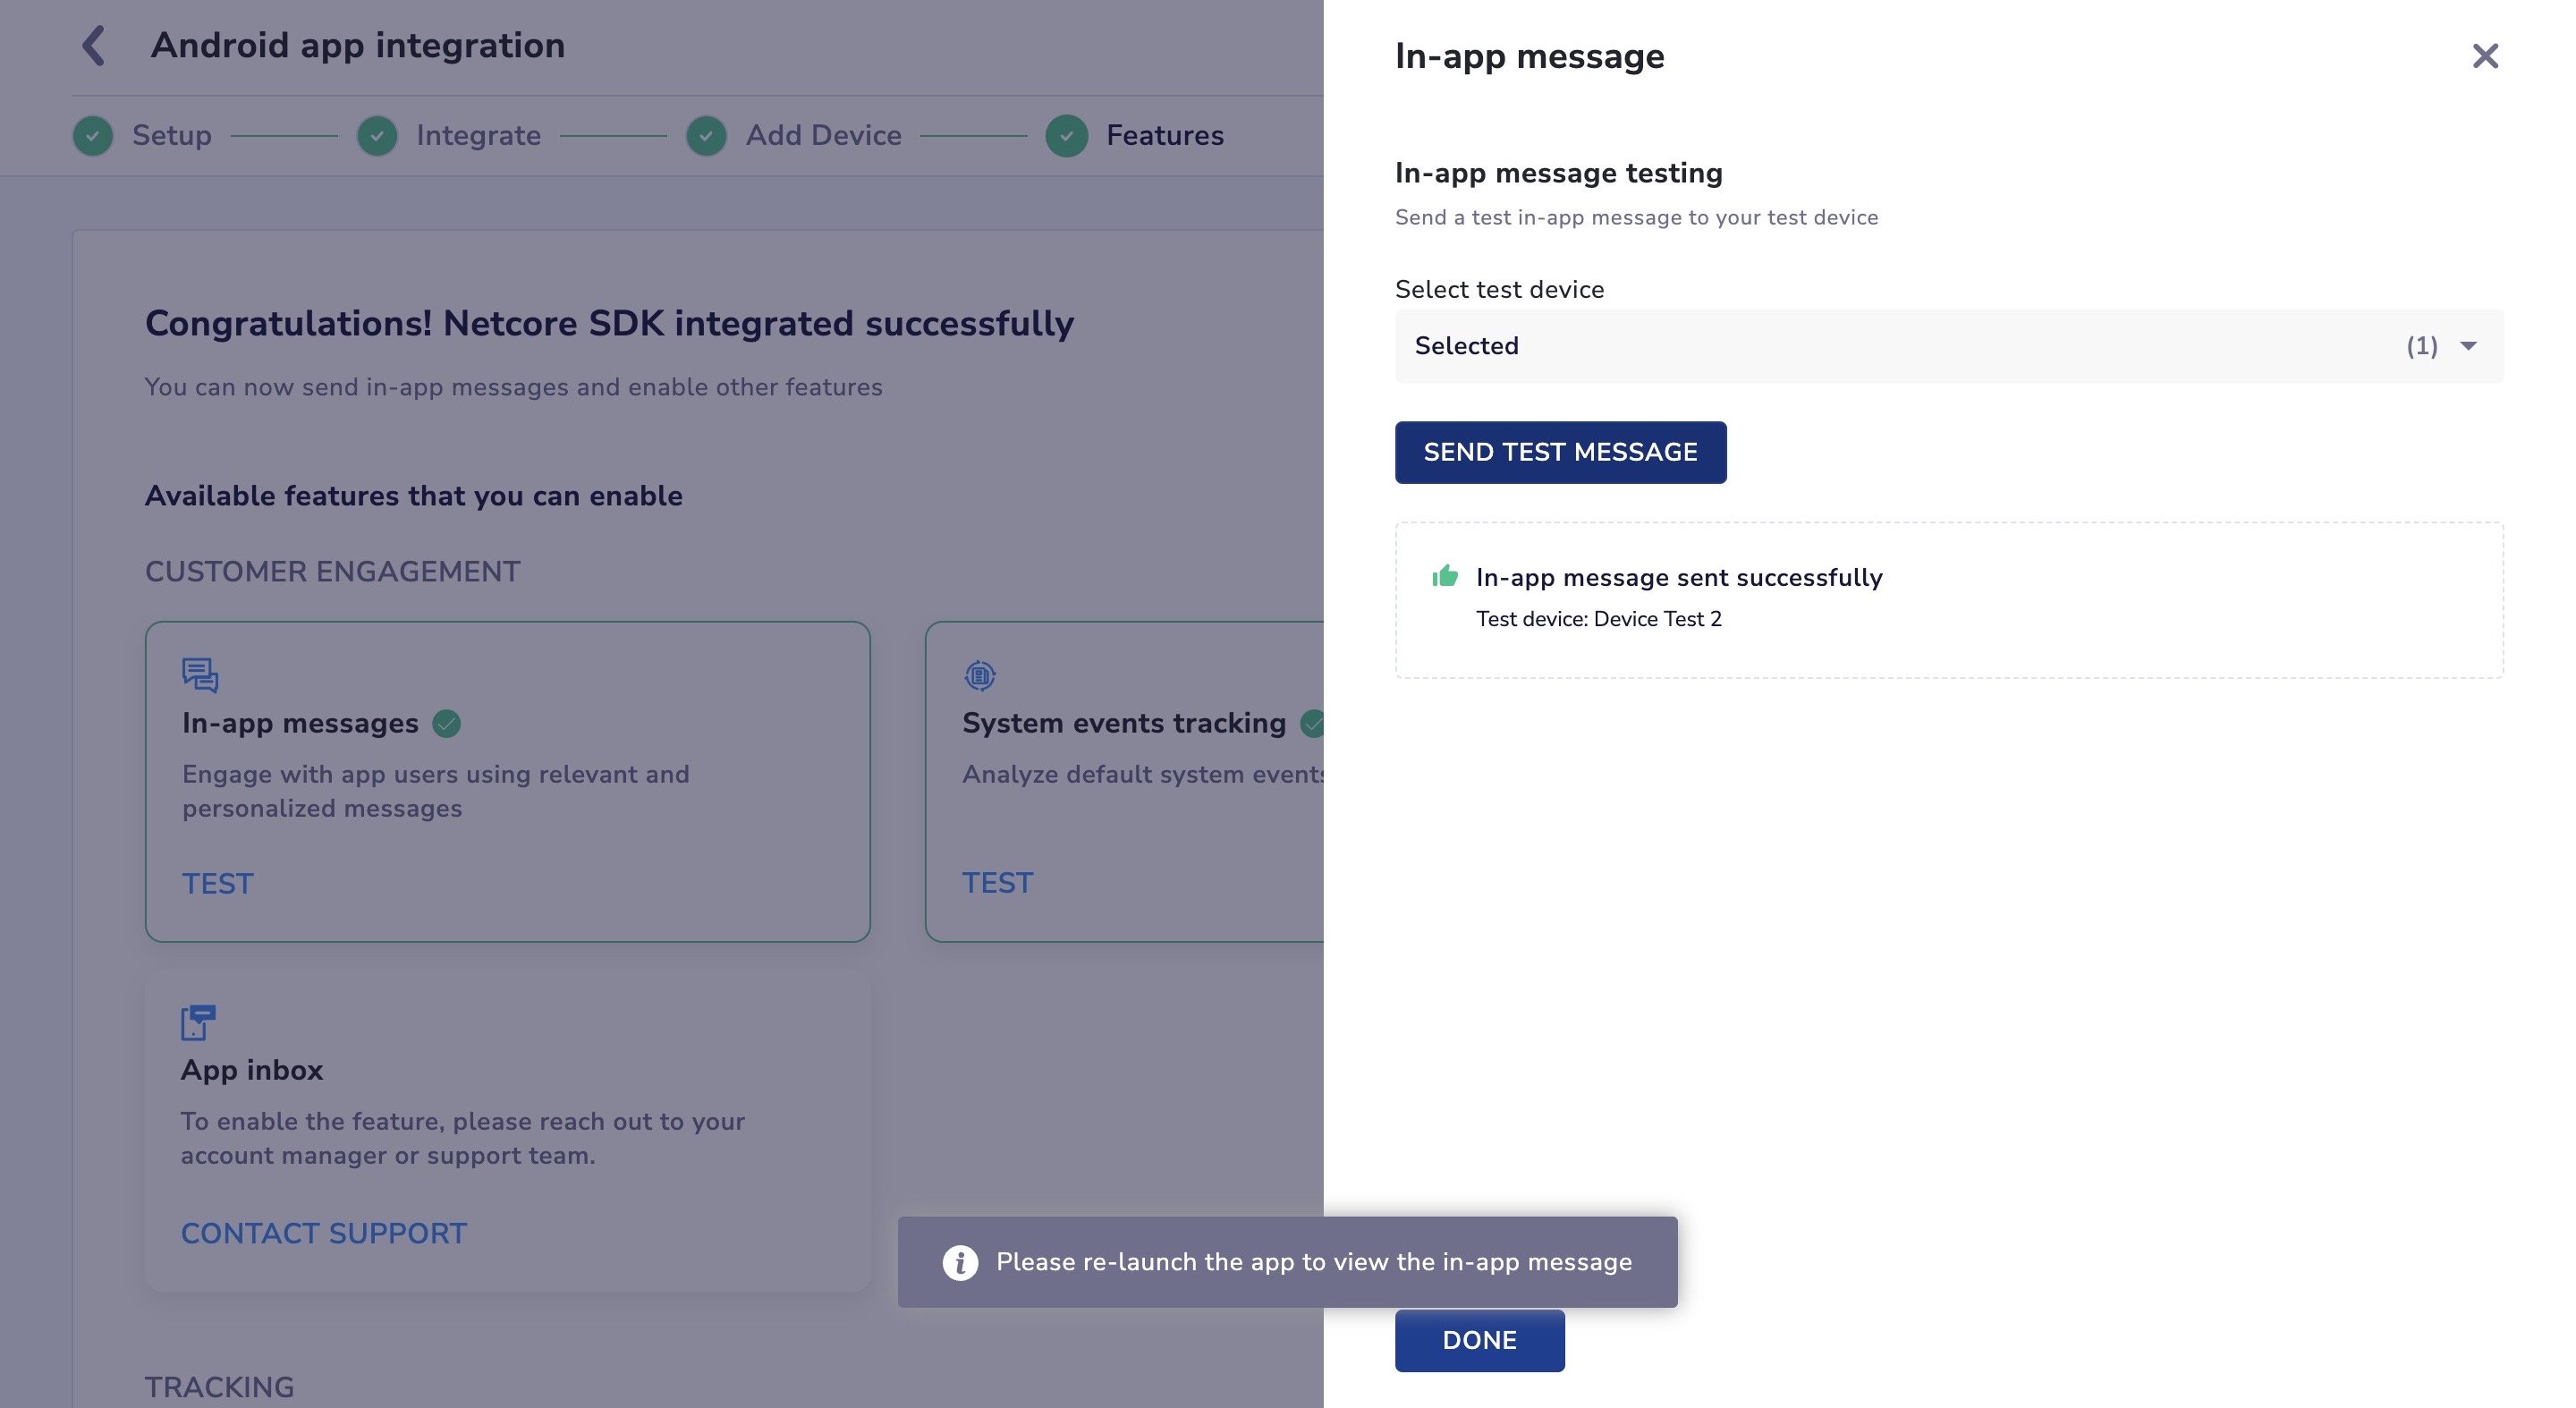
Test In-app Content
- If you have already integrated your test device then it will appear in the drop-down list in the 'Select test device' section.
- Select the devices you want to send the in-app message to and then click on 'SEND TEST MESSAGE' button.
- You will need to close and re-launch your app to receive the test in-app message. A success or failure message will also be shown on the panel.
Click here to know more about in-app messages
System events tracking
In this section, you can interact with your app and perform different system events and validate them from this section.
Here is the reference for the Sample Events Sheet by business vertical

System Event Tracking
- Simply choose the test device from the drop-down list.
- All system events perform from that device would be listed here along with the payloads under event value column. You can validate the date and time and the events performed from here to check if they are being tracked correctly.
- We also have a section which lists the events that were dropped, if any.
NOTE : Events performed by test devices would be stored in the panel for only upto 2 days from the performed date.
App push notification
To enable this feature, you will have to integrate the SmartPush SDK. Clicking on the 'ENABLE' button on this card will take you to the steps for integration.
- Integrate APN - This step has a set of 6 sub-steps required to integrate the SmartPush SDK. More details on these steps are present in the document linked above.
You need to check them all as 'Mark as done' once you have completed all of these steps to move ahead to the next step.
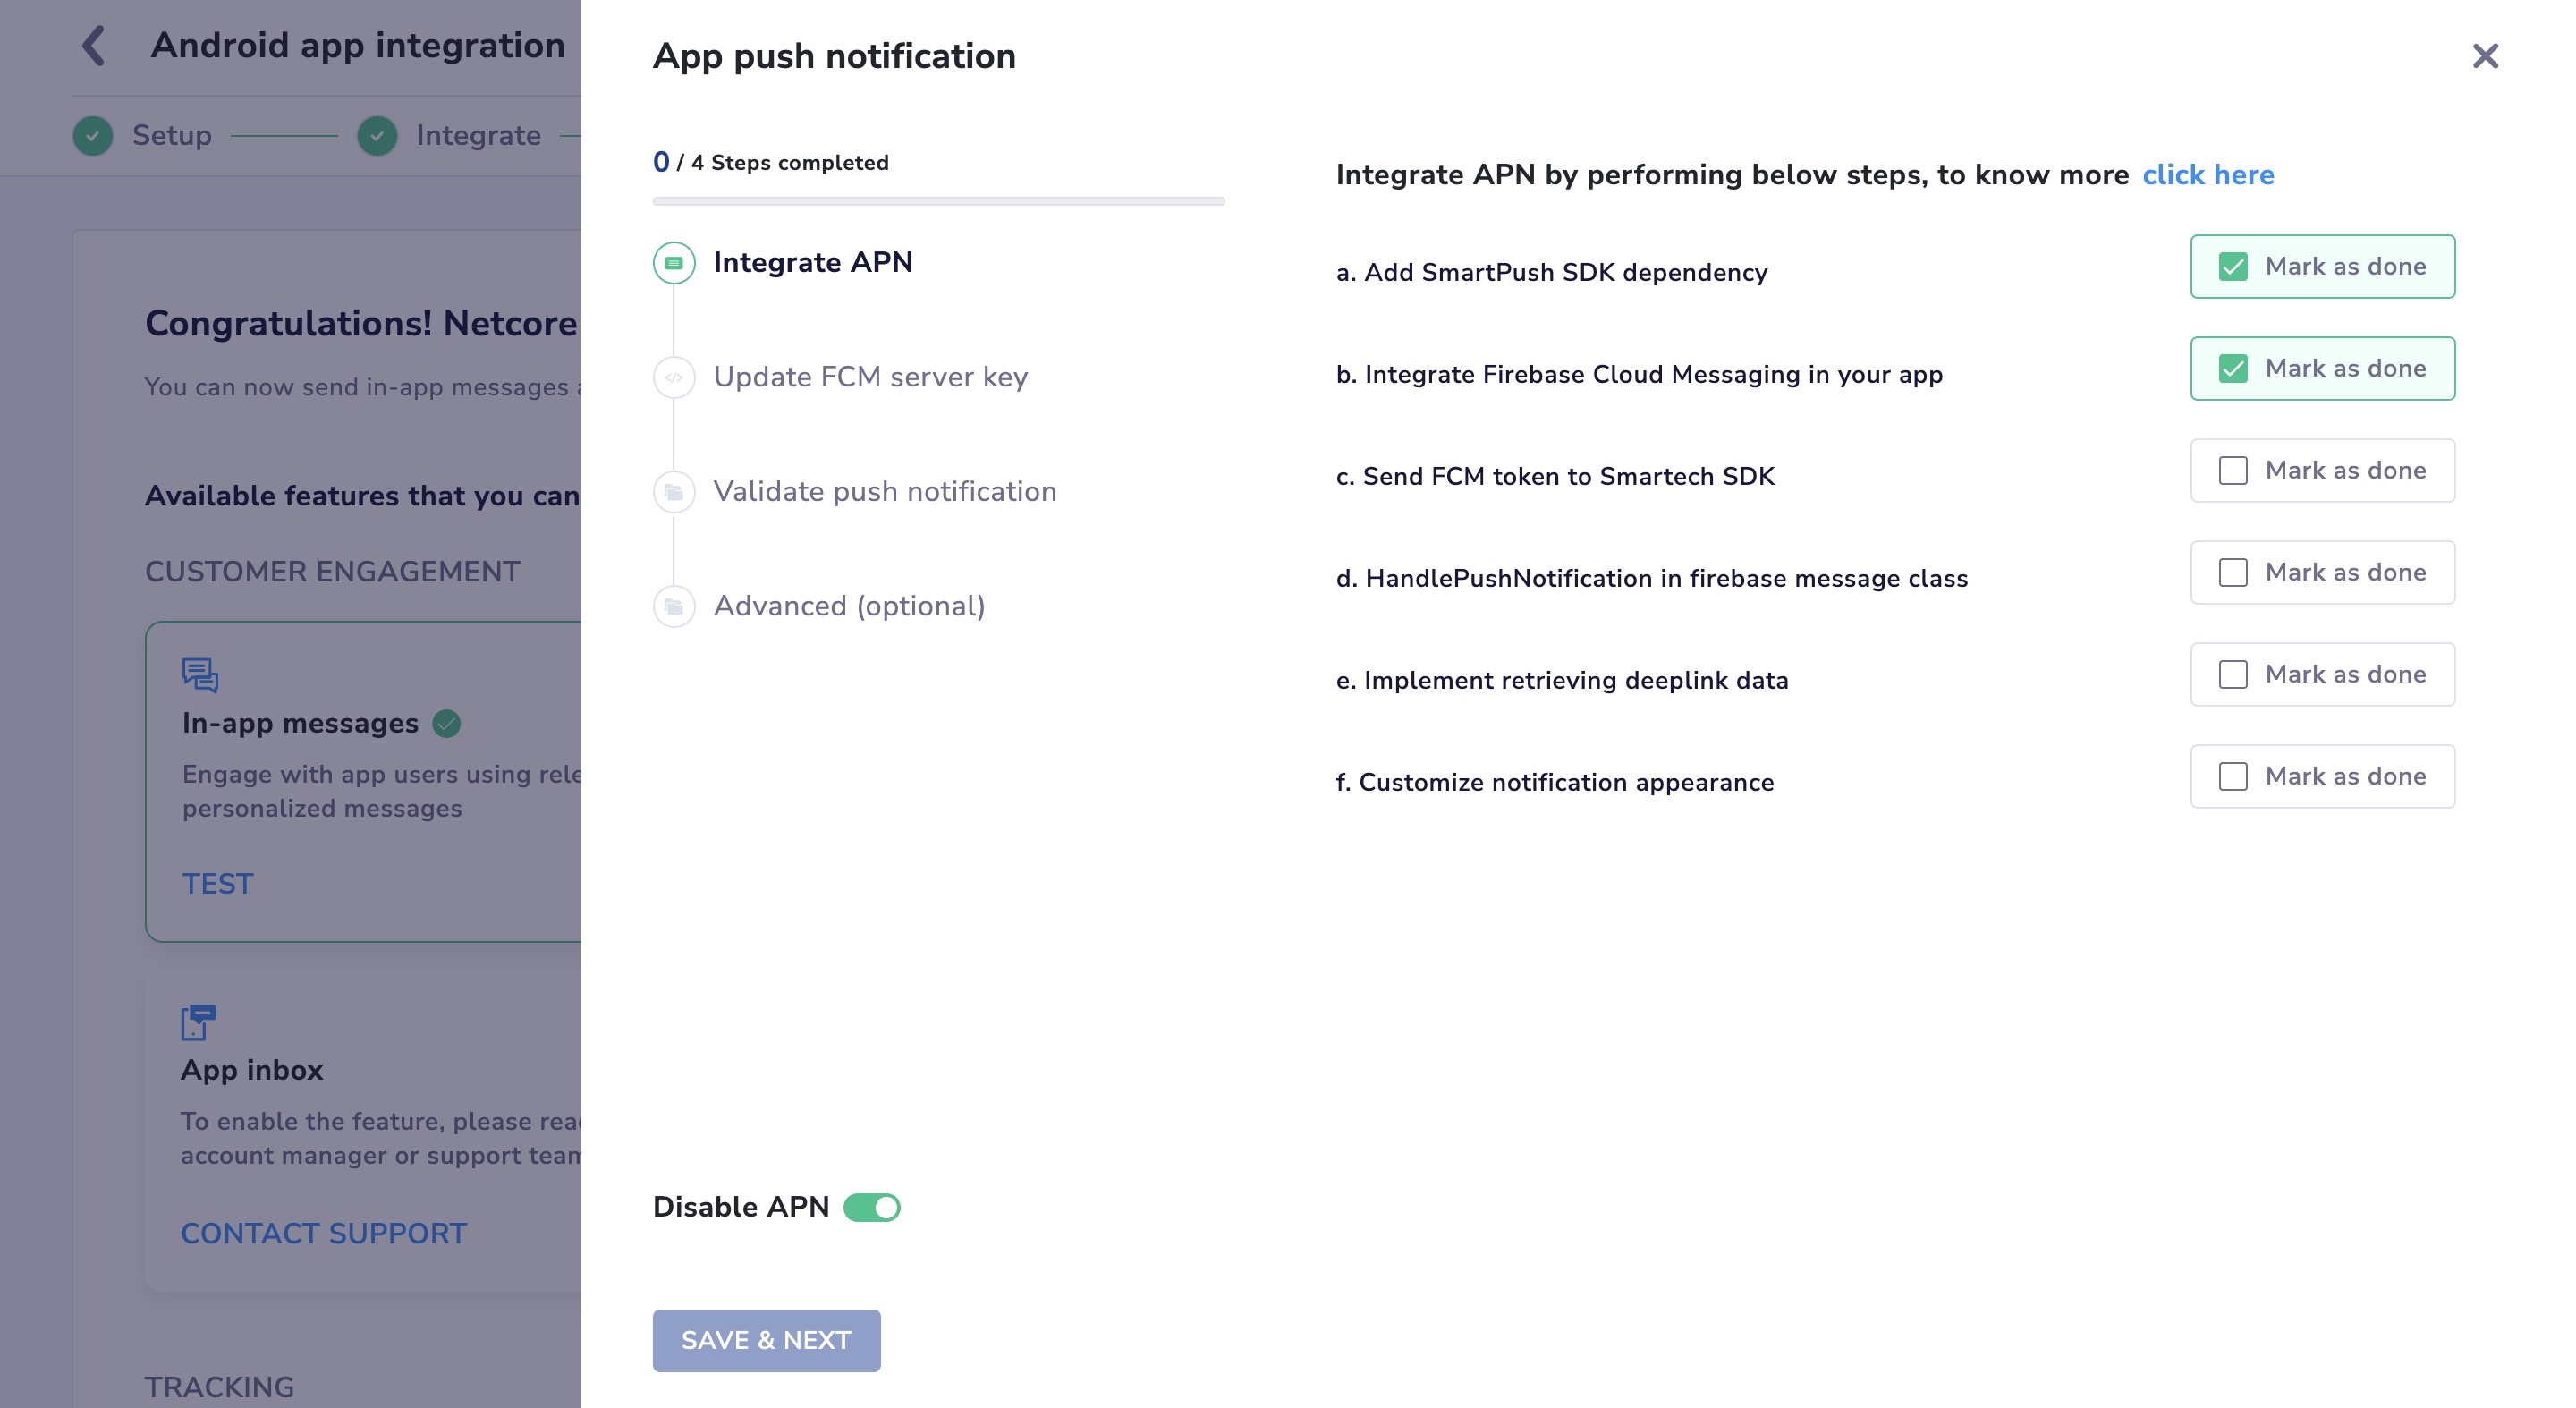
Integrate APN
- Update FCM server key- In this step you need to add your FCM server key and you can also enable the Push amplification feature if interested, it is optional.
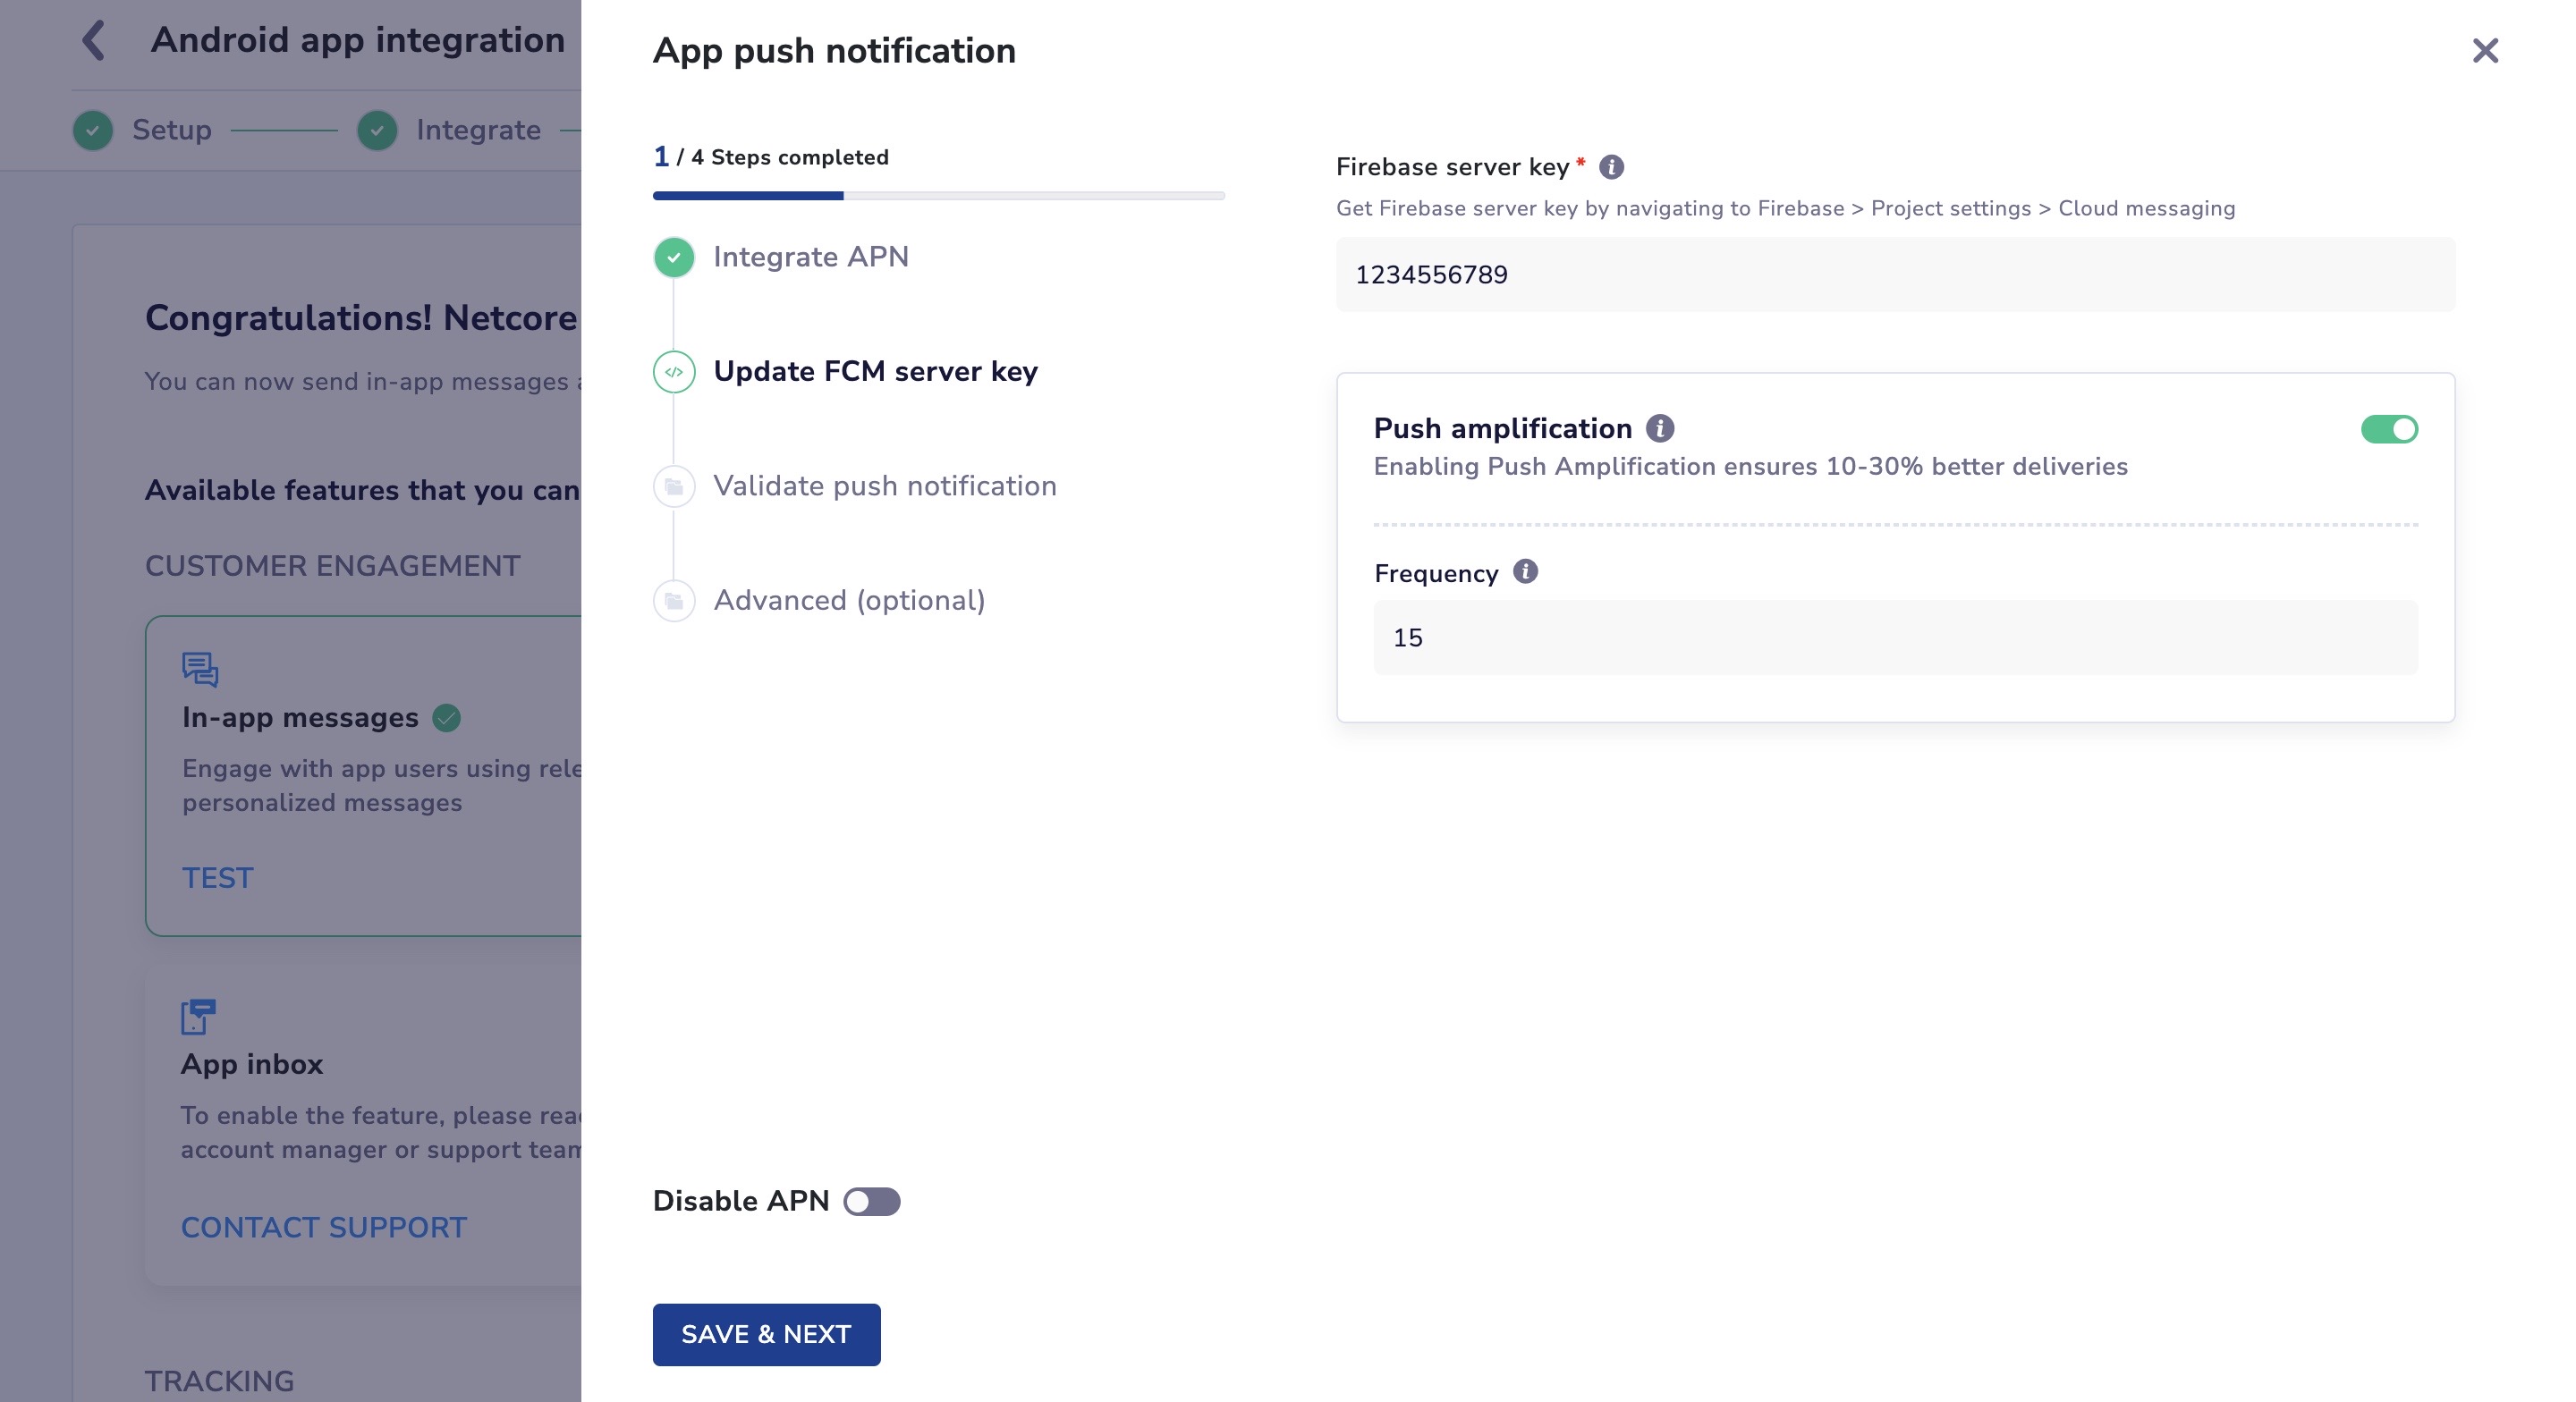
Update the FCM Server Key
- Validate push notification- Now it's time to test the integration! If you have followed all the steps until now error-free then you should be able to send an test push notification to your test devices.
- You need to select the devices from the drop-down, click on 'SEND TEST NOTIFICATION'. You should receive an app push notification on your test device and a success message on the panel.
- Advanced (optional)- This section consists of other advance features such as custom sound and the steps to enable it.
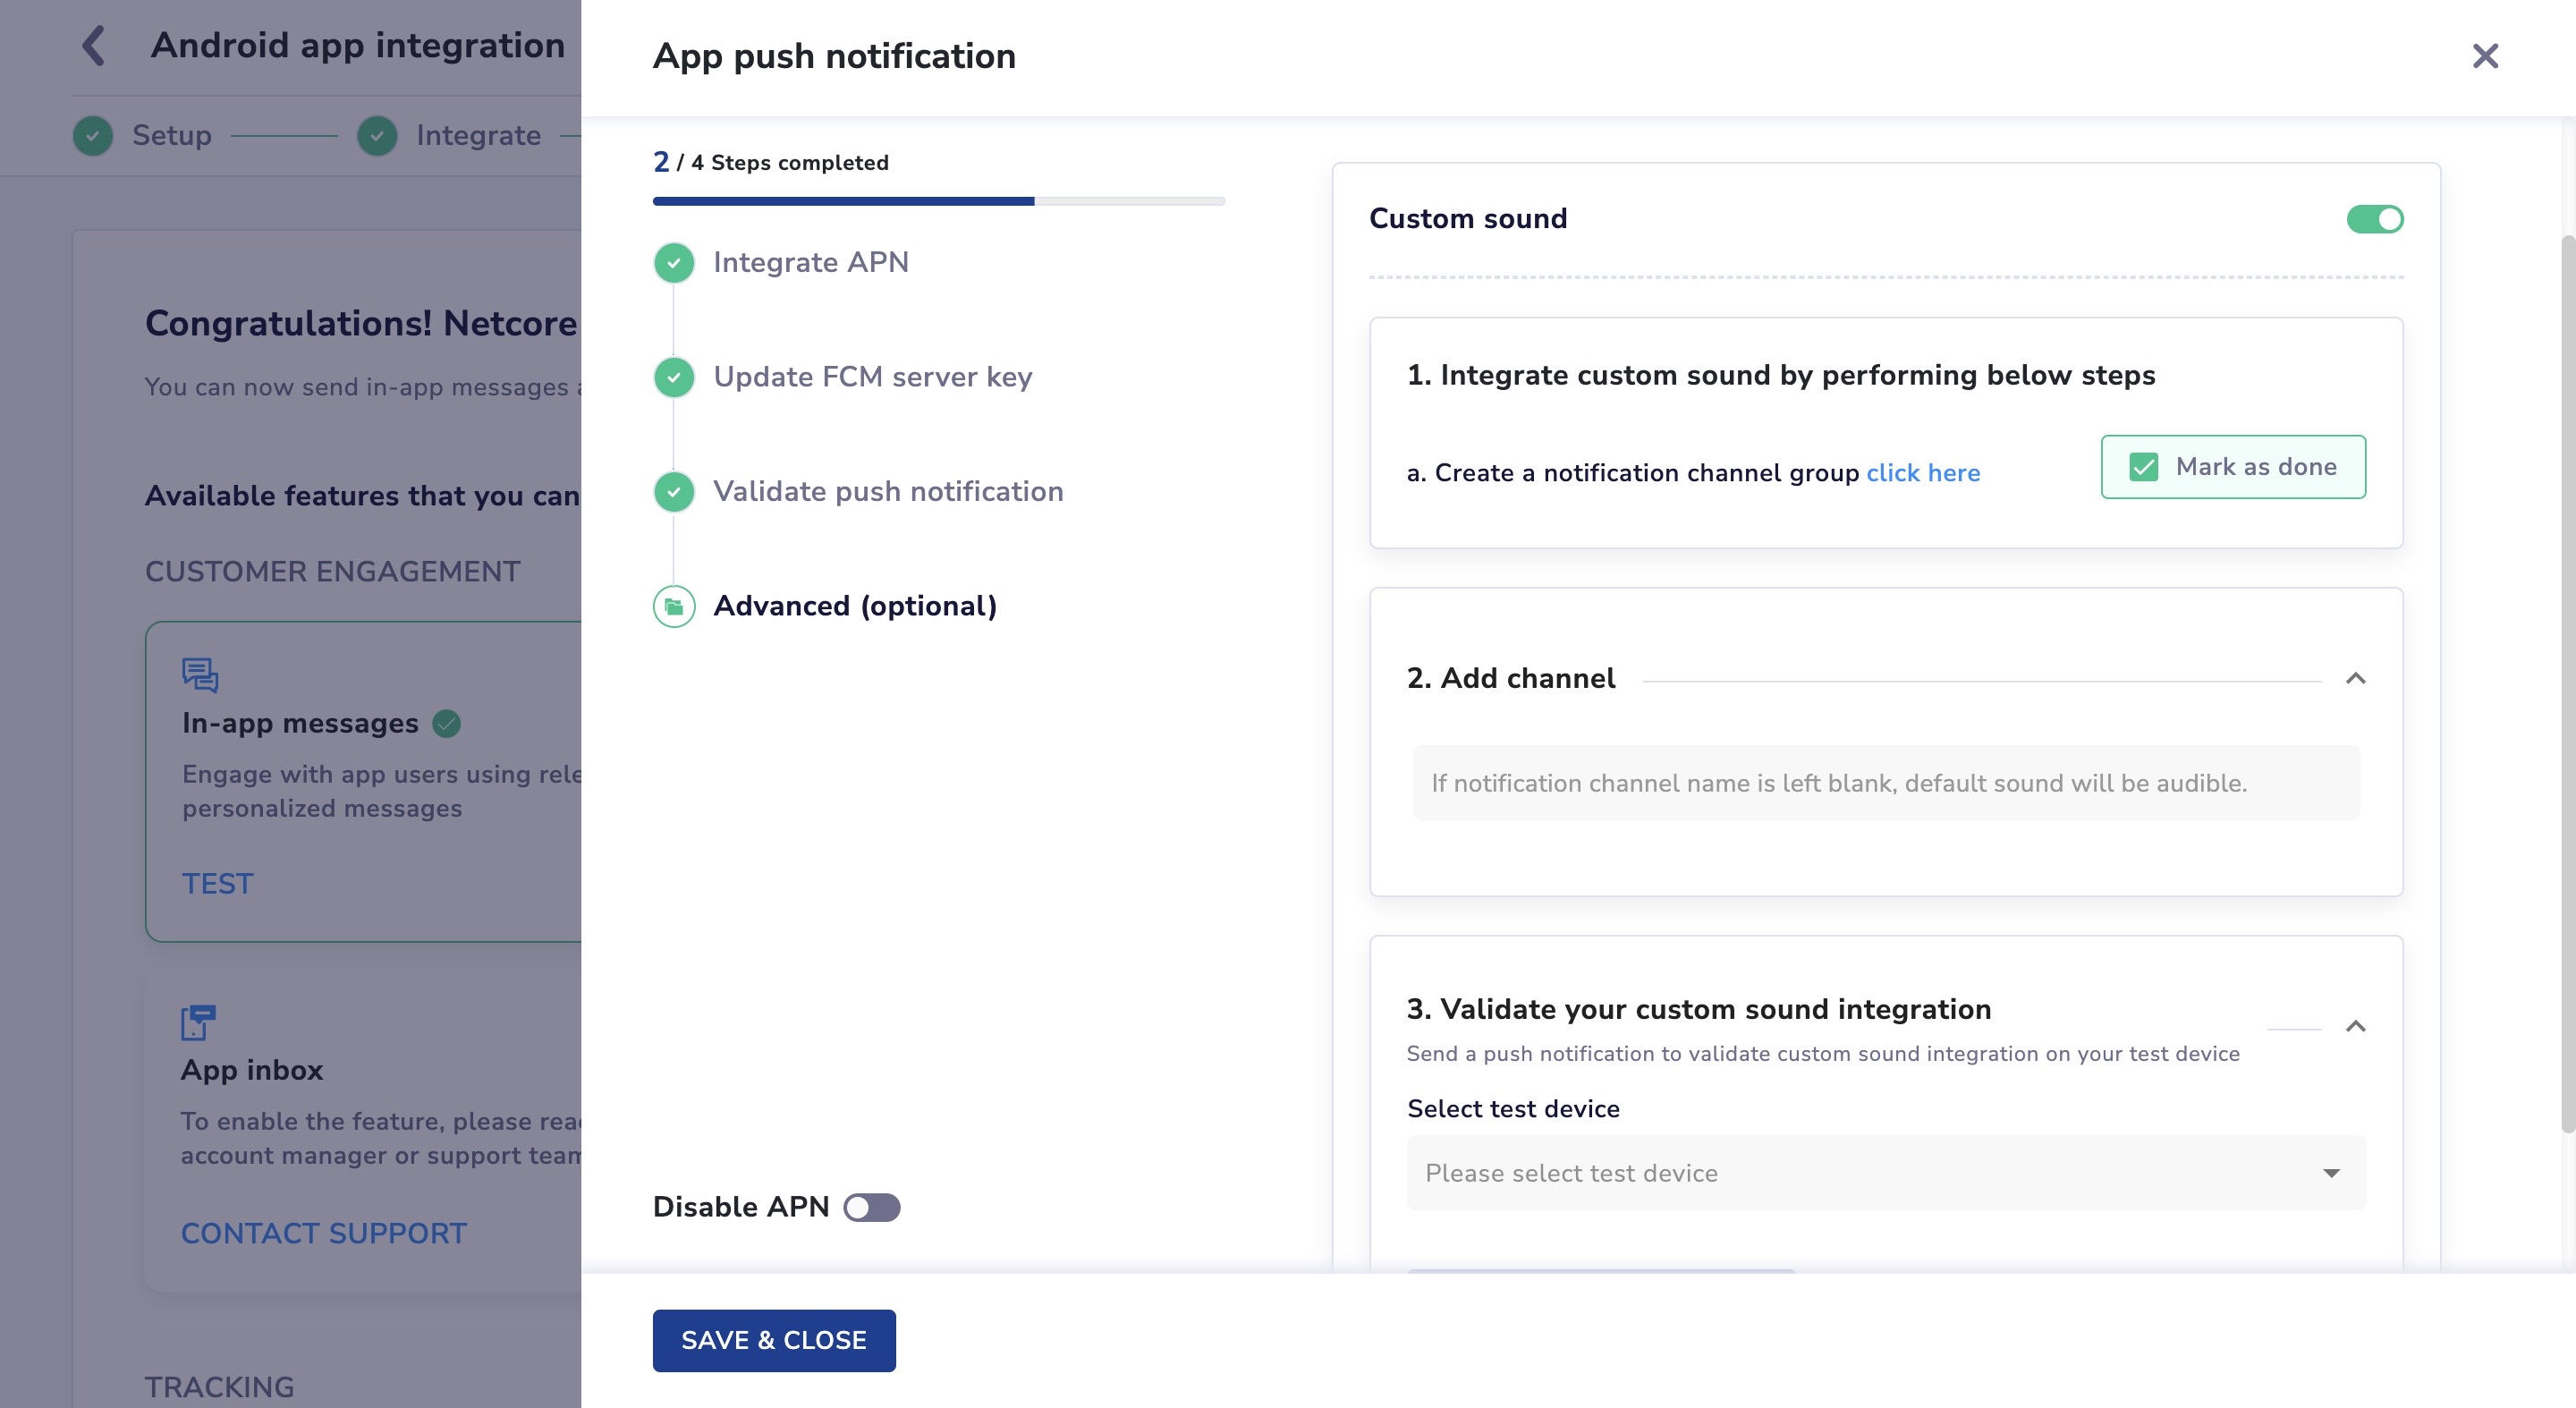
Advance Features
Disable APN- Switching on this toggle will disable the APN SDK. Please do not use this toggle unless absolutely necessary.
Click here to know more about app push notifications
App Inbox
You can enable App Inbox feature from here.
However please reach out to your Account manager, onboarding manager or Customer Service manager for this feature or send any email to our support team from the panel.
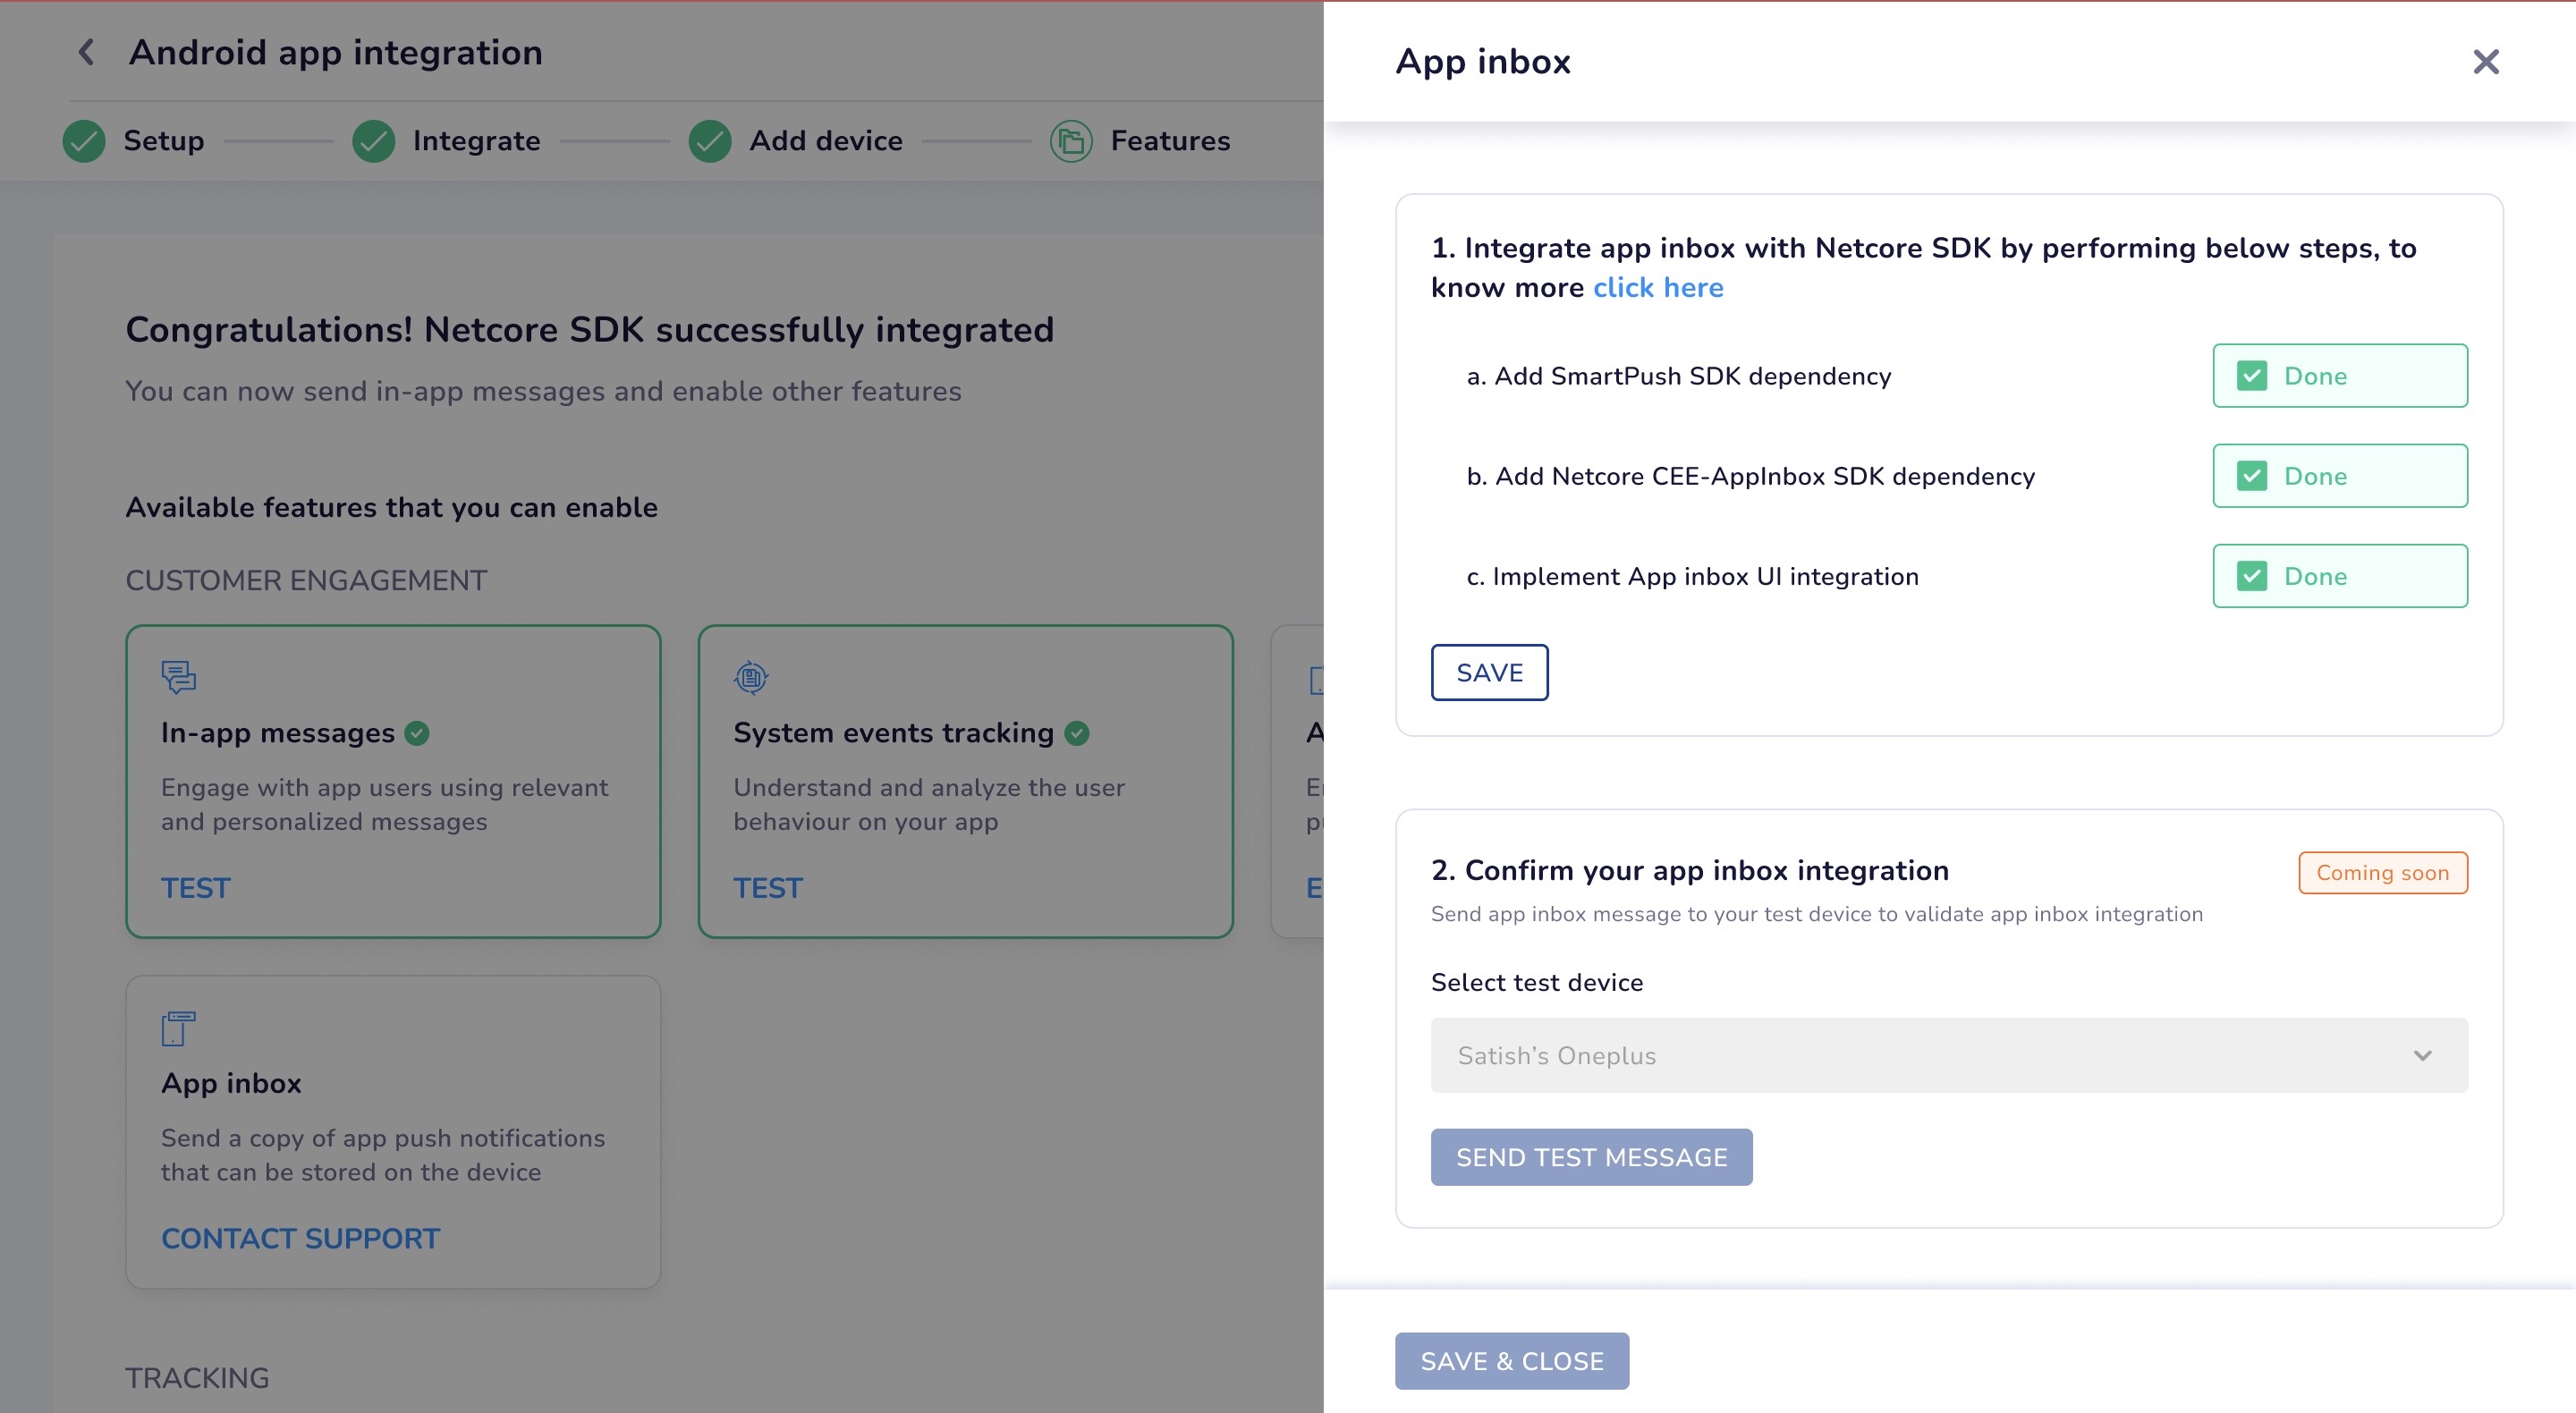
Integrate App Inbox with Netcore SDK
Click here to know more about app inbox
Custom events tracking
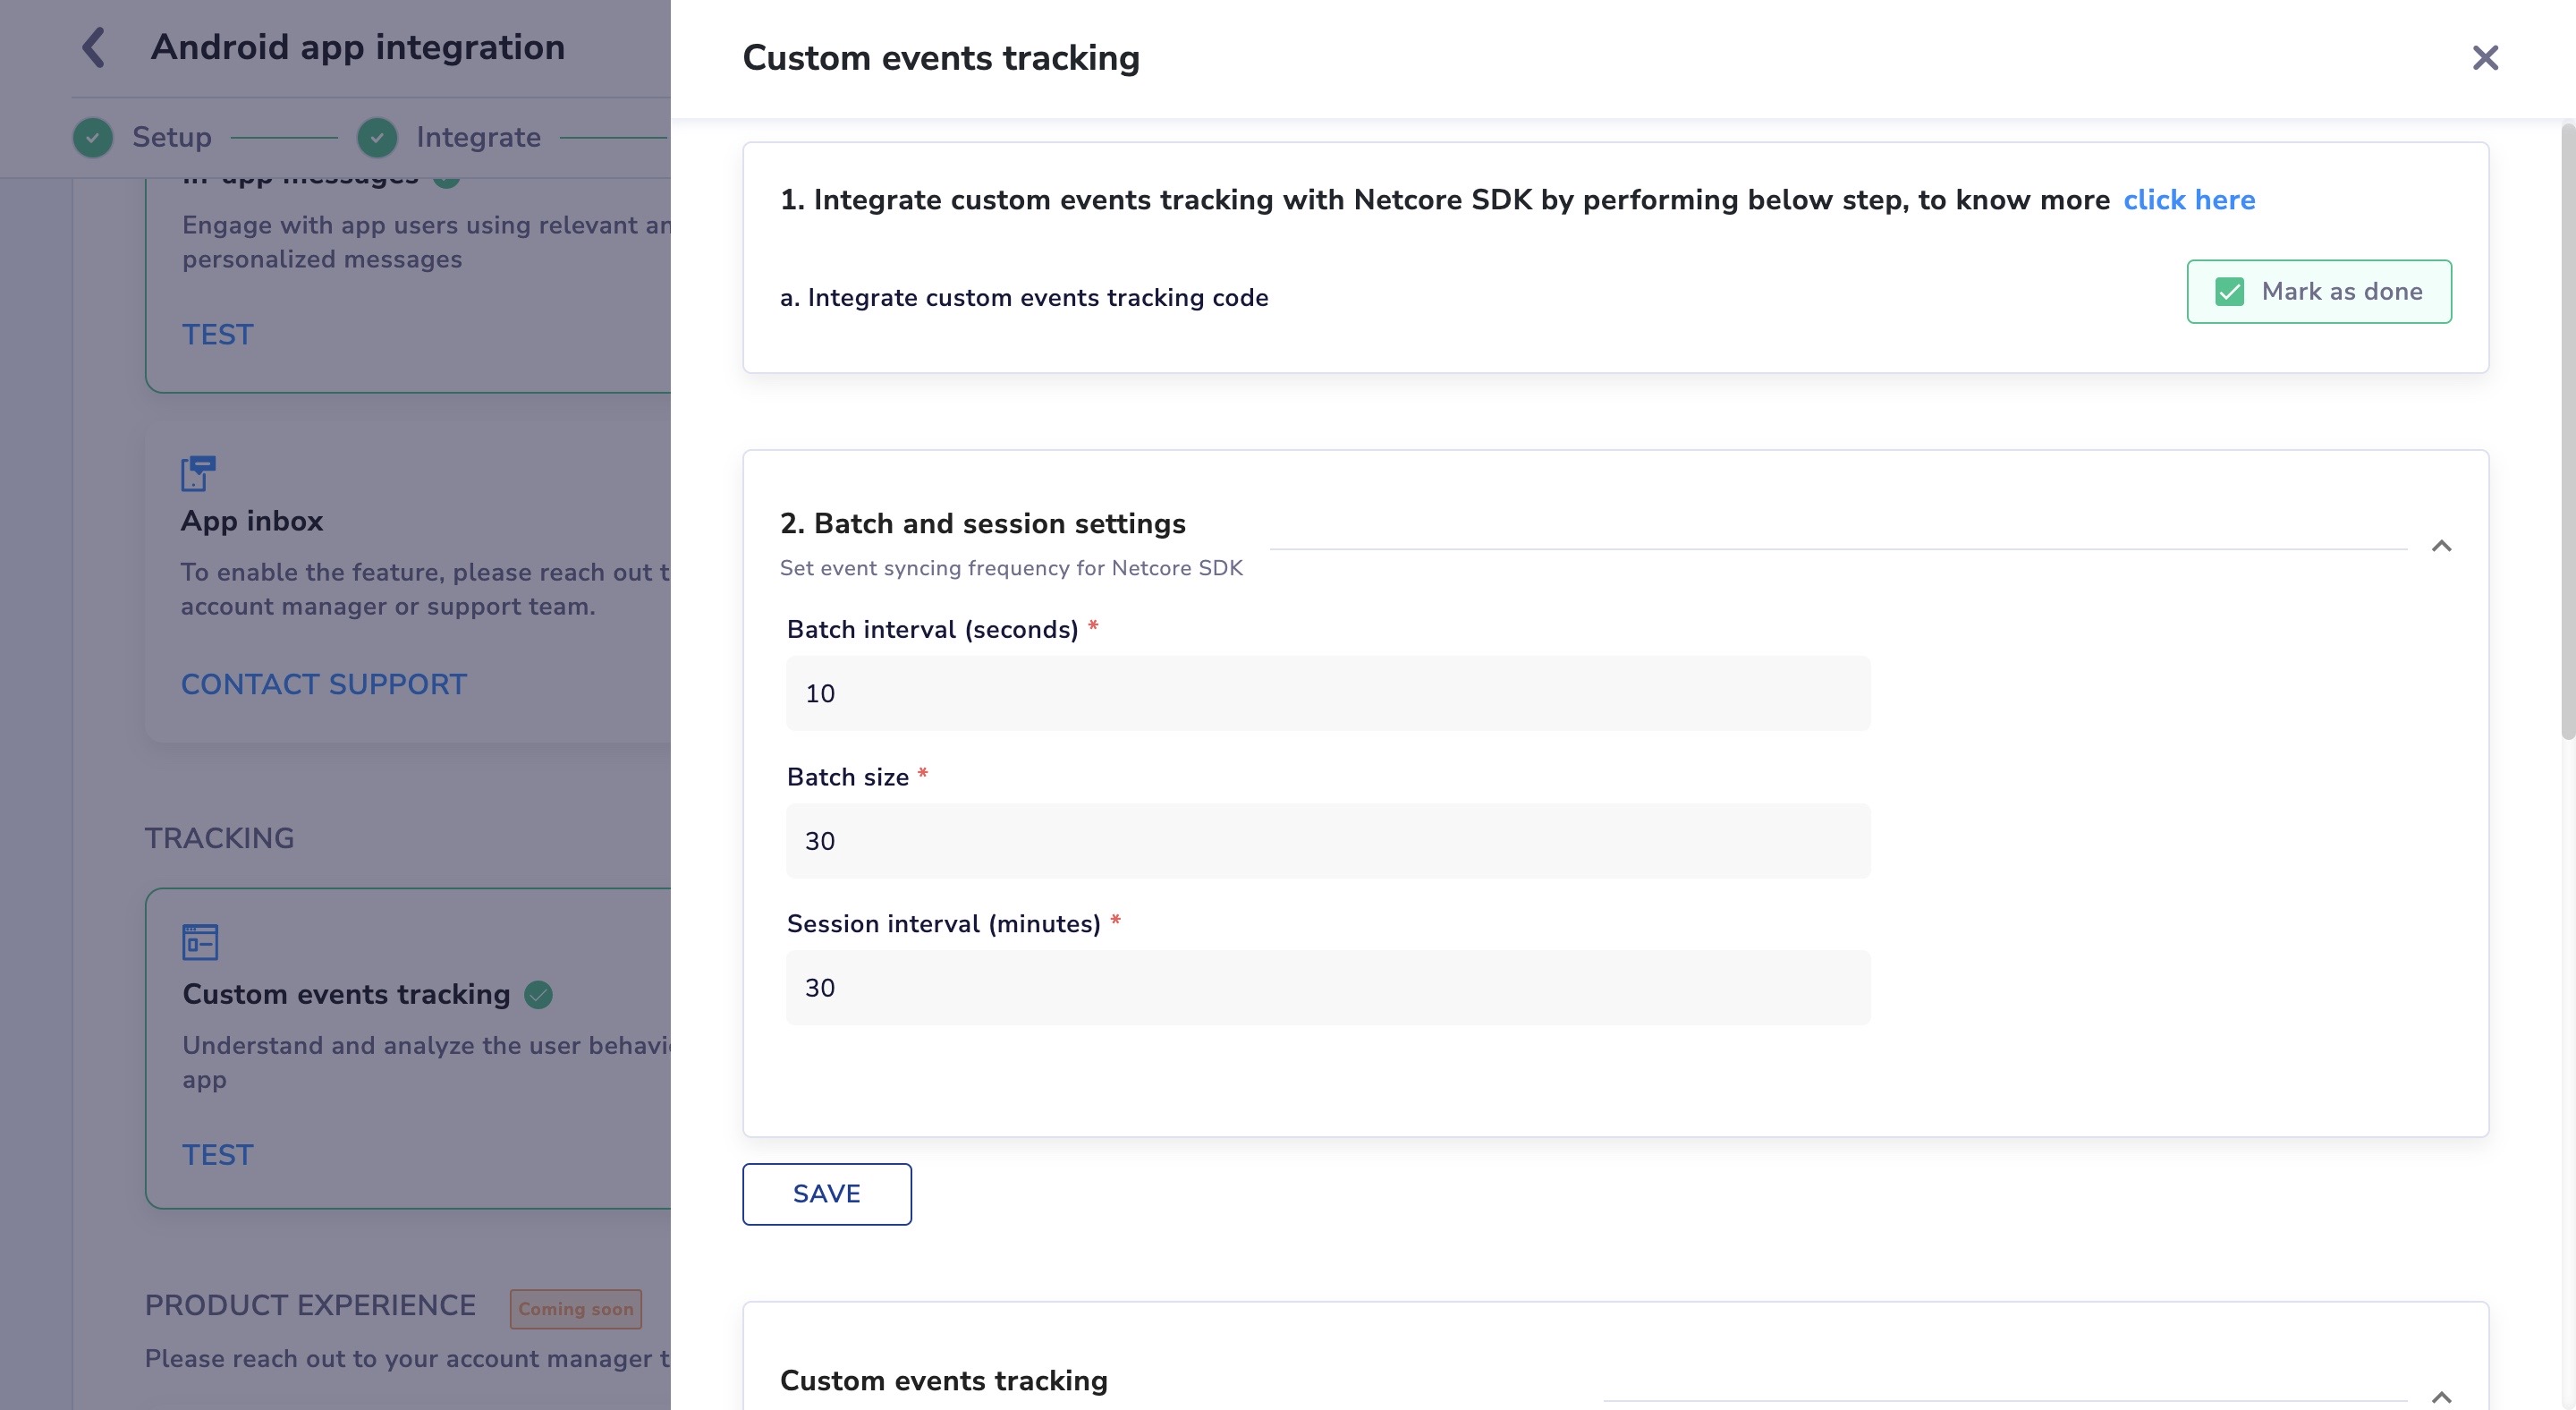
Custom Event Track
User tracking
Click here for user tracking implementation steps
Location tracking and Geofencing
You can enable location tracking as well as the geofence feature for your app by following these simple steps. Like all other features, you can also test its functioning using your test device.
It shows the actual location of your test device if the integration is done correctly.
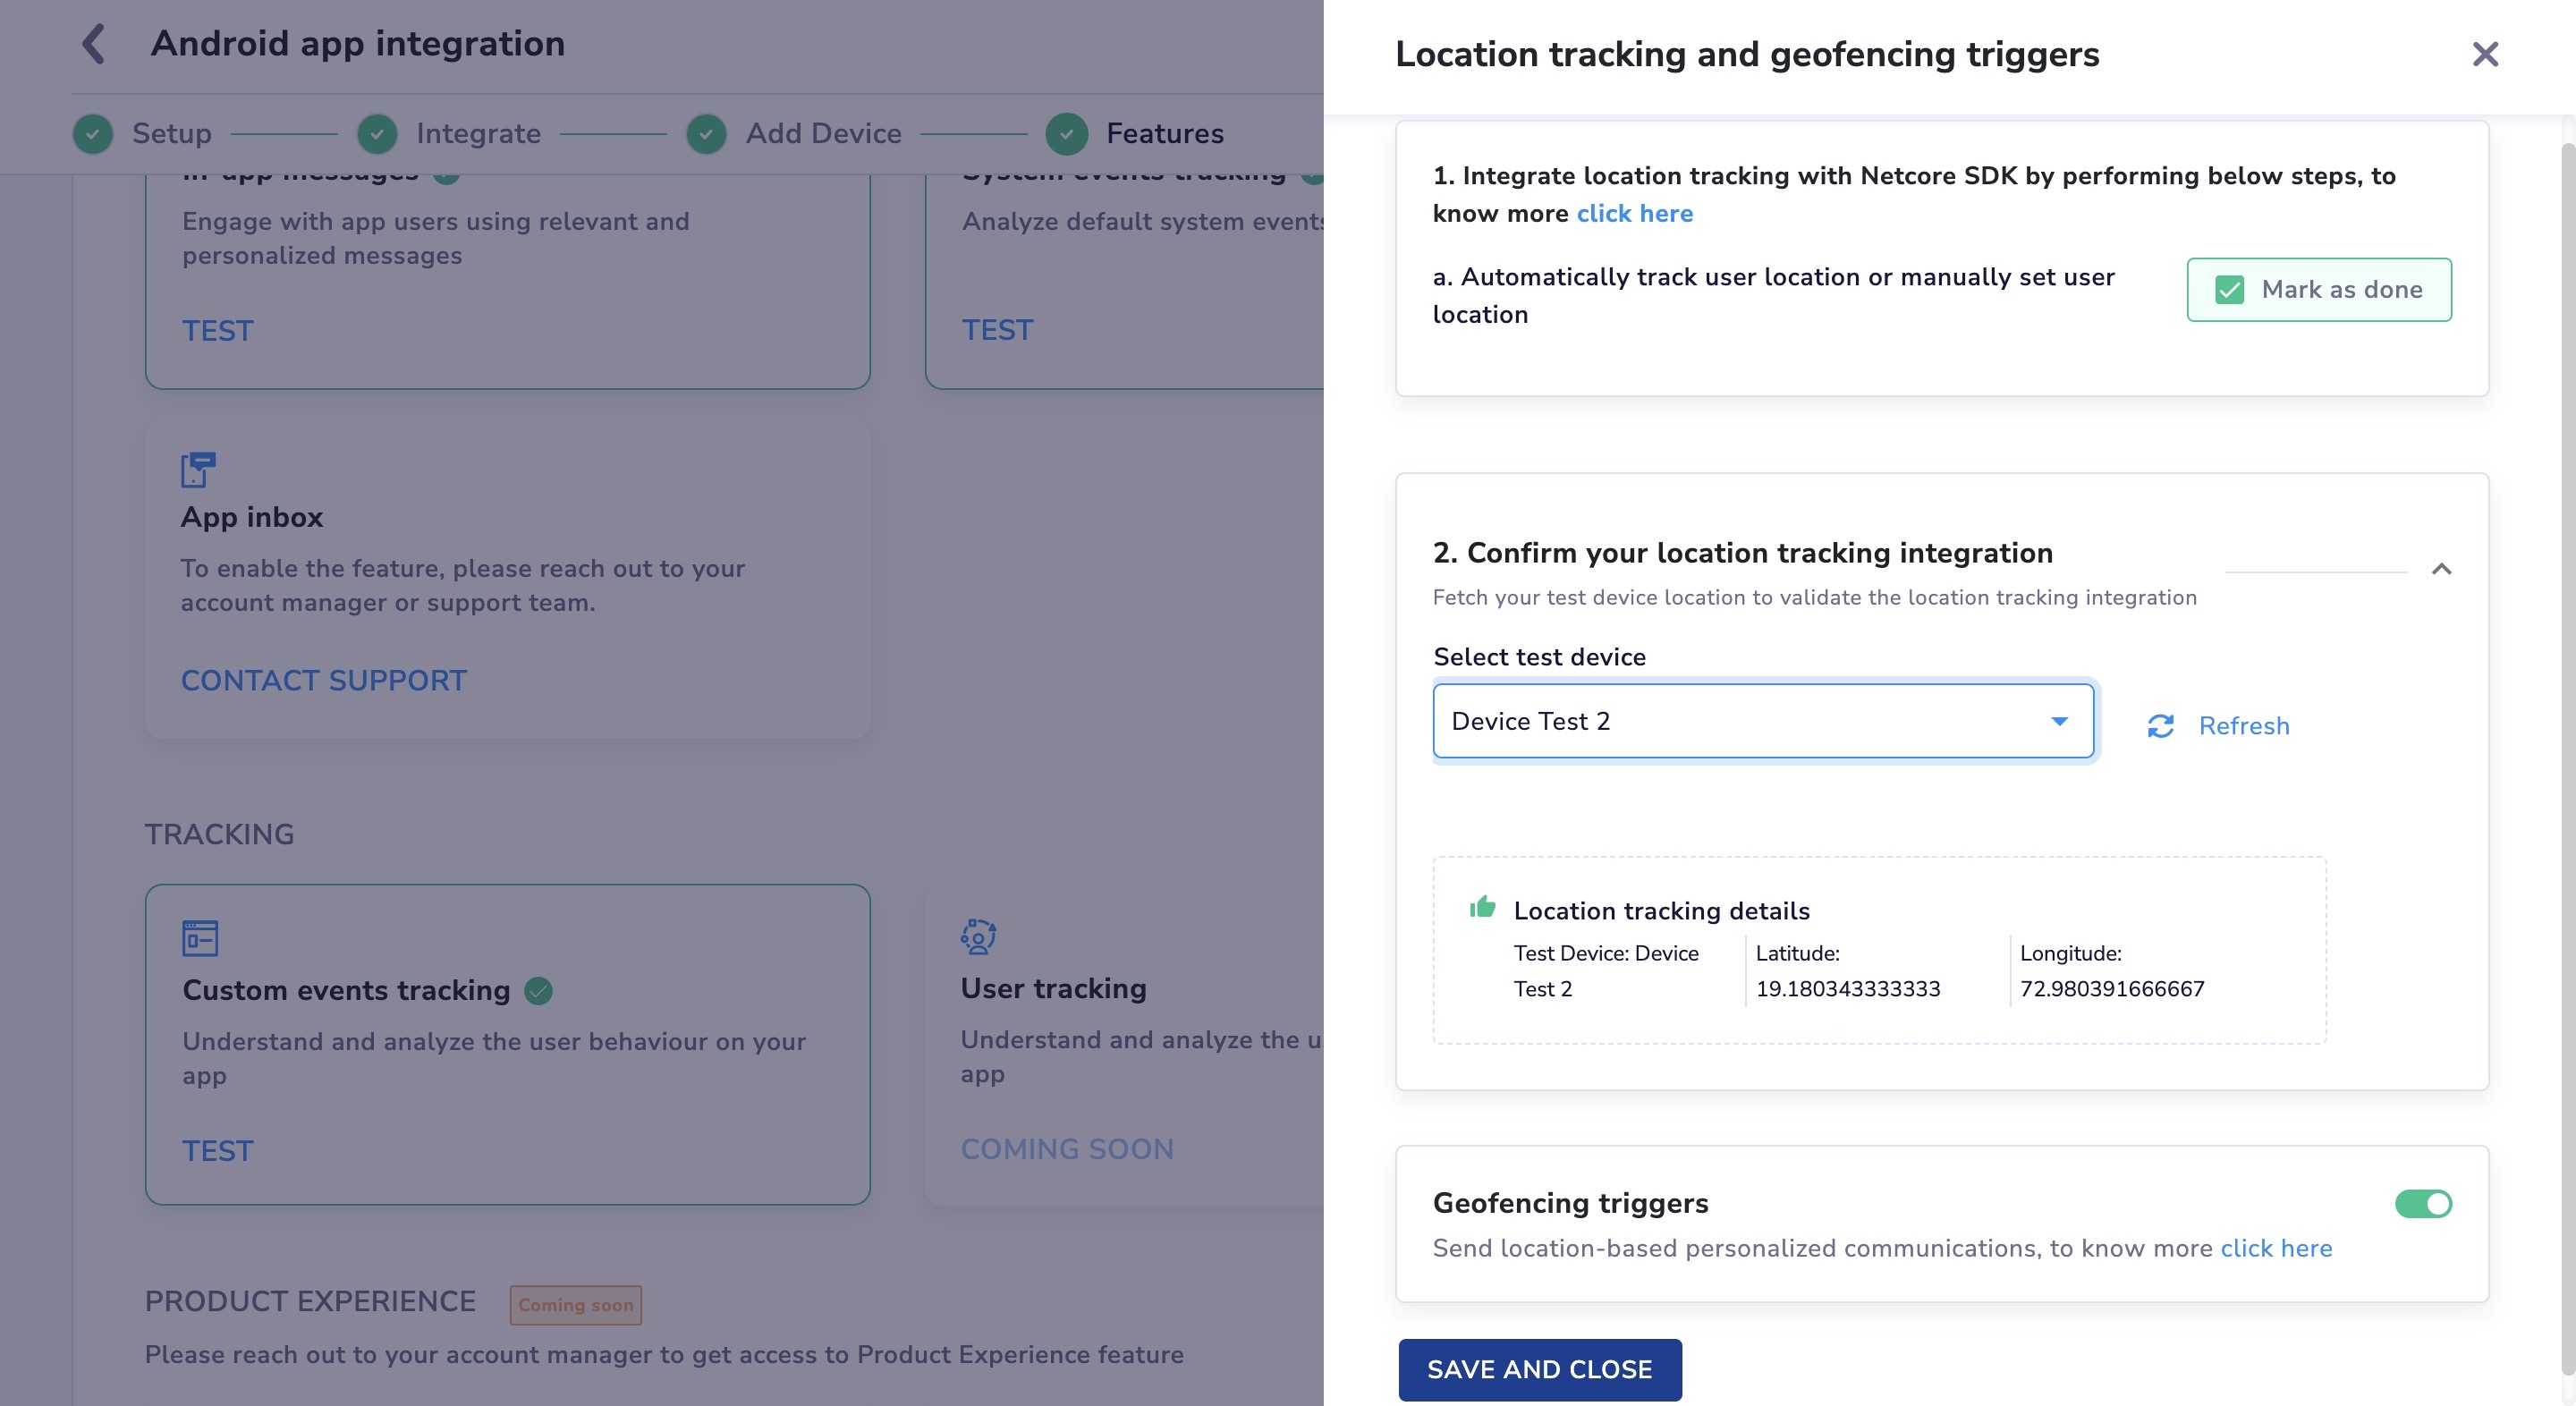
Integrate Location Tracking and geofencing with Netcore SDK
Updated about 1 month ago