Web-messaging
Web Message is a way to communicate and engage your contacts when they are on your website. You can directly engage the contacts as they browse, through messages that are displayed on the pages of your website. These messages appear based on the rules that you define.
You can schedule web messages based on rules like (time spent etc.)
For sending Web Messages, you need to:
- Design the message using the provided layouts
- Specify whom do you want to show the messages to
- Schedule the time when the messages should appear on the website
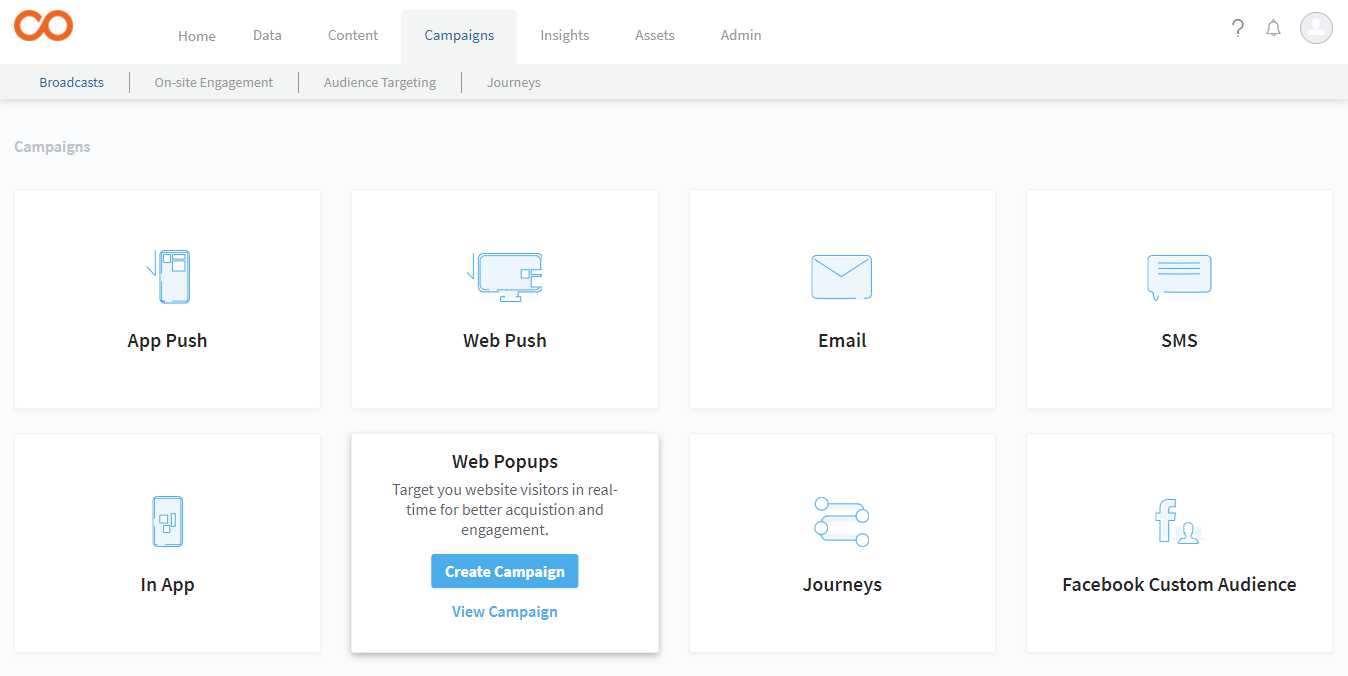
What
To send a Web Message, perform the following steps:
- Go to Campaigns > On-site Engagement > Web Messages > Create Web Message.
- Do either of the following:
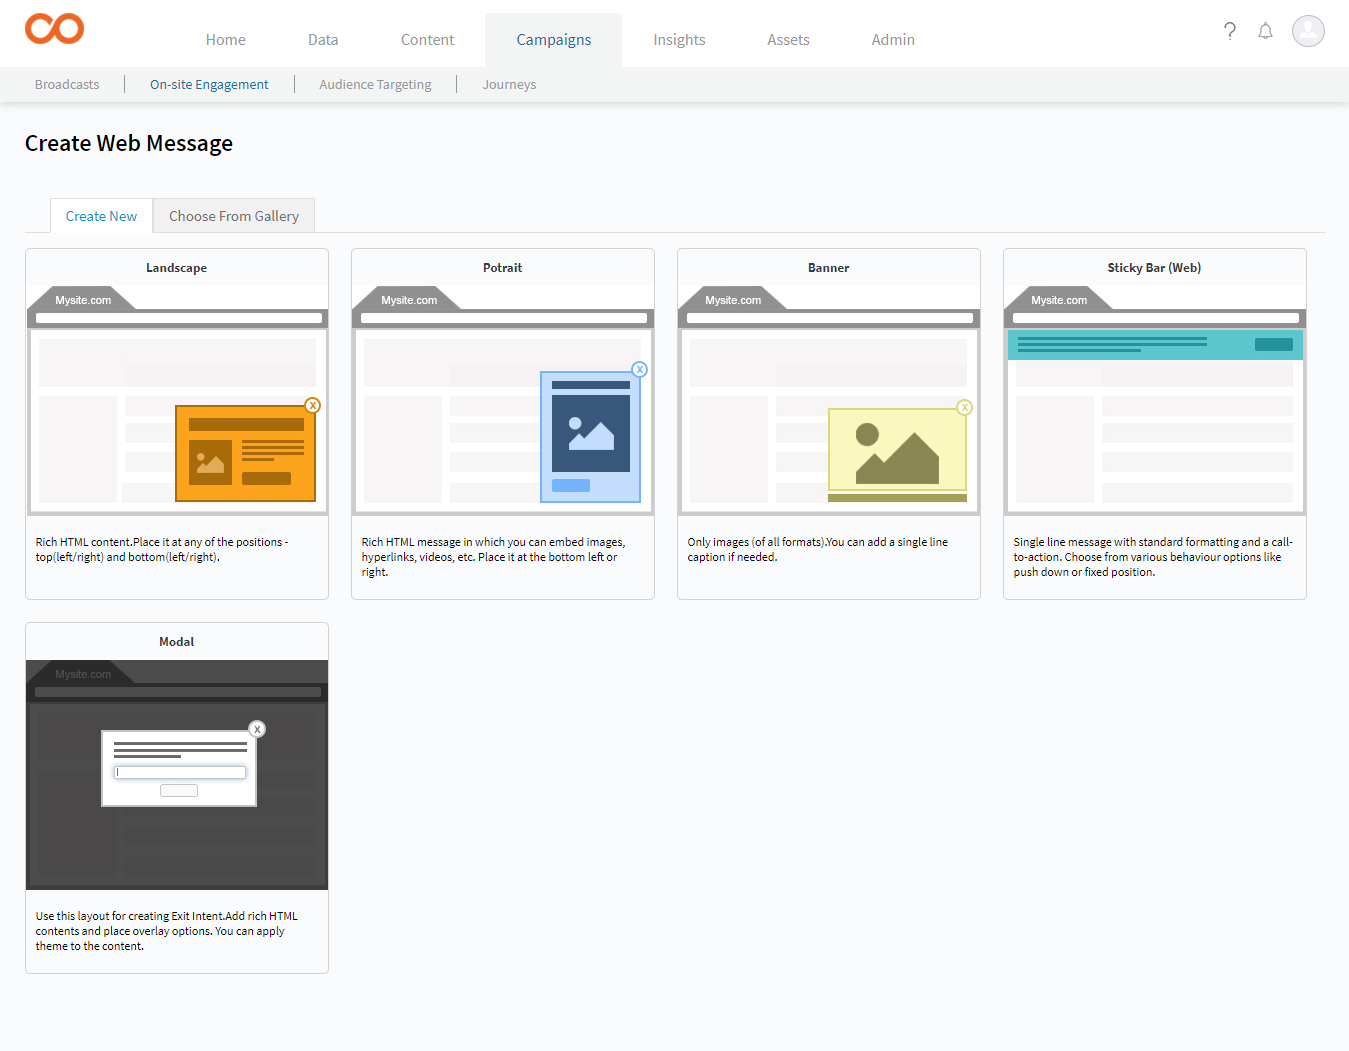
- To use an existing template from the gallery, click Choose From Gallery. Select the layout you want to use and click Use.
- To create your own layout, click Create New. Select the layout you want to use and click Use.
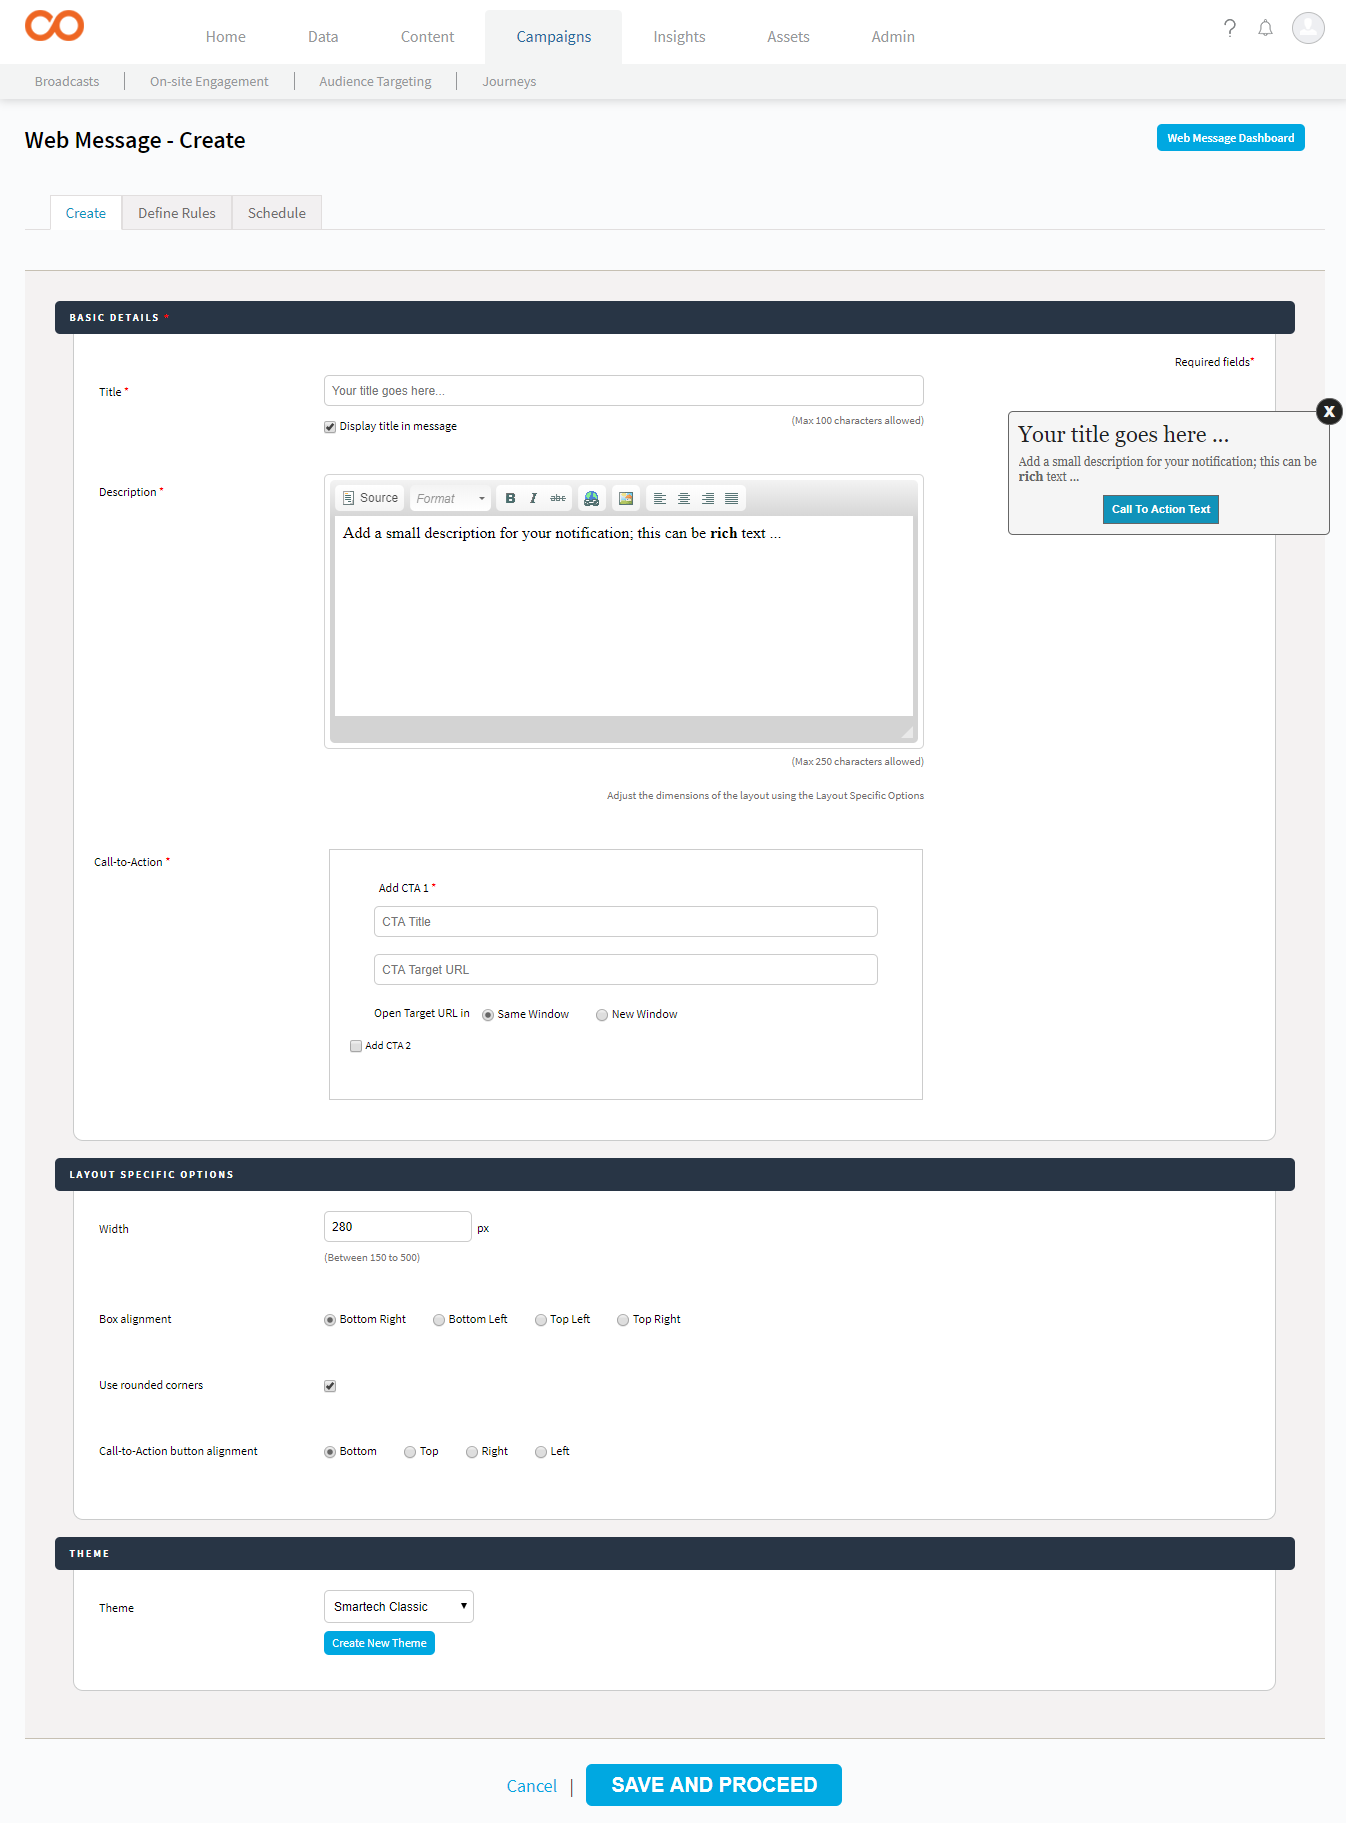
- In the Basic Details section, provide the following:
- Title – Title of the web message.
- Description – The content that you want to display in the message.
- Call-to-Action Text – The text that would appear on the Call-to-Action button. For example, Show Me the Product.
- Call-to-Action URL – The URL of the destination web page, where the contact would land on clicking the CTA button.
- Call-to-Action Target – Select if the destination page should open in the same window or a new window.
- In the Layout Specific Options section, you can specify the size and positioning of the Web Message box.
- In the Theme section, select the colour and design theme of the message box, from the available themes. Click Save & Proceed
Note: You can see the live preview of the Web Message as you create it.
Who
- In the Who section, do one of the following
- If you wish to send the broadcast to all the identified and anonymous contacts, select All Contacts.
- If you wish to send it to specific contacts, select Create Contact Filter.
- In Contacts, select the Contact Type, whether you wish to show the message to first time or New contacts, or returning contacts (those who have already visited your website earlier).
- If you wish to show the message to users having a specific attribute then attribute based targeting option is to be used. For example, Select 'City' from the first dropdown, then 'is' from the second dropdown and then enter 'Mumbai' in the input area. More similar conditions can be added with 'All' or 'Any' between them.
- If you wish to show the message to those contacts who visit the website after a certain time period, then provide the period in Last Seen option. For example, the contact last visited the website 2 months ago.
- Source – In Source, select the devices and the browser on which you wish to show the message. For example, you can choose to show the message on chrome browsers when opened in mobiles and tablets.
Where
- In the Where section
- Page URL – Specify all the web pages of your website on which you wish to display the Web Message. You can specify multiple conditions grouped through All or Any operators.
- Specify the number of pages the contact must view in the current visit before the web message is displayed on the website.
- In Cookies, provide the name of the Smartech cookies and the values of the parameters as set in your website.
When
- In the When section
- Scroll – You can specify that when the contact has scrolled the page for a certain percentage, the Web Message must appear.
- Time of the day – mention the days of the week and time of the day when the message should be visible to the contact
- Time spent on a page – a certain amount of time (in seconds) that the contact spends on the web page
- Exit Intent – specify if the message should be displayed when the contact is about to exit the website.
- Time spent on site by a contact in current visit – a certain amount of time (in seconds) that the contact spends on the website
- Exit Intent – If you want the web message to appear when the contact is about to exit, choose this option.
- Click Save and Proceed.
Schedule
In the Schedule section:
- Tag – you may want to give the broadcast with meaningful tags that would help in efficient searching.
- Start & End Date – the beginning and end dates of the broadcast.
- Skip Web Message on destination pages – You may not want to display the Web Message on the destination page, that is, the page where the contacts lands on clicking the Web Message. You can specify your choice here.
- Maximum number of times the message should be shown – Provide the number of times the message should be displayed to a contact, after which it should be disabled.
- Click Save & Activate to publish the Web Message
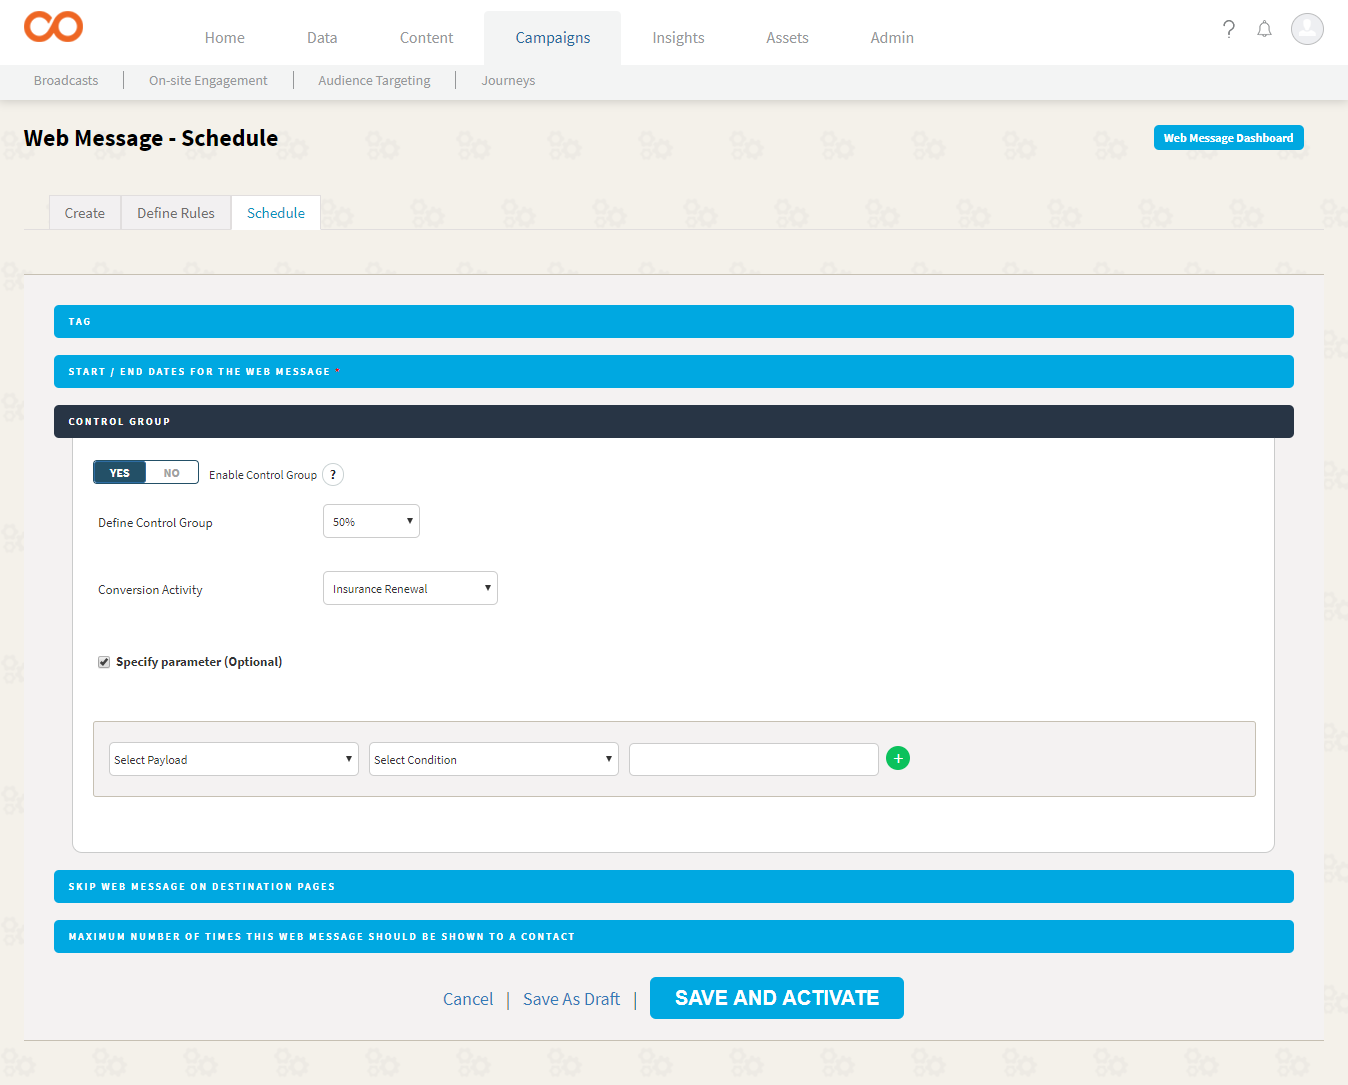
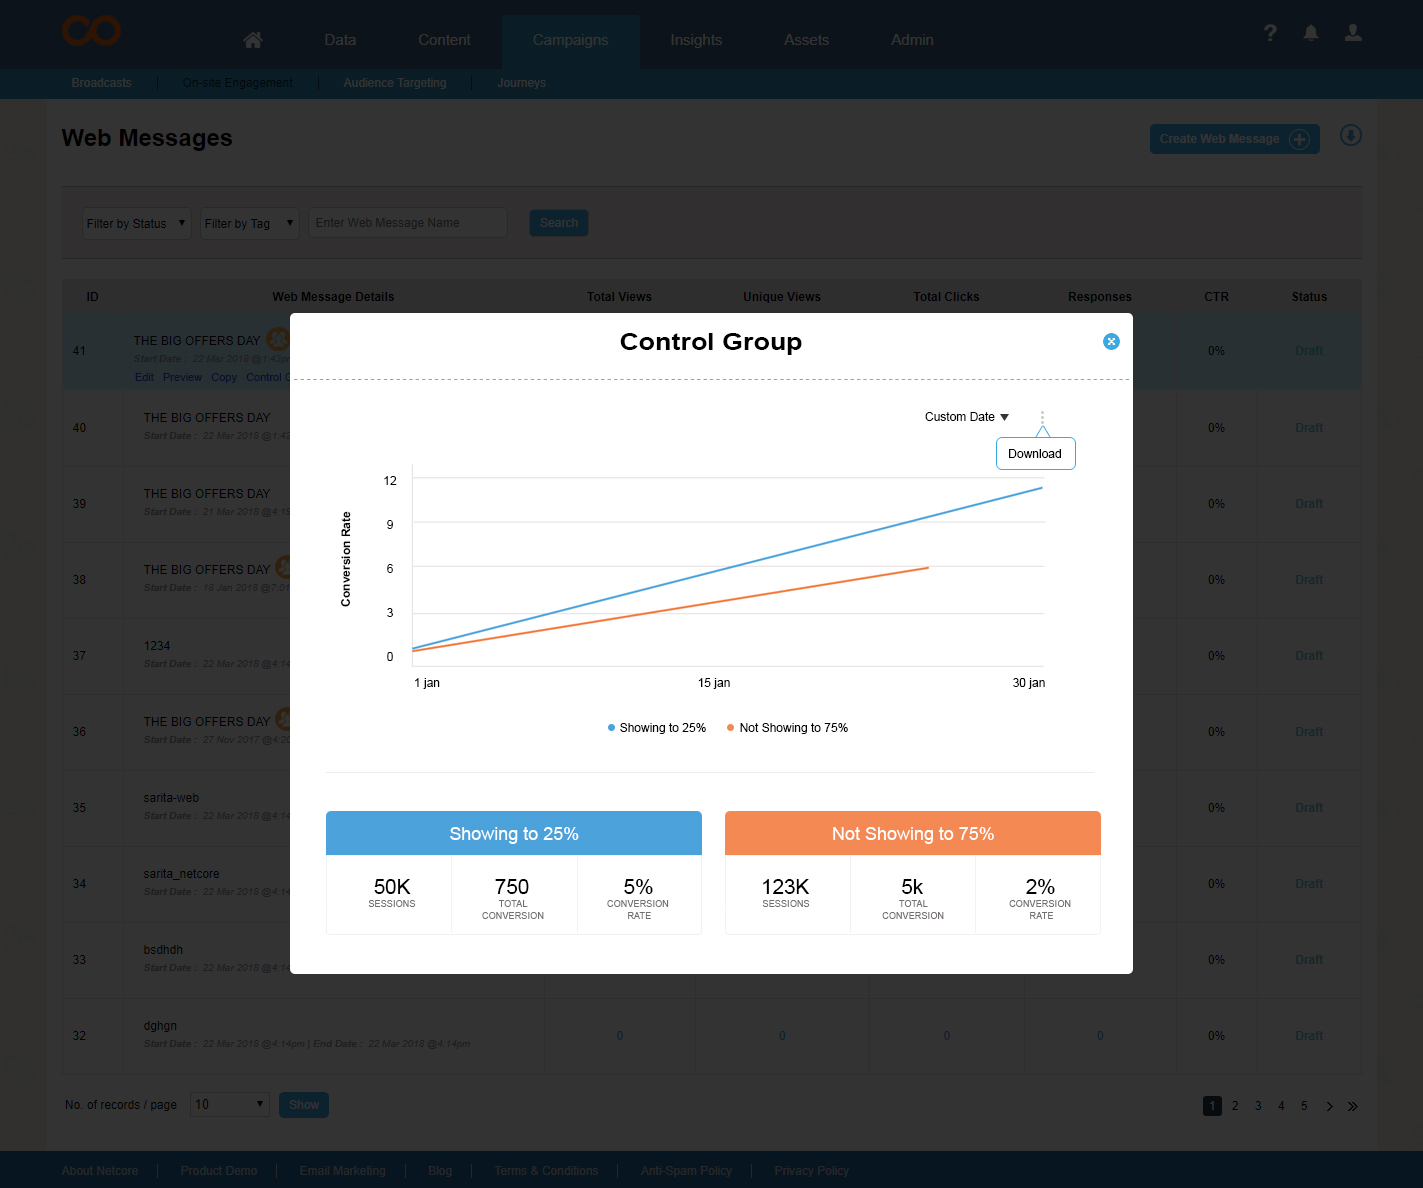
Control Group in Web Message
The control group is defined as the group in an experiment or study that does not receive communication by the marketer and is then used as a benchmark to measure how the other tested subjects do.
Under Schedule section, now user can define a control group where marketer can defined the percentage of control group who shall not receive (or see) the web message
Conversion Tracking in Web Message
Web activity should be enable to use Conversion Tracking in web message
- Select 'activity' name which defines the purpose of the web message campaign.
- Specify selected activity's payload parameter which acts as a rule to filter/consider activities within specified parameters (optional).
- Then define the campaign as usual.
- It's reports will be visible in Web Message Reports Section (list view)
WebMessage Personalization
Personalized webmessage tailored for each visitor drives a great engagement.
When it comes to web message personalization visitor attribute and activity are bucketed into 2 categories as
- From the session data
- From the historical data
To start with Smartech support personalization from in-session data w.r.t. Visitor attributes.
Steps to pass in-session data
In Smartech, we have exposed get and set function. "set" set attributes and "get" fetch the value of the attribute in console.
Set Function
var userData = {"NAME":"Ankur", "AGE":"24", "GENDER":"M", "PINCODE":"401107"};
smartech('set', 'attribute', userData);
| Identity | Remark |
|---|---|
| set | To set the attribute |
| attribute | To set the attribute value |
| <attribute_collection> | JSON collection with {key:value} pair |
Once the attribute is “set” then the same can be used via personalization with “[]” (square brackets)
Dear [NAME], You know we do free delivery at your location at pin [PINCODE].
This example will show a web message like -
Dear Ankur, You know we do free delivery at your location at pin 401107
Quick Tip
If you want to know that which attributes are set then you can use get method.
smartech('get', 'attribute');
This function will expose all the attribute data which is set at Smartech.
Updated about 2 years ago
