
Create Journey
Learn how to create your journey with settings like triggers, actions, conditions and flow control.
Follow the given steps to create a Journey.
- Log in to the Netcore CE dashboard and click Engage.
- Click CREATE > Engage with users > Journey.
- The Which type of journey would you like to create? screen appears. Here, we have listed ready-to-use journeys for different industries and use cases. Select your preferred industry from the dropdown. The options include All, BFSI, Others, and E-commerce.
| Option | Description |
|---|---|
| All | Displays templates from all industries. |
| BFSI | Shows templates designed for banking and financial services use cases. |
| ECommerce | Displays journeys tailored for online retail scenarios. |
| Others | Includes templates for other industry categories. |
- Click CREATE NEW to create a new journey with a blank canvas. Refer to the table to see the fields available for creating a journey.
| Field | Description |
|---|---|
| Journey Name | Enter the name of the journey to identify it easily. |
| Start Date | Set the date when the journey should begin. |
| End Date | Select whether the journey runs indefinitely (Never-ending) or set a specific end date. |
| Add Tags | Categorise your campaign/journey for easy search later. Type it in to create a new tag and click Create new. |
| DND (Do Not Disturb) | Allows users to set up DND hours to control when they receive notifications or messages. Update the DND setting from Account Configuration here. |
| Journey Goal | Define a goal to track key business metrics and measure the success of your campaign. You can track one conversion goal per campaign. Example: Track customers who purchased shoes after receiving a campaign (Event: Product Search, Product: Shoes). |
| Set Conversion Goal | Specify the conversion event that defines a successful outcome for your campaign. |
| Specify Payload Parameters | You can customise the conversion event with up to five parameters. For example, you could only track a Purchase event when the product price exceeds 10,000. |
| Conversion Window | Define the time frame in which actions are considered successful conversions after interaction with the campaign. Click here to know more about Conversion Window. |
| Revenue Parameter | Assign a value to each successful action to track its financial impact. |
| Control group | Create a control group of users who will be excluded from any experiment. By List: Select the created contact list for the control group. Note: List only works with dataset nodes. |
| Product collection | Product collection activates only when a user initiates an activity; therefore, lists/segments are disabled during this period. Multiple user activities are consolidated into one, such as multiple “Add to Cart” actions. |
- Once done, click SAVE.
Advanced OptionsIn the Advanced Options, you can choose to enable Frequency Capping for the particular journey. The Global settings of Frequency Capping will be applied in the journey.
The Journey canvas opens up. The following Journey Builder Nodes features available on the left pane to create a Journey:
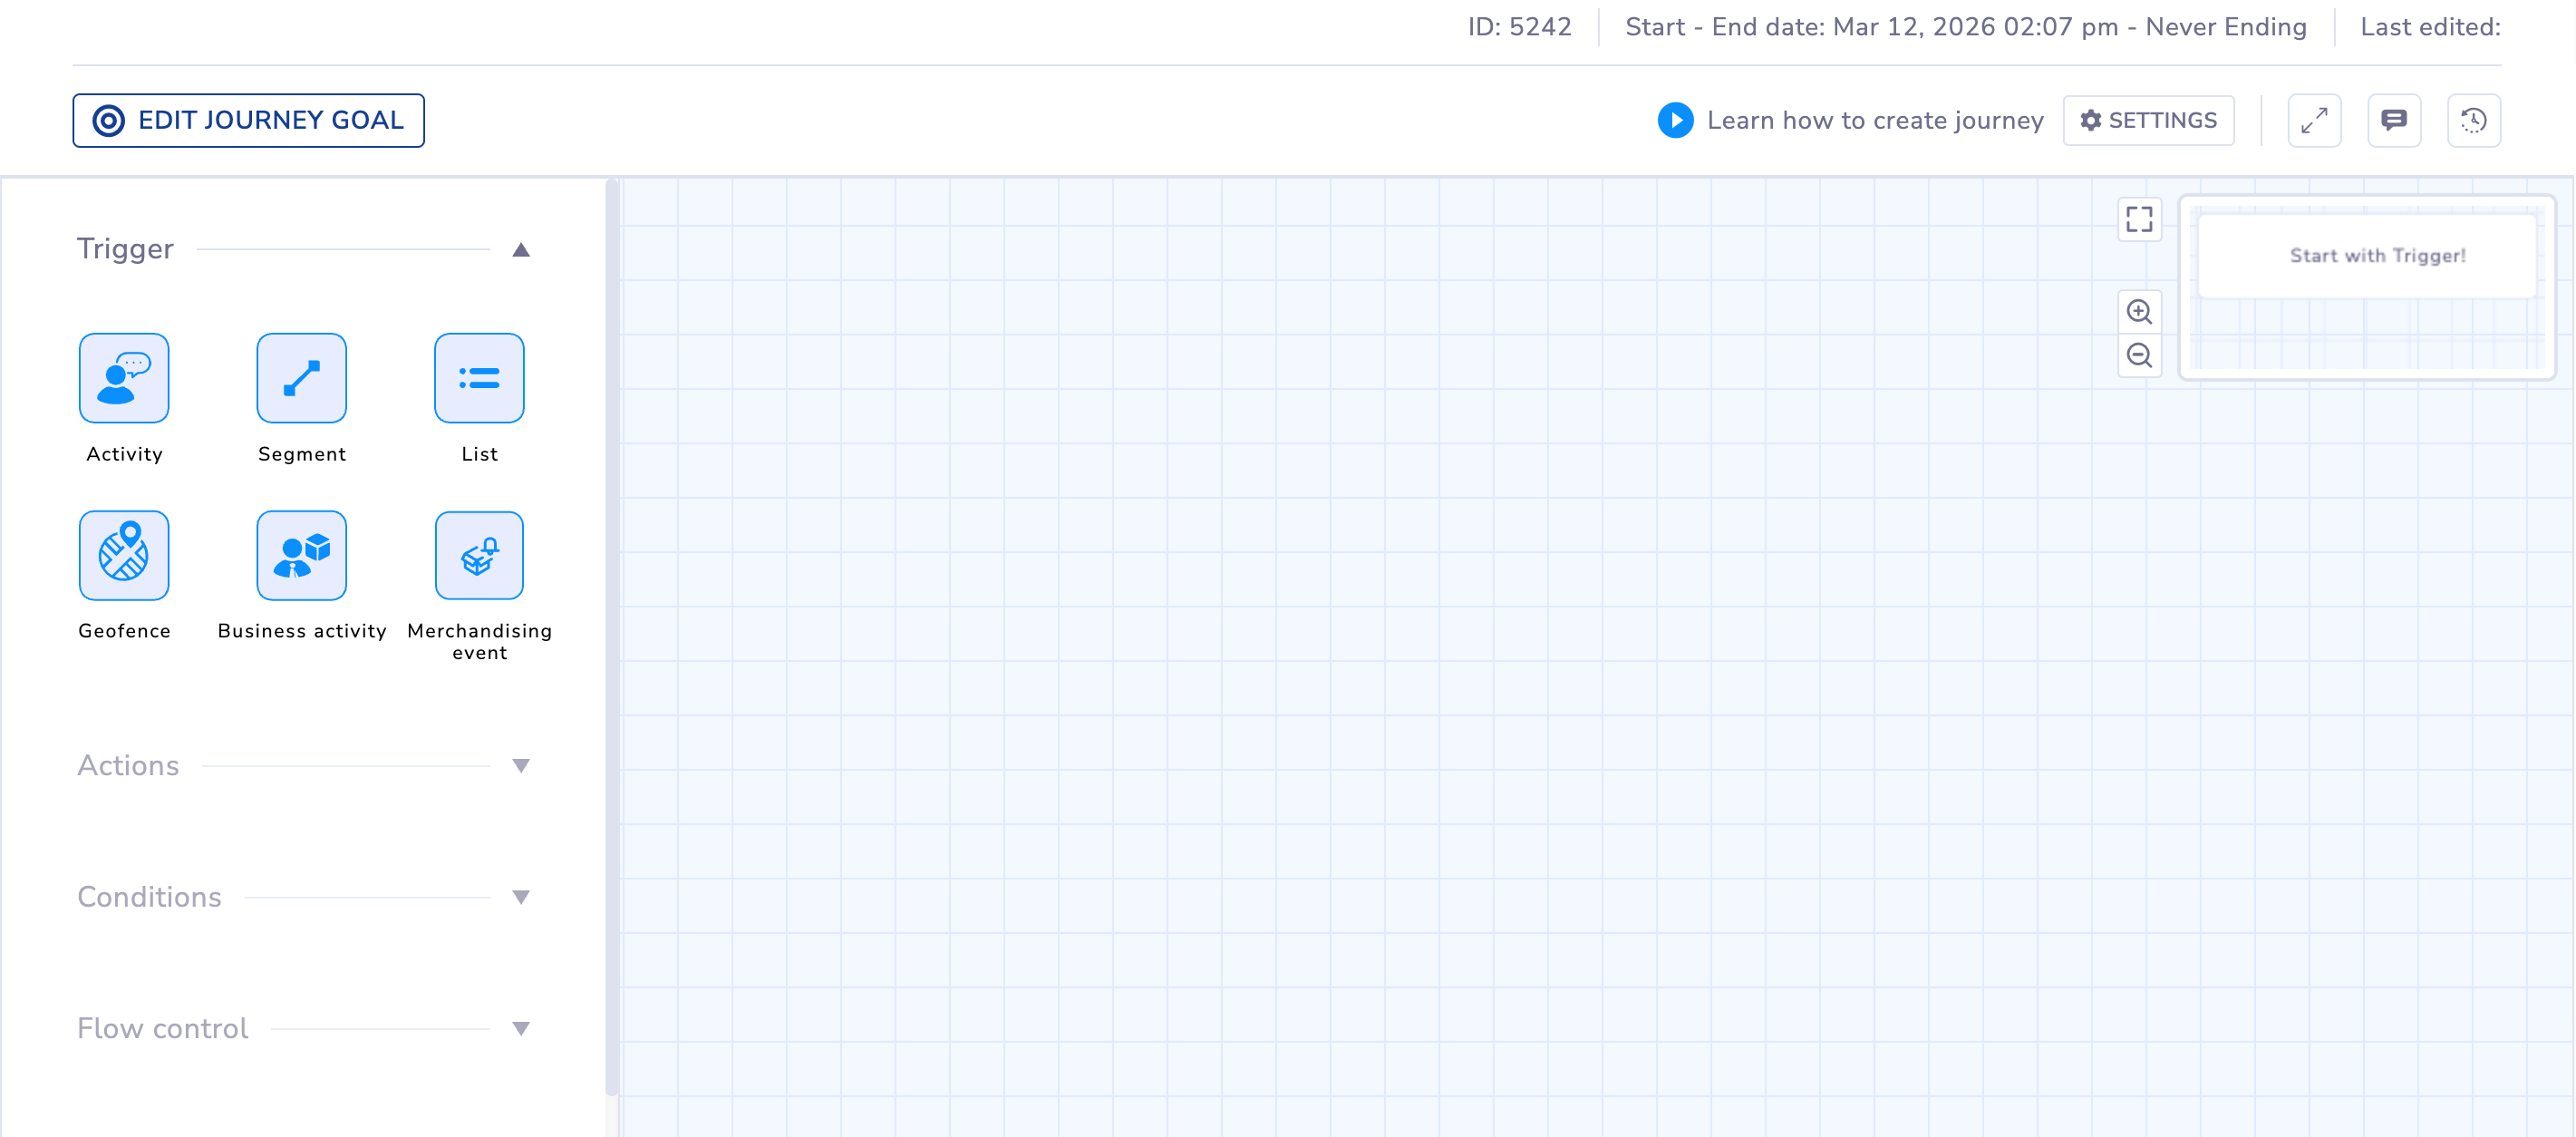
Select the Journey Builder Nodes from the canvas
Functionalities on Journey Canvas
Here are the key functionalities available in the top right corner of the screen to assist you in creating a journey.
| Functionality | Description |
|---|---|
| Auto Align | Automatically arranges journey nodes on the canvas. |
| Notes | Allows you to add annotations within the journey for reference. |
| Fullscreen Mode | Allows you to expand the journey canvas to full screen for a bigger view. |
| Journey Logs | The Logs feature in a Journey allows you to track and monitor all activities and node-related information within a specific journey. You can filter logs using a custom date range, the user who performed the activity, and the node type. |
Journey Logs
| Header | Description |
|---|---|
| Activity | Displays the actions performed within the journey, such as when the journey is exited, when a trigger is added, and so on. |
| Node Info | Displays details about the specific node where the activity took place. Use this to inspect and debug the journey. |
| Date & Time | Displays the exact timestamp when the activity occurred. |
| Username | Displays the user who performed or triggered the activity within the journey. |
Copy Nodes
Copy Node in Journeys helps you to create complex journeys by re-creating existing nodes. This is useful for nodes requiring extensive personalization and context. The re-created node inherits all properties of the original node. The following nodes are supported:
- APN
- WPN
- SMS
- RCS
- Viber
- Zalo
- Has done event
- Wait for event
Copy a Node
- Log in to the Netcore CE dashboard.
- Navigate to Engage > Journey to create a Journey. Hover over the node that you wish to copy in your journey.
- Click to duplicate the node.
- Configure the duplicated node (if required), then click Save.
Copy Node in Journeys
Updated about 1 month ago